TL;DR:
- Dubai’s harsh climate accelerates floor deterioration, but proper restoration techniques can revive almost any surface. Preparation, correct grit progression, and climate control are essential to achieving a professional finish in this environment. Professional assistance is recommended for high-end materials and climate-sensitive sealing to ensure durable results.
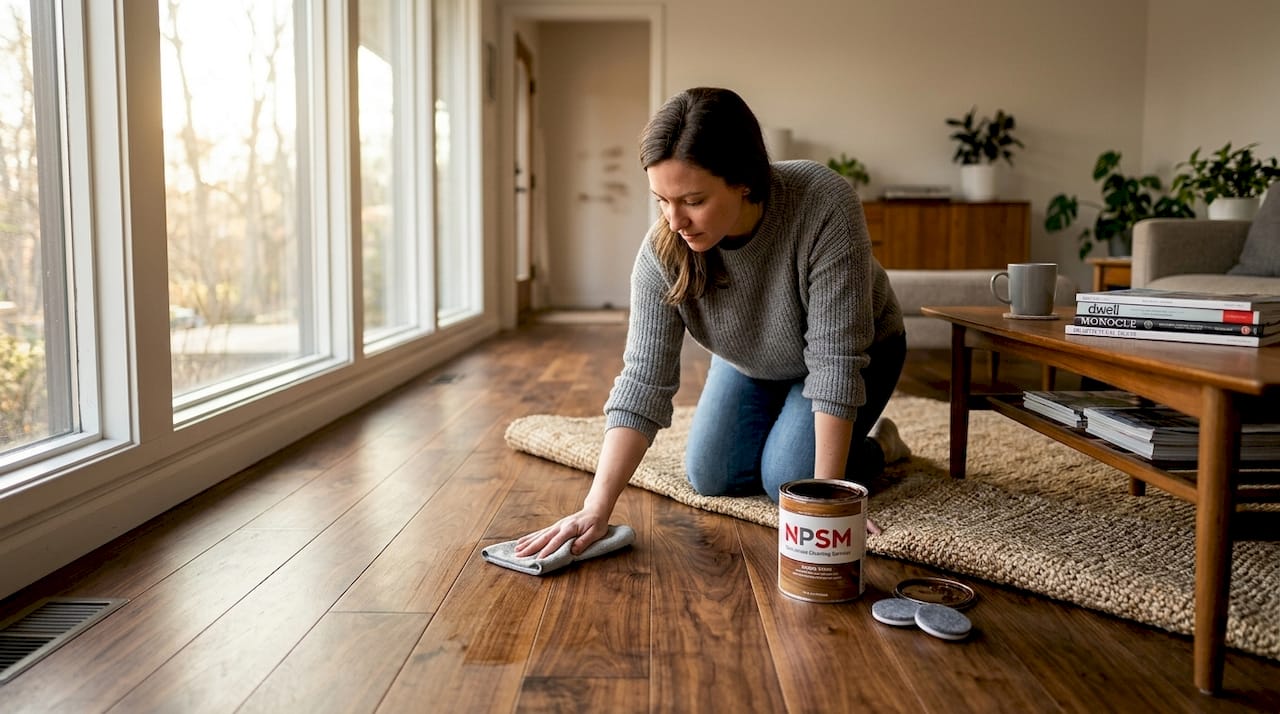
Your floors looked stunning when you first moved in. Now they’re scratched, faded, or stained, and every guest notices before they notice anything else. Dubai’s intense heat, dry desert air, and high indoor humidity swings take a harder toll on flooring than most homeowners realize. The good news is that a proper step by step floor restoration process, done in the right order with the right materials, can bring almost any floor back to life. This guide walks you through every stage, from prep to final finish, with techniques tailored specifically for the conditions you’re dealing with here.
Table of Contents
Key Takeaways
| Point | Details |
|---|---|
| Preparation determines results | Gather tools, control humidity, and prep the workspace before touching your floor. |
| Follow grit progression strictly | Moving from coarse to fine sandpaper in stages prevents scratches and uneven staining. |
| Repair before you finish | Fill cracks and restore grout before applying any sealer or stain to avoid trapped damage. |
| Climate control is non-negotiable | Keep indoor humidity between 40 and 60 percent throughout the project to protect wood finishes. |
| Sealing extends your investment | Regular grout and floor sealing every one to two years protects against Dubai’s heat and moisture. |
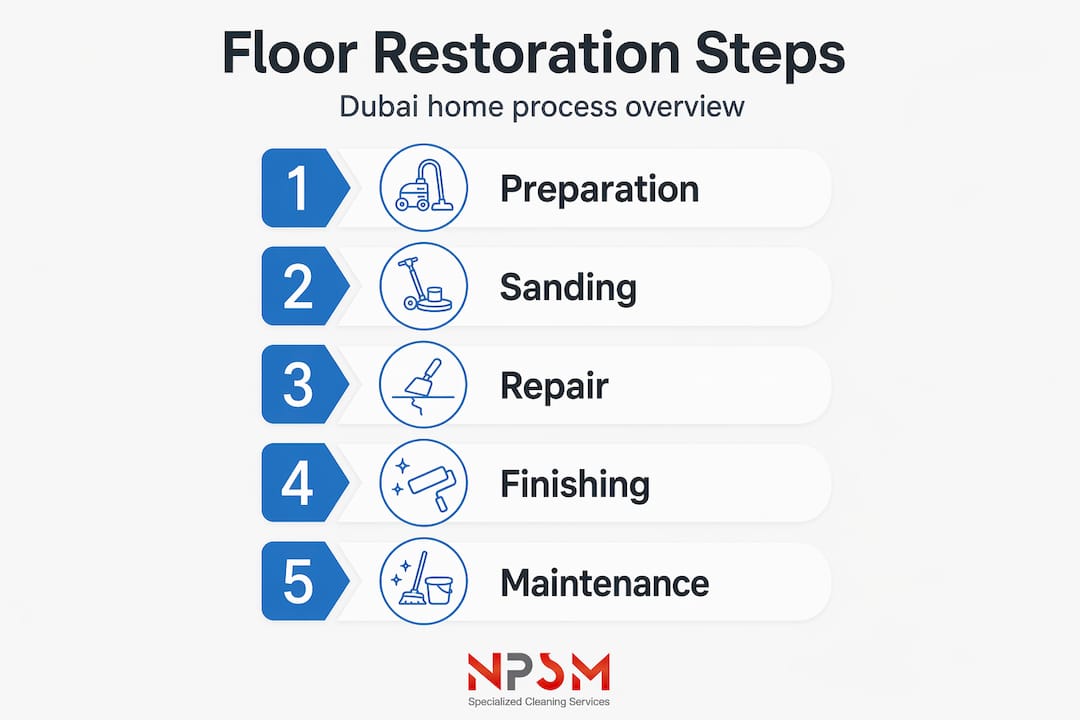
Step by step floor restoration: getting started right
Before you sand a single plank or mix a drop of grout, preparation decides whether your restoration looks professional or patchy. Skipping this phase is the single most common reason DIY floor restoration projects in Dubai fall short.
Tools and materials you’ll need
| Item | Purpose |
|---|---|
| Drum or belt sander | Removes old finish from large wood floor areas |
| Edge sander | Reaches corners and baseboards |
| Sandpaper (36, 60, 80, 100, 120 grit) | Progressive material removal for smooth surface |
| Shop vacuum | Removes dust between sanding passes |
| Tack cloth | Picks up fine particles before staining |
| Wood filler or epoxy filler | Fills cracks, gaps, and gouges |
| Grout saw or oscillating tool | Removes damaged grout from tile floors |
| Stain or finish of choice | Adds color and protection |
| Penetrating sealer | Protects grout and stone from moisture |
| Respirator mask, safety goggles, knee pads | Personal protection |
Pro Tip: In Dubai, schedule your sanding days for early morning when the indoor temperature is lower and the AC has been running overnight. Applying finish in peak afternoon heat accelerates drying unevenly and causes bubbling.
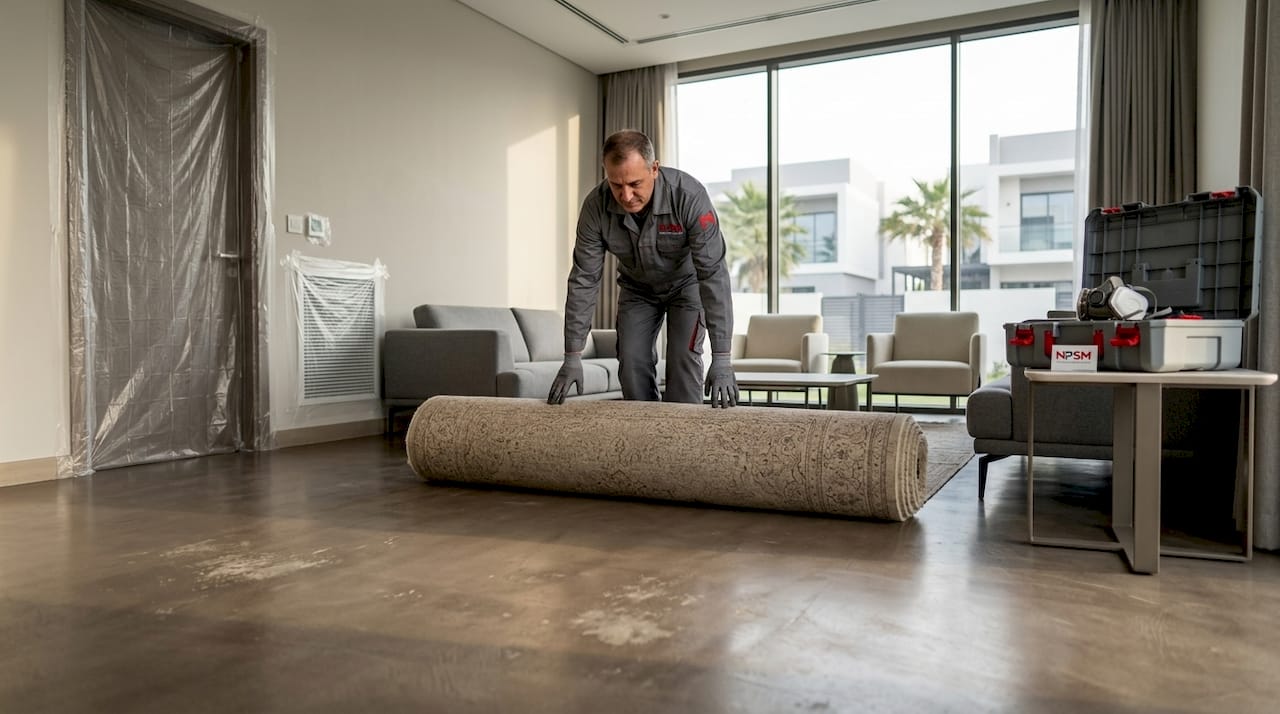
Clear all furniture from the room completely. Tape plastic sheeting over doorways and vents to stop dust from migrating through your HVAC system. Ventilate with a fan pushing air toward an open window, not pulling air in from other rooms. If you’re working on wood floors, moisture control is your biggest priority even before you pick up a tool. Dubai’s outdoor humidity spikes during summer, and that moisture gets trapped under finish if you’re not careful.
Sanding your floors correctly
This is where the real transformation starts, and also where the most mistakes happen. Step by step wooden floor sanding is not about speed. It’s about patience and sequence.
The grit progression you cannot skip
The sanding process follows a strict grit sequence: start with coarse 36 to 40 grit to strip old finish and remove deep scratches, move to medium 60 to 80 grit to smooth the surface, and finish with fine 100 to 120 grit before staining. Jumping from coarse to fine skips the intermediate step that removes the deep grooves left by the coarser paper, and those grooves show up clearly once stain goes on.
Here is the full sanding sequence for hardwood and engineered wood floors:
-
Dry-run the room. Walk the floor and mark any protruding nails with chalk. Hammer them below the surface. A nail catching the sanding drum at speed will tear both the paper and the wood.
-
First pass with coarse grit (36 or 40). Move the drum sander in the direction of the wood grain. Overlapping passes and moving with the grain prevents gouging and swirl marks. Work from one end of the room to the other in straight lines.
-
Edge sand immediately after each main pass. The drum sander cannot reach corners or the last few inches near walls. Use an edge sander in a circular motion, then blend it into the field area with light hand sanding.
-
Vacuum thoroughly. Get dust off the floor, walls, and even the ceiling if needed. This step between each grit change keeps old abrasive particles from scratching the surface you just smoothed.
-
Second pass with medium grit (60 to 80). Same technique, same direction. This removes the coarse scratch pattern.
-
Third pass with fine grit (100 to 120). The surface should feel silky and look uniform in raking light at this point.
-
Final vacuum and tack cloth wipe. Vacuuming plus tack cloth removes the fine dust that causes bumps and haze in your finish coat.
For tile and stone floors, sanding works differently. You’ll use a wet grinder with diamond polishing pads rather than sandpaper. The same grit logic applies, starting coarser and working finer, but water must run continuously to prevent cracking from heat.
Pro Tip: If you notice the wood surface looks raised or feels rough after sanding in Dubai’s summer months, your floor has absorbed ambient humidity overnight. Let the AC run for a few hours and lightly re-sand with fine grit before staining.
Repairing damaged areas before finishing
Sanding reveals what was hiding under old finish. You’ll likely find cracks between boards, gaps at walls, old nail holes, and possibly broken or missing grout between tiles. These all need to be addressed before any finish goes down.
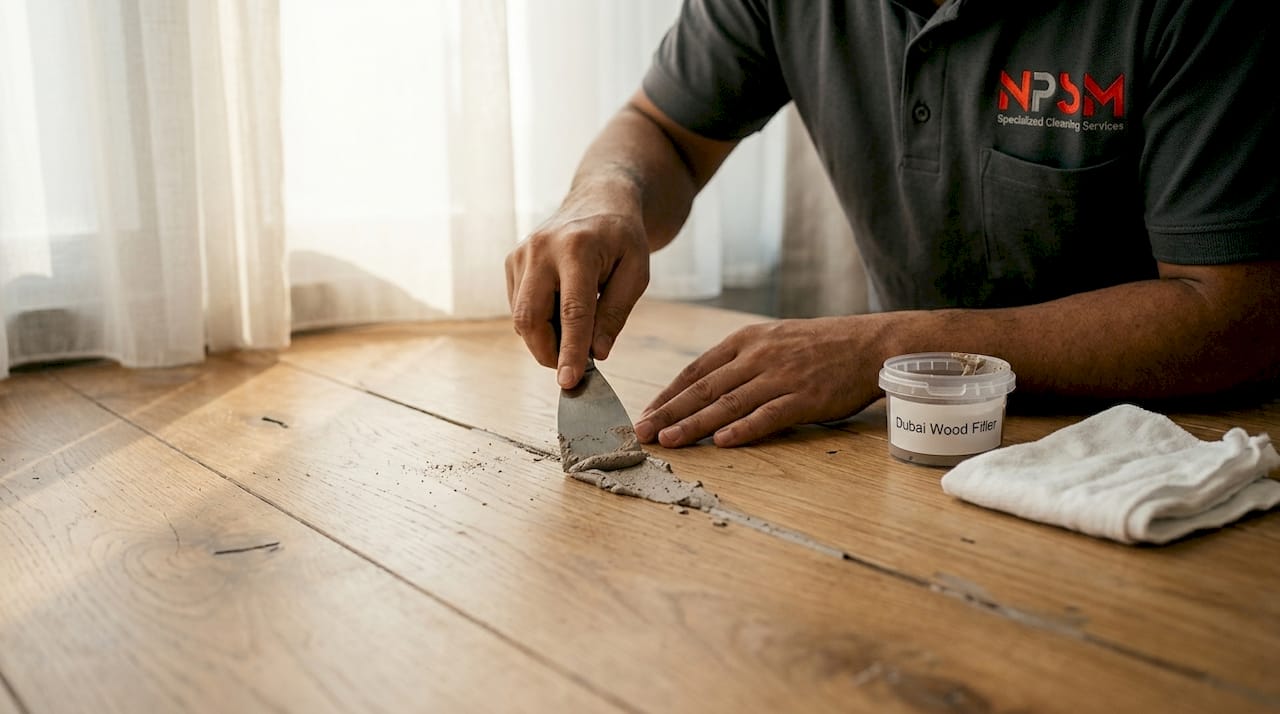
Wood floor repairs
For cracks and gaps in wood, use a wood filler that accepts stain. Mix the filler with fine sanding dust from your own floor to get a close color match before the stain goes on. Press it firmly into the gap, let it cure fully, then sand flush with 120 grit. Do not rush the cure time, especially in air-conditioned rooms where drying is slower.
For boards that are warped, deeply gouged, or structurally compromised, replacement is the better call. Trying to fill a badly damaged board with filler gives you a visible patch that stands out even more after staining.
Tile and grout repairs
Tile grout restoration involves removing old grout carefully with a grout saw, cleaning the joint thoroughly, and applying new grout at the correct consistency before sealing after full curing. Skipping the sealing step after new grout is one of the most common failures in tile floor restoration.
For stained but structurally sound grout, color sealing is often the smarter choice. Color sealing restores heavily stained grout and protects against future moisture penetration, at a fraction of the cost and labor of full regrouting.
| Damage type | Recommended fix | When to replace instead |
|---|---|---|
| Small cracks or gaps in wood | Stainable wood filler | Board is warped or structurally weak |
| Surface staining on grout | Color sealing | Grout is crumbling or mold has penetrated deep |
| Chips in tile | Tile repair epoxy | Tile is cracked through to the subfloor |
| Hollow-sounding tiles | Professional re-adhesion | Multiple adjacent tiles have failed |
For details on tackling tile joints specifically, the tile grout restoration guide from Floorpolishing covers the full Dubai context.
Sealing, staining, and maintaining your restored floor
You’ve sanded, repaired, and cleaned. Now comes the finish work, which is what everyone actually sees.
Stain application for wood floors
Work in manageable sections of about four to six square feet. Apply stain with a brush or applicator pad, moving with the grain, and wipe off excess stain with a wet edge before moving to the next section. Letting stain sit too long before wiping causes blotchy, sticky spots that cannot be fixed without sanding back.
Choosing finishes for Dubai’s climate
Not all finishes perform equally in Dubai. The conditions here require finishes with specific properties:
-
UV-resistant polyurethane or lacquer for wood floors exposed to direct sunlight through windows. Regular professional polishing with UV-protective treatments helps defend against color fading over time.
-
Water-based polyurethane dries faster and has lower odor, practical for furnished villas where you need to be back in the room quickly.
-
Epoxy coatings for high-traffic areas like entryways and garages, where durability outweighs aesthetics.
-
Penetrating oils for natural stone and marble, sealing from within rather than forming a surface film.
One climate-specific warning: trapped moisture during finishing causes “blushing”, a cloudy white haze that forms in the finish when humidity is too high during application. Run your AC to keep indoor humidity below 60 percent before and during the finishing stage.
Grout sealing and ongoing maintenance
Sealing tile grout every one to two years is the single most effective maintenance step you can take for tile floors. Penetrating sealers absorb into the grout and block moisture, soap residue, and staining agents from getting in. For wooden floors, maintaining indoor humidity between 40 and 60 percent year-round prevents the expansion and contraction cycles that crack finishes prematurely.
Pro Tip: After completing your step by step room restoration, place a digital hygrometer in the space and check it weekly for the first month. If readings spike above 65 percent regularly, add a dehumidifier. This one habit will extend your floor’s finish life by years.
For seasonal care specific to Dubai apartments and villas, the wooden floor maintenance tips from Floorpolishing offer a practical year-round schedule worth bookmarking.
My honest take after years of seeing Dubai floors
I’ve walked through hundreds of villas and apartments across Dubai where homeowners attempted restoration themselves, and the pattern I see most often is the same: the project starts strong and falls apart at the finishing stage. People rush the drying times, apply stain in a warm room at midday, or apply the second coat of polyurethane before the first one has fully cured. Then they wonder why the floor looks worse than before.
The other thing I’ve learned is that Dubai’s climate genuinely changes the rules. What works in a temperate European climate does not automatically translate here. Wood breathes differently when your indoor environment swings between 35 percent and 75 percent humidity depending on the season. That’s why I always push people to protect wood floors from climate proactively, not reactively.
My honest advice: do the sanding yourself if you have the patience for it. Rent quality equipment, follow the grit progression exactly, and don’t rush. But for the finishing and sealing stages, especially on marble, natural stone, or engineered wood, I’d lean toward bringing in someone with local experience. The cost difference between a professional finish and a DIY finish is often less than you’d expect. The cost of sanding back a failed DIY finish, however, is not.
— Qadir
Restore your floors with Floorpolishing in Dubai
If any stage of this process feels beyond what you want to tackle alone, or if your floors have damage that needs professional equipment, Floorpolishing has you covered across Dubai. The team at Floorpolishing handles floor restoration and polishing for marble, granite, wooden, vinyl, tile, and natural stone floors in villas and apartments. Services include wood floor sanding, grout restoration, broken tile repair, and epoxy floor coatings. For wooden floors specifically, their wooden floor polishing service is designed around Dubai’s climate conditions, using finishes that hold up to the UV exposure and humidity swings that standard products struggle with.
FAQ
What is the correct grit order for wooden floor sanding?
Start with coarse 36 to 40 grit, progress to 60 to 80 grit, then finish with 100 to 120 grit. Skipping any stage leaves scratches that show clearly after staining.
How do I prevent finish problems on wood floors in Dubai’s humidity?
Keep indoor humidity between 40 and 60 percent using your AC or a dehumidifier during and after finishing. High humidity causes a white haze called blushing to form in the finish.
Is color sealing better than regrouting for stained tile floors?
For structurally intact but discolored grout, color sealing is more cost-effective and achieves similar visual results without the labor of full regrouting.
How often should I reseal grout on tile floors?
Reapply a penetrating sealer to tile grout every one to two years to maintain moisture protection and prevent staining, especially in bathrooms and kitchens.
When should I hire a professional instead of doing it myself?
Consider hiring a professional for marble, natural stone, or engineered wood finishing, for floors with widespread structural damage, or when climate-specific finish products and application experience are needed for lasting results.