Dubai’s intense heat and high humidity take a harsh toll on wooden floors, causing dullness, scratches, and surface damage that diminish your villa’s beauty. Restoring these floors requires specific techniques suited to the local climate, from thorough preparation and progressive sanding to applying multiple protective finish coats. This guide walks you through proven methods that deliver durable, beautiful results tailored to Dubai’s challenging conditions.
Table of Contents
- Pre-restoration Preparation
- Sanding And Refinishing Process
- Finishing And Sealing Methods
- Safety Precautions During Restoration
- Alternative Restoration Approaches And Tradeoffs
- Common Mistakes And Troubleshooting
- Maintenance Tips Post-restoration
- Timeline, Costs, And Expected Outcomes
- Restore Your Wooden Floors With Expert Help In Dubai
- Frequently Asked Questions
Key takeaways
| Point | Details |
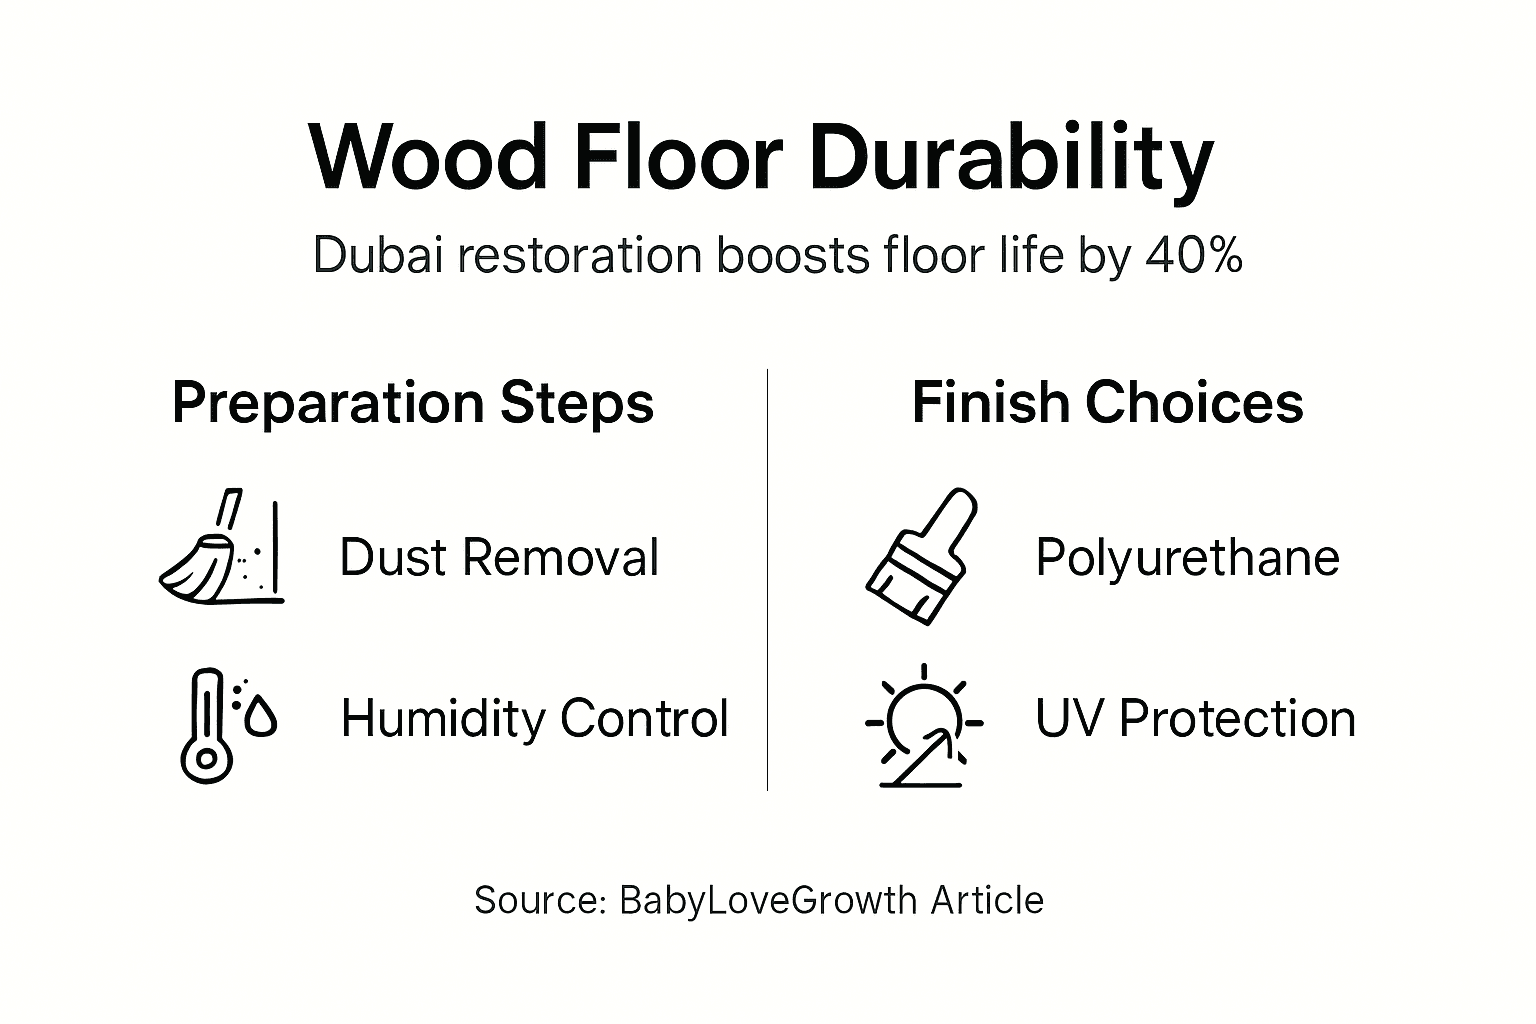
| Proper preparation | Remove all dust, wax, and debris before sanding to ensure effective restoration and finish adhesion. |
| Progressive sanding | Sand from coarse to fine grit to smooth surfaces and reduce visible marks by up to 80%. |
| Three finish coats | Applying three coats of water-based polyurethane increases floor protection by 40% compared to two coats. |
| Safety and ventilation | Use respirator masks, eye protection, and ensure good airflow during all sanding and finishing operations. |
| Post-restoration care | Regular maintenance with furniture pads and gentle cleaning extends restored floor lifespan by years. |
Pre-restoration preparation
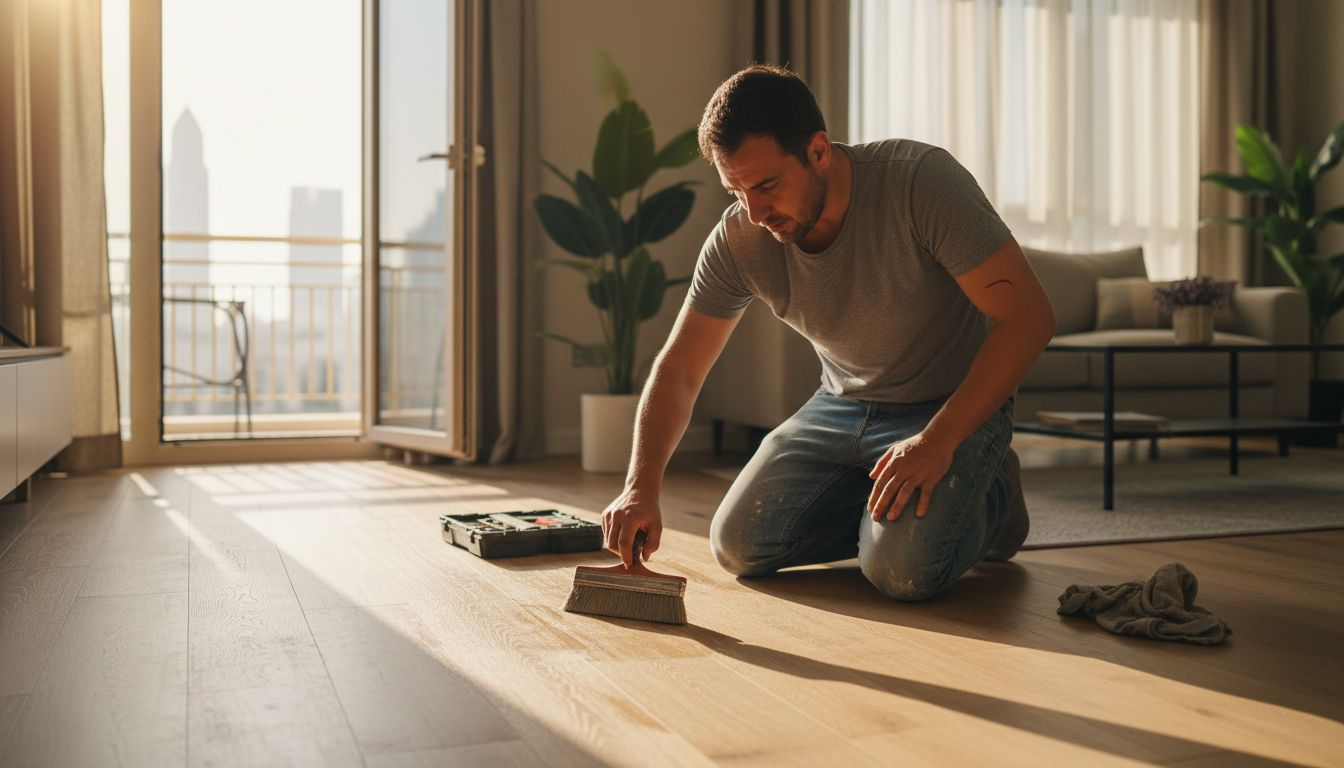
Before you touch a sander, thorough preparation sets the foundation for flawless restoration. Remove all furniture, rugs, and decorative items from the room to create a clear workspace. Sweep and vacuum every corner to eliminate dust, dirt, and debris that can scratch the wood during sanding or contaminate your finish.
Dubai’s climate demands attention to environmental conditions during restoration. Work only when indoor humidity stays below 50% to prevent moisture from interfering with finish adhesion and curing. Open windows or use dehumidifiers if necessary, but avoid working during humid summer months when possible. Proper ventilation not only controls humidity but also disperses dust and fumes safely.
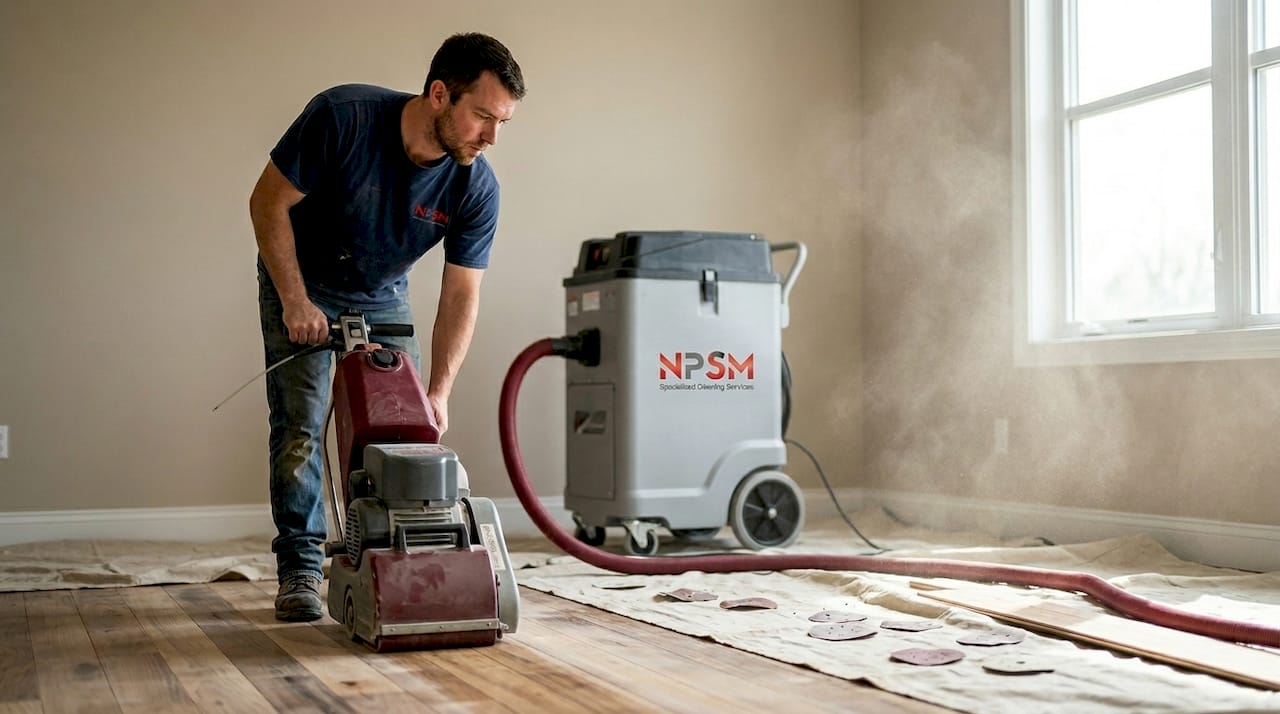
Gather your equipment before starting. You’ll need multi-grit sanders ranging from coarse (36-60 grit) to fine (120-150 grit), a respirator mask rated for dust and fumes, safety goggles, heavy-duty gloves, and commercial wood cleaning agents. Inspect the floor for protruding nails or staples and hammer them down flush with the surface. Any metal left exposed will tear sandpaper and damage your equipment.
Essential preparation checklist:
- Clear the entire room of furniture and floor coverings
- Vacuum and sweep thoroughly to remove all loose particles
- Check humidity levels and ensure adequate ventilation
- Inspect for and secure any protruding nails or metal fasteners
- Test cleaning agents on a small hidden area first
- Gather all safety equipment before beginning work
| Preparation step | Time required | Critical for |
| Room clearing and cleaning | 1-2 hours | Preventing contamination |
| Humidity and ventilation setup | 30 minutes | Proper finish curing |
| Equipment gathering | 1 hour | Efficient workflow |
| Floor inspection and repairs | 1-2 hours | Avoiding equipment damage |
Skipping preparation steps leads to poor results and wasted effort. A floor with embedded dust or improper humidity will never hold a finish properly, no matter how skilled your sanding technique.
Sanding and refinishing process
Sanding transforms damaged wooden floors into smooth, ready-to-finish surfaces through a progressive grit sequence. Start with coarse grit sandpaper (36-60 grit) to remove old finishes, deep scratches, and surface damage. Move the sander steadily along the wood grain, never stopping in one spot to avoid creating dips or uneven areas.
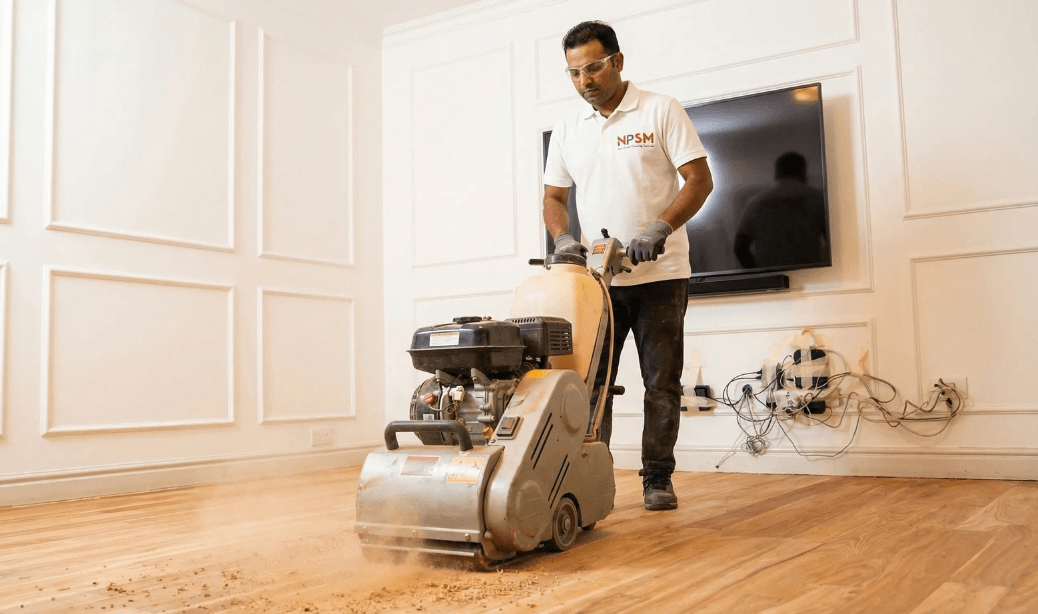
After the initial coarse pass, vacuum thoroughly and switch to medium grit (100). This intermediate step begins smoothing the surface while removing marks left by coarse sanding. Using 120-150 grit after initial 36-60 grit sanding reduces sanding marks by up to 80%, creating a surface that accepts finish beautifully. This correct sanding sequence prevents the swirl marks and scratches that plague rushed jobs.
Screening with fine grit paper (120-150) after your final sanding pass prepares the surface for optimal finish adhesion. This light buffing removes any remaining imperfections and opens the wood pores slightly, allowing polyurethane to penetrate and bond effectively. If your floors show causes and fixes for dull wooden floors in Dubai, proper sanding and screening address these issues at the root.
Progressive sanding sequence:
- First pass with 36-60 grit to remove damage and old finish
- Vacuum thoroughly between each grit change
- Second pass with 100 grit to smooth and refine surface
- Third pass with 120-150 grit for final smoothing
- Screen with 150 grit to prepare for finish application
- Final vacuum and tack cloth wipe before applying finish
Water-based polyurethane works exceptionally well in Dubai’s hot climate. Unlike oil-based finishes that take days to dry, water-based products dry in 2-4 hours per coat, reducing project time significantly. Apply three thin coats rather than two thick ones. Thin coats dry faster, cure harder, and create a more durable surface that resists scratches and wear.
Finishing application guidelines:
- Apply first coat evenly with quality applicator or brush
- Allow 2-4 hours drying time in controlled humidity
- Lightly buff with 220 grit between coats
- Apply second coat following same technique
- Wait recommended drying time before third coat
- Third coat provides 40% more protection than stopping at two
| Grit sequence | Purpose | Expected result |
| 36-60 (coarse) | Remove damage and old finish | Clean, level surface |
| 100 (medium) | Smooth and refine | Reduced visible scratches |
| 120-150 (fine) | Final smoothing | 80% fewer sanding marks |
| 150 (screening) | Prepare for finish | Optimal finish adhesion |
Pro Tip: Always sand with the wood grain, never across it. Cross-grain scratches become glaringly visible once finish is applied, requiring complete resanding to fix.
Finishing and sealing methods
Choosing the right finish and applying it correctly determines how long your restoration lasts. Water-based polyurethane stands out as the best choice for Dubai conditions. It dries quickly in hot weather, emits fewer volatile organic compounds than oil-based alternatives, and creates a clear, non-yellowing finish that preserves wood’s natural color.
Drying and curing are different processes. While water-based polyurethane feels dry to touch in 2-4 hours, full curing takes 7 or more days in Dubai’s humidity. During curing, the finish hardens and reaches maximum durability. Rushing this process by placing furniture or allowing heavy traffic damages the surface before it achieves full strength.
Three coats provide approximately 40% more protection than two coats. This extra layer creates a thicker barrier against moisture infiltration, scratch resistance, and daily wear. In Dubai’s climate, where humidity effects on floors cause accelerated degradation, this additional protection extends floor life significantly.
Optimal finishing practices:
- Choose water-based polyurethane rated for high-traffic areas
- Apply thin, even coats to prevent bubbling or pooling
- Maintain room temperature between 15-25°C during application
- Keep humidity below 50% throughout drying and curing
- Avoid air conditioning or heating that creates rapid temperature changes
- Wait full curing time before returning furniture or rugs
Proper sealing protects against Dubai’s specific challenges. Moisture from humidity can penetrate inadequately sealed floors, causing warping and finish failure. A three-coat system with full curing time creates a moisture barrier that maintains floor integrity despite environmental stress.
Pro Tip: Test your finish on a hidden area or scrap piece first. Some exotic woods react differently to finishes, and a test patch reveals any compatibility issues before you commit to the entire floor.
Safety precautions during restoration
Wooden floor restoration generates hazardous dust and fumes that require serious protective measures. Wood dust irritates respiratory systems and prolonged exposure causes long-term health problems. Polyurethane fumes, even from water-based products, contain chemicals that affect breathing and cause headaches without proper ventilation.
A respirator mask rated N95 or higher filters fine dust particles that regular dust masks miss. Safety goggles protect eyes from airborne particles that cause irritation and injury. Heavy-duty gloves prevent splinters during preparation and protect skin from finish chemicals during application. Never compromise on these basics.
Ventilation removes airborne particles and disperses chemical fumes safely. Open multiple windows to create cross-ventilation, or use fans positioned to push contaminated air outside while drawing fresh air in. Poor ventilation concentrates dust and fumes to dangerous levels, even when wearing protective equipment.
Essential safety equipment:
- N95 or higher-rated respirator mask for dust and fume filtration
- Impact-resistant safety goggles with side shields
- Chemical-resistant work gloves rated for solvents
- Hearing protection during extended sander operation
- Long sleeves and pants to prevent skin contact with dust
- First aid kit with eye wash solution readily accessible
Avoid chemical paint strippers marketed for DIY use. These products contain methylene chloride and other highly toxic substances that cause serious health effects, including unconsciousness and death in poorly ventilated spaces. Professional-grade equipment and water-based products deliver results without extreme chemical risks.
“The greatest danger in floor restoration comes not from the equipment, but from inadequate respiratory protection and poor ventilation. Invest in quality safety gear and maintain airflow throughout your project to protect your health long-term.”
Alternative restoration approaches and tradeoffs
Not every wooden floor needs full sanding and refinishing. Understanding your options helps you choose the most cost-effective approach for your situation. Three main methods exist: full sanding and refinishing, surface recoating, and chemical restoration. Each offers distinct advantages and limitations.
Full sanding removes all existing finish and surface damage, creating essentially new flooring. This method provides the longest-lasting results and most dramatic transformation but requires the most time and highest cost. Expect 3-5 days for a typical 30 square meter room, including drying and initial curing time. Professional services typically charge premium rates for full restoration.
Surface recoating, also called screening and recoating, works for floors with intact finish that need refreshing. This process lightly abrades the existing finish, then applies new topcoats without removing all the old finish. It saves up to 50% of the time required for full sanding and costs significantly less. However, it only works when the existing finish remains sound and the wood beneath shows no deep damage.
Chemical restorers promise to rejuvenate floors without sanding but deliver limited results. These products work only on very minor wear and cannot address scratches, dents, or finish failure. Villa owners seeking long-term value should avoid chemical shortcuts in favor of proven mechanical methods.
| Restoration method | Duration | Cost level | Best for | Lifespan |
| Full sanding | 3-5 days | High | Damaged floors, complete refresh | 8-12 years |
| Surface recoating | 1-2 days | Medium | Minor wear, intact finish | 3-5 years |
| Chemical restorers | Few hours | Low | Superficial dulling only | 1-2 years |
Choosing the right approach:
- Assess current floor condition honestly before deciding
- Full sanding suits floors with deep scratches, stains, or finish failure
- Recoating works when finish is intact but dulled from traffic
- Consider long-term value versus upfront cost savings
- Villa owners benefit most from full restoration durability
- Rental properties may justify recoating for cosmetic updates
Your choice affects not just immediate results but long-term maintenance requirements and total cost over the floor’s lifetime. A proper full restoration now prevents repeated partial fixes that accumulate higher costs over time.
Common mistakes and troubleshooting
Even experienced DIYers make errors that compromise restoration quality. Recognizing these pitfalls before you start prevents frustration and wasted materials. Inadequate dust control ranks as the most common problem. Up to 60% of DIY sanding projects report issues with dust contamination affecting finish quality. Dust particles settle into wet finish, creating a rough, gritty surface that requires complete removal and reapplication.
Uneven sanding creates visible waves, dips, or ridges that become obvious once finish is applied. This happens when you pause the sander in one spot, use inconsistent pressure, or skip grit sequences. Always keep the sander moving at a steady pace and follow the progressive grit method without shortcuts. Understanding wood floor refinishing mistakes helps you avoid repeating common errors.
Applying finish coats too quickly causes bubbling, poor adhesion, or cloudy appearance. Each coat must dry completely before the next application. Humidity above 50% extends drying times significantly, so be patient and test dryness before proceeding. Press your thumb firmly on an inconspicuous area; if the finish feels tacky or shows a thumbprint, it needs more drying time.
Common problems and solutions:
- Dust in finish: Vacuum exhaustively between coats, use tack cloth, seal room from outside dust sources
- Uneven surface: Maintain steady sander movement, check sandpaper condition frequently, follow complete grit progression
- Finish bubbles: Apply thinner coats, avoid shaking finish container, maintain proper room temperature
- Streaky appearance: Use quality applicators, maintain wet edge while applying, work in manageable sections
- Slow drying: Improve ventilation, reduce humidity, avoid working during monsoon season
Skipping safety equipment creates health risks that manifest over time. Chronic dust exposure damages lungs permanently, and solvent exposure affects neurological function. No time savings justify long-term health consequences.
Pro Tip: If you discover a problem after finishing, wait for complete curing before attempting fixes. Trying to repair wet or partially cured finish makes problems worse and often requires stripping everything and starting over.
Maintenance tips post-restoration
Your newly restored floors need ongoing care to maintain their beauty and extend their lifespan. Simple habits prevent damage that would otherwise require premature refinishing. Furniture pads on chair and table legs prevent scratches from daily movement. Replace these pads annually as they compress and lose effectiveness.
Clean floors weekly with products specifically designed for polyurethane-finished wood. Avoid steam mops, excessive water, and harsh chemicals that break down the protective finish. A slightly damp microfiber mop removes dirt without introducing moisture that damages wood. Always dry the floor immediately after damp cleaning.
Dust and grit act like sandpaper under foot traffic, wearing down finish prematurely. Regular sweeping or vacuuming removes these abrasive particles before they cause damage. Place mats at entrances to catch dirt and sand from outside, but avoid rubber-backed mats that trap moisture and discolor wood.
Essential maintenance practices:
- Apply self-adhesive felt pads to all furniture legs and replace annually
- Sweep or vacuum at least twice weekly to remove abrasive particles
- Clean spills immediately to prevent moisture penetration
- Use wood-safe cleaning products diluted according to instructions
- Avoid walking on floors with high heels or sharp objects
- Maintain indoor humidity between 35-50% year-round
- Trim pet nails regularly to minimize scratch risk
Dubai’s intense sunlight fades wood over time, especially near windows and glass doors. Use UV-filtering window treatments or apply protective film to glass to reduce this effect. Rearrange rugs and furniture occasionally to ensure even aging across the entire floor surface.
Routine maintenance extends your restoration investment by years. Well-maintained floors can last a decade or more before needing refinishing, while neglected floors may require work in half that time. For more guidance, explore floor maintenance tips tailored to Dubai conditions.
Pro Tip: Schedule a professional inspection every two years. Experts spot early signs of finish wear or damage before they become serious problems requiring extensive repairs.
Timeline, costs, and expected outcomes
Understanding project scope helps you plan effectively and set realistic expectations. A typical 30 square meter wooden floor restoration takes 3-5 days from start to walk-on-ready condition. This includes preparation (1 day), sanding (1 day), applying three finish coats with drying time between each (1-2 days), and initial curing (1 day minimum).
Full curing extends beyond initial walk-on time. While you can carefully walk on floors after 24 hours, avoid placing furniture or rugs for at least one week. Heavy items or area rugs placed too soon leave permanent impressions in incompletely cured finish.
Three finish coats can extend floor durability approximately five more years compared to two coats. This translates to 8-12 years of beautiful, durable flooring versus 5-7 years with minimal finishing. The extra day and cost for a third coat delivers exceptional return on investment.
| Project phase | Duration | Key activities |
| Preparation | 1 day | Clear room, clean, inspect, gather equipment |
| Sanding | 1 day | Progressive grit sanding, screening, final cleaning |
| Finishing | 1-2 days | Apply three coats with drying time between each |
| Initial curing | 1+ days | Light foot traffic only, no furniture |
| Full curing | 7+ days | Complete hardening, normal use resumes |
Professional services deliver consistent quality with accurate timelines. Experienced technicians complete work faster than DIY efforts while achieving superior results. They also carry insurance covering any damage during work and guarantee their results.
Properly maintained restored floors significantly outlast original finishes. The combination of modern water-based polyurethane, proper application technique, and three-coat systems creates a protective barrier that withstands Dubai’s climate challenges. Your villa’s aesthetics remain pristine for years, enhancing property value and living enjoyment.
Cost varies based on damage extent, room size, and whether you hire professionals or DIY. Full sanding and refinishing represents the highest expense but delivers unmatched longevity and quality. For comprehensive solutions, consider wooden floor polishing services that include preparation, restoration, and finishing.
Restore your wooden floors with expert help in Dubai
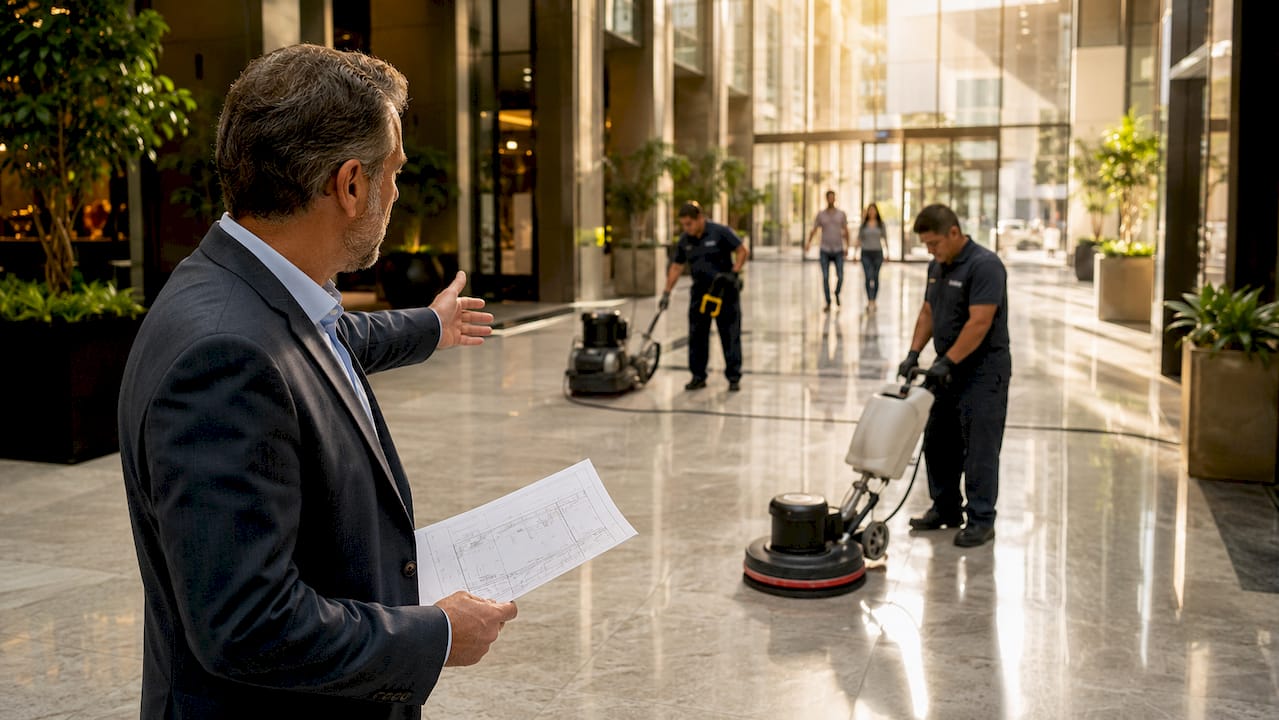
Wooden floor restoration demands precision, proper equipment, and experience to achieve lasting results in Dubai’s challenging climate. While DIY approaches work for skilled homeowners, professional wooden floor restoration services in Dubai guarantee flawless outcomes without the trial and error that wastes time and materials.
Our experienced technicians use commercial-grade equipment and premium water-based finishes specifically suited to hot, humid conditions. We complete projects efficiently while protecting your home from dust and disruption. Transparent pricing and flexible scheduling make professional restoration accessible for villa owners throughout Dubai. From initial assessment through final curing, we handle every detail so you enjoy beautiful, durable floors without the hassle. Visit our expert wooden floor polishing page or explore our complete floor polishing and restoration in Dubai services to schedule your free consultation today.
Frequently asked questions
How long must I wait before walking on newly finished wooden floors in Dubai?
Wait at least 24 hours for light foot traffic in socks only after the final coat. Full curing takes 7-10 days in Dubai humidity before placing furniture or rugs. Rushing this timeline risks permanent damage to incompletely cured finish.
How often should wooden floors be maintained after restoration?
Sweep or vacuum twice weekly to remove abrasive particles, and damp mop monthly with wood-safe cleaners. Professional inspection every two years catches minor wear before it becomes serious. With proper care, restored floors last 8-12 years before needing refinishing.
Is water-based polyurethane safe for indoor air quality?
Yes, water-based polyurethane emits significantly fewer volatile organic compounds than oil-based alternatives. It dries quickly with minimal odor, making it ideal for occupied homes. Maintain ventilation during application and curing for best results.
Can minor scratches be fixed without full sanding?
Shallow surface scratches often respond to spot sanding and touch-up finish application. Deep scratches penetrating through finish into wood require at least screening and recoating. Multiple deep scratches indicate full sanding would deliver better overall results.
What signs indicate full sanding is necessary over surface recoating?
Full sanding becomes necessary when finish is worn through to bare wood in traffic areas, deep scratches cover significant portions, or the existing finish is flaking or peeling. If more than 30% of the floor shows these conditions, recoating cannot adequately restore appearance or protection.
Permalink