TL;DR:
Most flooring failures are caused by environmental and humidity issues, not manufacturing defects.
Proper diagnosis, including moisture testing and environmental assessment, is essential before repairs.
Flooring defects are flaws in floor surfaces caused by moisture exposure, improper installation, or material failure that compromise both function and appearance. The industry term for these conditions is “flooring discrepancies,” though most homeowners and property managers know them simply as floor problems. What surprises most people is that 90% of flooring failures trace back to environmental or humidity-related issues, not manufacturing defects. That single fact changes how you should approach every repair decision. Whether you manage a Dubai villa, a commercial office, or a rental apartment, understanding the real causes of floor damage is the fastest path to fixing it correctly the first time.
What are the most common flooring defects and their symptoms?
Flooring defects show up as buckling, cupping, cracking, gaps, discoloration, loose tiles, and adhesive failure. Many of these problems develop gradually from environmental changes or poor installation practices rather than appearing immediately after the floor is laid.
Here are the most common defects by type and what they look like:
-
Cupping: The edges of hardwood or laminate planks rise higher than the center, creating a concave surface. This is almost always a moisture sign. The underside of the plank is absorbing more moisture than the top.
-
Buckling: Planks lift completely off the subfloor, sometimes by an inch or more. This happens when there is no expansion gap at the walls, or when flooding occurs.
-
Gaps between planks: Boards separate and leave visible spaces. Low indoor humidity causes wood to shrink. Gaps that appear in winter and close in summer confirm a humidity cycle problem.
-
Squeaking: Boards rub against each other or against fasteners when walked on. This signals loose subfloor panels, missing adhesive, or planks that were not properly secured.
-
Discoloration and staining: Dark patches on hardwood or laminate indicate moisture trapped beneath the surface. White haze on tile or stone signals efflorescence, where mineral salts migrate upward through grout.
-
Adhesive failure: Vinyl or tile flooring lifts at the edges or bubbles in the center. This points to subfloor moisture that broke down the adhesive bond.
-
Cracking: Tile cracks in straight lines across the face or along grout joints. This usually means the subfloor flexes under load, which tile cannot tolerate.
Each of these symptoms is a signal, not the root problem. Treating the symptom without finding the cause leads to repeat failures within months.
How do moisture and environmental conditions cause flooring defects?
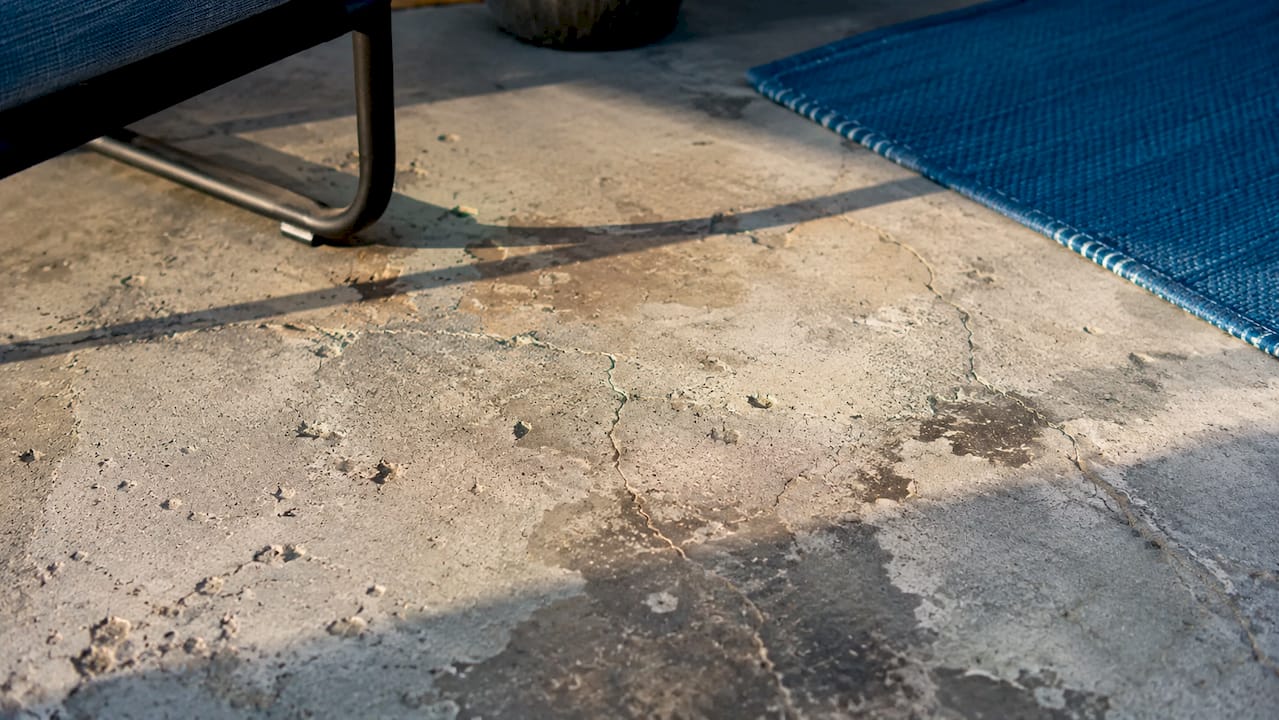
Moisture is the single most destructive force acting on floors. It enters from three directions: the subfloor below, the ambient air around the floor, and spills or leaks from above. Each pathway creates different defects, which is why a thorough flooring issues guide always starts with moisture mapping.

Concrete subfloors are particularly problematic. Ignoring moisture vapor transmission in concrete causes adhesive delamination, bubbling, and mold growth that leads to full flooring failure. Concrete releases moisture for months after it is poured, and groundwater can push vapor upward indefinitely if no proper vapor barrier is installed. HVAC conditions and seasonal temperature swings accelerate this process in climates like Dubai’s, where the gap between indoor air conditioning and outdoor heat is extreme.
Wood and laminate floors respond directly to relative humidity. When humidity rises, wood absorbs moisture and expands. When humidity drops, it releases moisture and contracts. This cycle is normal, but only within limits. Manufacturers design floors to handle a specific humidity range, typically 35–65% relative humidity. Outside that range, cupping, gapping, and buckling follow.
“Moisture is cited as the primary driver in 90% of troubleshooting cases, requiring rigorous pre-installation testing before any flooring material is laid.”
Acclimation is the industry-standard method for reducing moisture shock. Most laminate manufacturers require 48–72 hours of acclimation time before installation. During this period, planks sit in the room where they will be installed, adjusting to the local temperature and humidity. Skipping this step is one of the most common flooring installation mistakes, and the result is a floor that buckles or shifts within weeks.
| Defect | Primary moisture cause | Affected floor types |
|---|---|---|
| Cupping | Subfloor moisture higher than surface | Hardwood, engineered wood |
| Buckling | Flooding or missing expansion gap | Laminate, hardwood |
| Adhesive failure | Vapor transmission through concrete | Vinyl, tile, carpet |
| Efflorescence | Mineral salts migrating through grout | Tile, stone |
| Gaps | Low ambient humidity causing shrinkage | Hardwood, laminate |
Dubai’s climate adds a specific challenge. The combination of high outdoor humidity and aggressive indoor air conditioning creates rapid moisture swings that floors cycle through daily. Properties near the coast or with older HVAC systems are especially vulnerable. Understanding how humidity damages floors in this environment is the first step toward preventing expensive repairs.
What diagnostic steps identify the root cause of flooring defects?
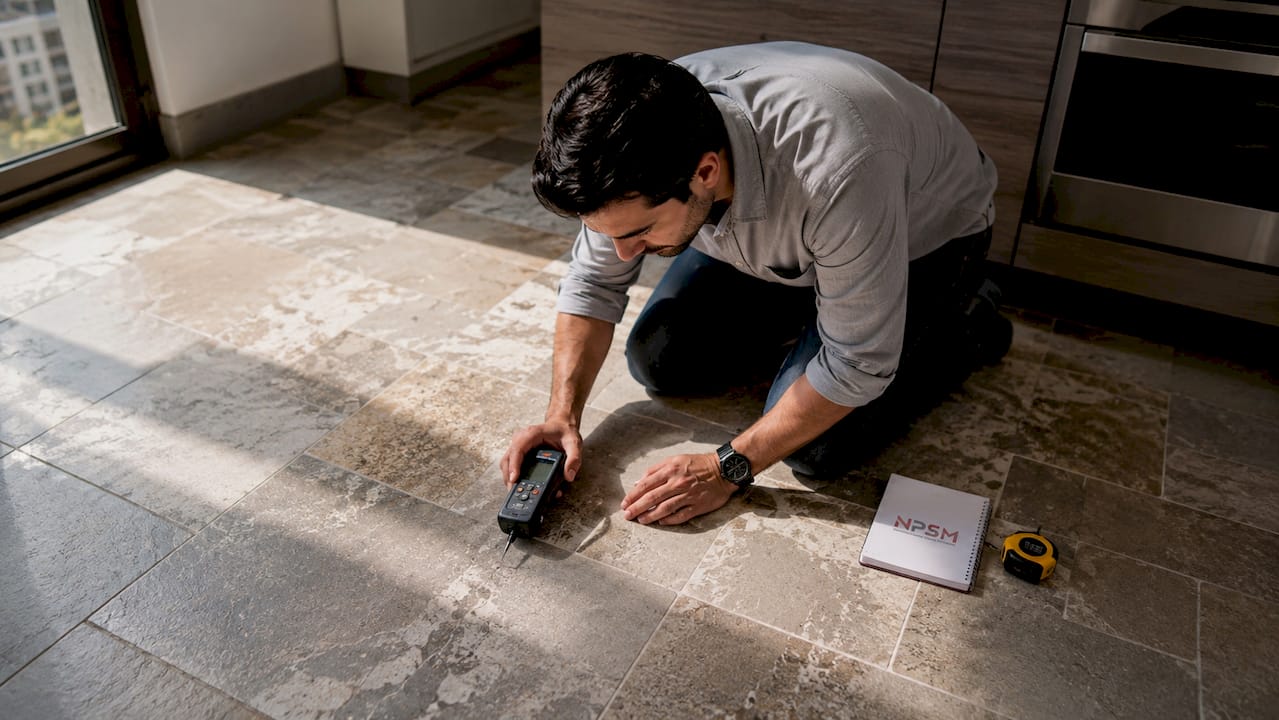
Systematic diagnosis separates a permanent fix from a temporary patch. Moisture testing at all layers of the floor assembly is the critical first step because most flooring problems are symptoms of humidity mismatches, not surface damage.
Follow this diagnostic sequence:
-
Visual inspection: Walk the entire floor and mark every defect location. Note whether problems cluster near walls, windows, bathrooms, or HVAC vents. Clustering reveals the moisture source.
-
Subfloor moisture measurement: Use a calibrated moisture meter on the subfloor surface. Readings above the manufacturer’s specified threshold confirm a subfloor moisture problem before any repair begins.
-
Plank or tile moisture measurement: Measure the flooring material itself. A large gap between subfloor and plank readings confirms active moisture movement through the assembly.
-
Ambient air measurement: Record the room’s relative humidity with a hygrometer. Compare this to the floor manufacturer’s recommended range.
-
Installation detail check: Look for expansion gaps at walls and transitions. Measure them. Missing or undersized gaps are a direct cause of buckling and are a clear flooring installation mistake.
-
Adhesive inspection: At lifted edges or bubbled sections, check whether the adhesive has dried out, crystallized, or never bonded. Each failure mode points to a different cause.
-
Photographic documentation: Photograph every defect before touching anything. Manufacturers frequently deny warranty claims without photographic evidence of subfloor preparation and acclimation.
Floor inspections conducted by qualified professionals assess installation quality, environmental conditions, and material performance together. This combined analysis is often required for construction disputes or insurance claims. A professional inspector can distinguish between a manufacturing defect, an installation error, and an environmental problem, which determines who is financially responsible for the repair.
Pro Tip: Never start repairs before completing moisture testing. Fixing a buckled floor without measuring subfloor moisture first almost guarantees the problem returns within one season.
What are effective prevention and repair strategies for common flooring defects?
Prevention costs a fraction of repair. The most effective prevention strategies address moisture control, proper installation, and ongoing maintenance as a connected system rather than separate tasks.
Before installation:
-
Test subfloor moisture with a calibrated meter and confirm readings fall within the flooring manufacturer’s specified range before laying any material.
-
Allow adequate acclimation time. For laminate and hardwood, this means 48–72 hours minimum in the installation room.
-
Install a vapor barrier on concrete subfloors. This single step prevents the majority of adhesive failures and mold-related defects.
-
Leave correct expansion gaps at all walls, doorways, and transitions. Most manufacturers specify a minimum gap of 10–12 millimeters.
For existing minor problems:
-
Squeaking floors respond well to non-invasive fixes. Powdered soap or shims resolve the majority of minor squeak issues without demolition or professional intervention.
-
Small gaps that appear seasonally often close on their own when humidity returns to normal range. Monitor them through one full seasonal cycle before filling.
-
Surface scratches on hardwood or engineered wood can be addressed with wooden floor refinishing techniques that restore the surface without replacing boards.
For moisture-related damage:
-
Sanding hardwood floors that are cupped due to moisture imbalance causes permanent board thinning. The moisture must be corrected and the floor allowed to dry and flatten before any sanding begins.
-
Active water damage requires professional assessment. Mold can establish within 24–48 hours under wet flooring. Water damage restoration specialists can determine whether subfloor replacement is necessary before new flooring goes down.
Ongoing maintenance:
-
Maintain indoor humidity between 35–65% year-round using humidifiers or dehumidifiers as needed.
-
Clean spills immediately. Standing water on any floor type accelerates defect formation.
-
Follow a floor maintenance routine that includes periodic inspection of expansion gaps, grout lines, and adhesive edges.
Pro Tip: Document your floor’s installation date, the products used, and the subfloor moisture readings at the time of installation. This record is your strongest tool if a warranty dispute arises later.
Key Takeaways
Flooring defects are caused primarily by moisture and installation errors, and fixing them correctly requires diagnosing the root cause before touching the surface.
| Point | Details |
|---|---|
| Moisture drives most failures | Environmental and humidity issues cause 90% of flooring failures, not manufacturing defects. |
| Acclimation prevents buckling | Allow 48–72 hours of acclimation for laminate and hardwood before installation to prevent shifting. |
| Test before you repair | Measure subfloor, plank, and ambient moisture before starting any repair to avoid repeat failures. |
| Document everything | Photograph installation stages and defects to protect warranty rights and support insurance claims. |
| Avoid sanding cupped floors | Restore moisture balance first; sanding a cupped floor permanently thins the boards. |
What I’ve learned from years of watching floors fail
The most common mistake I see property owners make is treating a floor symptom as the problem itself. A buckled plank gets replaced. Three months later, the new plank buckles too. The subfloor moisture was never measured. The repair cost doubles, and the frustration is entirely avoidable.
Moisture testing is not optional. It is the starting point of every credible diagnosis. I have seen floors in Dubai apartments that looked perfect from above but had subfloor moisture readings three times above the safe threshold. The floor was failing from the bottom up, invisibly, until it was not.
The other pattern I keep seeing is rushed installation. Skipping acclimation to meet a move-in deadline is one of the most expensive shortcuts a property manager can take. A floor that buckles two weeks after installation requires full removal, subfloor drying, and reinstallation. The cost of those 48 hours of acclimation time is essentially zero by comparison.
My honest advice: treat your floor as a system, not a surface. The subfloor, the vapor barrier, the adhesive, the material, and the ambient environment all interact. When one element is wrong, the floor tells you. Your job is to listen to what it is saying rather than silence it with a quick fix.
Work with qualified inspectors for anything beyond minor squeaks or surface scratches. A professional inspection report also gives you documentation that manufacturers and insurers actually respect. That piece of paper has saved property owners significant money in disputes I have personally witnessed.
— Qadir
Professional floor restoration services in Dubai
When flooring defects go beyond what a moisture meter and a tube of adhesive can fix, professional restoration is the most cost-effective path forward. NPSM Specialized Cleaning Services LLC provides floor polishing and restoration across Dubai for marble, hardwood, tile, vinyl, terrazzo, and natural stone surfaces. The team uses diamond polishing systems and industry-approved techniques to address worn, scratched, stained, and moisture-damaged floors without full replacement. For property managers and real estate professionals, the company also supports warranty documentation and pre-sale floor assessments. You can review the full range of restoration services available for Dubai homes and commercial properties to find the right solution for your specific floor type and defect.
FAQ
What causes most flooring defects?
Environmental and humidity-related issues cause 90% of flooring failures, making moisture the primary culprit rather than manufacturing defects. Improper installation practices, such as skipping acclimation or omitting vapor barriers, account for most of the remaining cases.
How do I identify flooring defects early?
Walk the floor and look for cupping, gaps, discoloration, and lifted edges at transitions or walls. Early signs of flooring wear, such as slight edge curling or seasonal gaps, indicate moisture imbalance before structural damage sets in.
Can I fix squeaky floors without professional help?
Powdered soap or shims resolve most minor squeaks without demolition or professional repair. If squeaking is widespread or accompanied by soft spots, the subfloor needs professional assessment.
When should I call a professional for flooring problems?
Call a professional when defects are widespread, when moisture readings are elevated, or when mold is suspected under the floor. Professional inspections are also required for construction disputes and insurance claims to establish whether the fault lies with the manufacturer, installer, or environment.
Is it safe to sand a cupped hardwood floor?
Sanding a cupped floor before correcting the moisture imbalance permanently thins the boards and causes the floor to crown when it dries. Restore the correct humidity level first and allow the floor to flatten naturally before any sanding takes place.