
Yes, most scratched wooden floors can be restored without full replacement when the wood underneath is still sound. The right fix depends on how deep the damage runs: a quick diagnosis tells you whether you need a touch-up marker, a maintenance coat known as screen-and-recoat, or a full sand-and-refinish. Replacement only enters the picture when boards are rotten, warped, or too thin to work with safely.
TL;DR:
Most scratched wooden floors can be repaired through touch-up, re-coating, or patching unless the damage involves rotting, warping, or thin wear layers.
Shallow finish scratches are fixable with cleaning, matching a touch-up marker, and applying a clear coat, but deeper gouges require filling and careful staining.
A screen-and-recoat is effective for minor surface wear when the existing finish remains intact and is not contaminated, extending the floor’s lifespan without full sanding.
Full sanding or replacing boards becomes necessary when damage exposes bare wood, in high-traffic wear areas, or when the finish has worn through completely.
Proper inspection by professionals is essential to identify the right repair method and avoid unnecessary costs or damage, especially on engineered floors with limited wear layers.
Table of Contents
-
Objective conditions that require replacement instead of repair
-
How professionals diagnose and what to ask a restoration contractor
How to tell whether a scratch is finish-level or wood-level
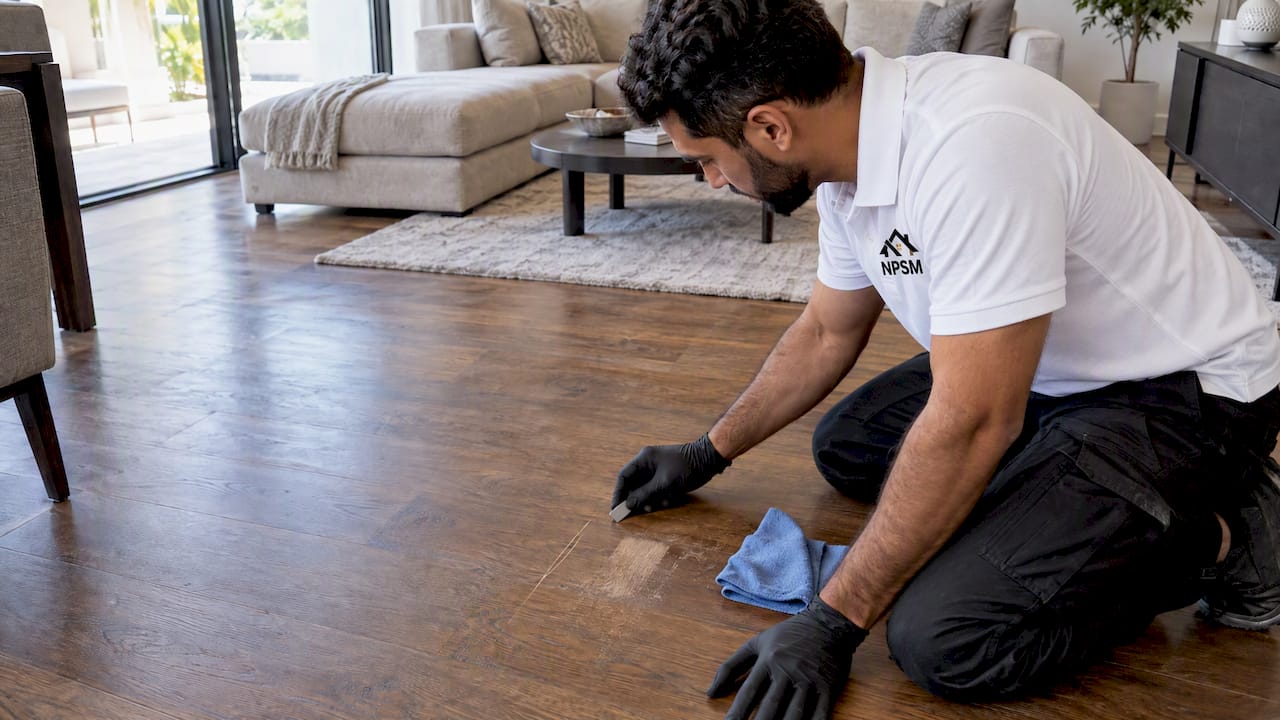
A flashlight held at a low angle across the floor shows the difference instantly: finish scratches catch the light as thin white or silvery lines, while deeper damage shows a change in texture or color. The fingernail test backs this up. Drag a nail across the mark and if it does not catch, the damage is likely limited to the finish layer. If the nail catches on raw fiber or the scratch looks brown rather than white, the wood itself has been cut.
-
Finish-only scratches look silvery or white and the fingernail glides across smoothly.
-
Wood-level scratches show exposed brown fiber and snag a fingernail at the edge.
-
Clouding, beading water, or a dull haze across wide areas points to finish wear rather than a single scratch.
-
Cupping, loose boards, or soft spots near a scratch suggest water damage, which changes the repair path entirely.
Safe DIY steps for shallow finish scratches
Shallow finish scratches are the easiest category to fix, and most homeowners can handle them in an afternoon. Start by cleaning the area well, since dust and old polish residue will stop any new product from bonding properly. Always test a new product on a hidden spot first, such as inside a closet, because stain tones and sheens vary between brands and floor finishes.
-
Clean the scratched area with a wood-safe cleaner and let it dry fully.
-
Match the tone with a touch-up marker or wax stick designed for wood floors.
-
Apply a thin color layer, following the wood grain rather than crossing it.
-
Add a small dot of compatible clear coat if the finish layer was broken.
-
Let the repair cure fully before walking on it or placing rugs over it.
Pro Tip: Wax-based fillers can block future finish coats from bonding, so skip wax on any floor you might want to screen-and-recoat later.
Fixing deeper scratches and gouges without replacing boards
Gouges that reach into the wood need a different approach than surface scratches, but they still rarely require pulling up boards. A pre-mixed wood filler works for small, shallow gouges, while a two-part epoxy filler holds up better in gaps with any structural give, such as around a doorway threshold.
-
Clean the gouge thoroughly, removing any loose splinters or debris.
-
Fill slightly above the surface, since most fillers shrink a little as they cure.
-
Sand the patch flush once dry, working carefully to avoid scratching surrounding wood.
-
Apply stain to match the surrounding floor, then feather a thin finish coat over the edges.
A patch like this can look slightly visible up close, especially under raking light, but it typically disappears once you are standing and viewing the floor at normal distance.
What a screen-and-recoat does and when it works
A screen-and-recoat, sometimes called a maintenance coat, abrades the existing finish just enough for a new coat to bond, without cutting into the wood itself. New finish layers fill in the web of fine scratches that build up over years of foot traffic, restoring shine without the dust and disruption of full sanding.
-
Works best when the existing finish is intact and free of wax or oil contamination.
-
Not suitable when there are deep gouges, exposed bare wood, or widespread cupping.
-
Faster and less expensive than sanding, since it skips the removal of multiple finish layers.
-
Carries some adhesion risk on prefinished factory floors with a hard aluminum oxide topcoat.
A screen-and-recoat can typically be repeated multiple times on a sound finish foundation before a full sand becomes necessary, which stretches the life of the original flooring considerably before any heavier work is needed.
When sanding and full refinishing becomes necessary
Full sanding is the right call when bare wood is exposed across a wide area, when scratches are too deep for filler to hide, or when the finish has worn through in traffic lanes and no longer matches the rest of the room. It is also the answer when you want a different stain color, since sanding removes the old color entirely rather than working around it.
-
Bare wood exposed in multiple spots, not just an isolated scratch or two.
-
Visible wear patterns in high-traffic lanes that recoating cannot blend away.
-
A desire to change stain color, which recoating cannot achieve.
-
Engineered floors need a wear-layer check first, since thickness rather than the “engineered” label determines whether sanding is safe.
Professionals typically check engineered boards at a floor register or door transition, measuring the veneer there to calculate how many sanding cycles remain. A solid wood floor can usually be sanded several times over its life; an engineered floor with a thin wear layer may only tolerate one light sanding, or none at all.
Objective conditions that require replacement instead of repair
Some damage sits beyond what sanding or recoating can fix, and pushing ahead anyway wastes money. Rot, delamination, active moisture intrusion, and severe warping all fall into this category, since no surface treatment addresses a structural problem underneath.
-
Boards that are rotten, delaminating, or affected by an ongoing moisture source.
-
Wear layers too thin to sand safely, common in budget engineered products.
-
Factory finishes so hard or contaminated that recoats will not adhere reliably.
-
Severe warping or loose board movement that a patch cannot stabilize.
In many cases, only the damaged boards need replacing rather than the whole floor, which keeps costs down while still resolving the underlying issue.
How to protect restored floors and prevent future scratches
Once a floor is repaired or refinished, the biggest threat is grit being dragged across the surface during routine cleaning. Sweep or dust-mop before any wet cleaning, since a damp mop alone just grinds dirt into the finish instead of lifting it away.
-
Use felt pads under furniture legs and check them periodically for wear.
-
Place doormats at entry points to catch grit before it reaches the floor.
-
Trim pet nails regularly and keep high-heeled or cleated shoes off the floor.
-
Avoid wax or oil-based products on factory-finished floors, since they can block future maintenance coats from bonding.
Pro Tip: Schedule a maintenance coat every few years rather than waiting for scratches to accumulate; it is far cheaper than a full sand later.
How professionals diagnose and what to ask a restoration contractor
A professional inspection goes beyond a visual check. Technicians typically test adhesion on a small patch before committing to a full screen-and-recoat, check for wax or oil contamination, measure wear-layer thickness on engineered boards at a transition point, and assess moisture levels if cupping or staining is present.
-
Ask whether the contractor has worked on your specific floor type, solid or engineered.
-
Request examples of similar jobs they have completed.
-
Ask what dust-control method they use during sanding.
-
Confirm what warranty or guarantee covers the finished work.
Services like wooden floor sanding and polishing, screen-and-recoat, and spot repair and blending each address a different stage of wear, and a proper site visit should identify which one your floor actually needs before any quote is finalized.
Preserve the wood first, sand only when you must
The instinct to sand a floor the moment it looks tired usually costs more than it needs to, both in money and in the finite number of sandings a floor has left. Recoating and careful patching solve most scratch problems while keeping the original wood intact. Sanding earns its place when the finish is genuinely gone or the color needs to change, not as a default first move. When the diagnosis is unclear, a professional assessment before any power tool touches the floor is worth the short wait.
— Qadir
Get a professional assessment and a clear quote
Diagnosing a scratch yourself only goes so far, and a wrong guess can mean paying for a full sand when a maintenance coat would have done the job. A professional inspection can include an on-site floor check to assess the finish and wood condition, and recommend the least disruptive option that effectively solves the problem.
-
Wooden floor sanding and polishing for floors that need a full refinish.
-
Screen-and-recoat for floors with an intact finish and widespread fine scratching.
-
Spot repair and blending for isolated gouges or high-traffic wear lines.
A site visit typically covers a finish check, a wear-layer measurement for engineered boards, and a written quote before any work begins. Readers researching deeper fixes can also look at resurfacing options for wooden floors or check available wooden floor polishing services to request an inspection.
Sources worth checking for further reading
Guidance on recoating thresholds and wear-layer rules for engineered floors comes from the National Wood Flooring Association, an industry body that publishes refinishing standards. Step-by-step spot-repair techniques, including the fingernail test for distinguishing finish from wood damage, are covered in consumer flooring guides such as the DIY scratch repair guide from AO Saves Wood Floors. For readers weighing rug placement to protect a freshly restored floor, see this guide to safe rugs on hardwood.

FAQ
Can scratched wood floors be repaired?
Yes, most scratched wood floors can be repaired without replacement, since the vast majority of scratches sit only in the finish layer rather than the wood itself. A quick fingernail and flashlight check tells you whether a touch-up, a maintenance coat, or a deeper repair is the right fit.
How can I fix scratches on my wood floor without sanding it?
Shallow finish scratches respond well to touch-up markers, wax sticks, or oil-based restore products applied directly over the mark. For widespread fine scratching with an intact finish, a screen-and-recoat refreshes the surface without sanding down to bare wood.
Can hand-scraped wood floors be refinished?
Hand-scraped floors can often be refinished, but the texture and depth of the scrape affects how evenly a new finish sits in the grooves. A professional should check the existing finish and wood condition first, since the same wear-layer rules apply to engineered hand-scraped products.
Is it possible to restore wooden floors without sanding them?
Yes, when the existing finish is sound and damage is limited to fine surface scratches, a screen-and-recoat restores shine and evens out minor wear without sanding to bare wood. This maintenance coat can usually be repeated three to four times before a full sand becomes necessary.