
Most water-damaged wood floors can be saved when the water is clean, the exposure is short, and the subfloor stays sound. The three factors that decide the outcome are the water category, how many hours the floor stayed wet, and whether the subfloor swelled or delaminated underneath. Stop the source, document the damage with photos, and start drying immediately. A professional inspection with moisture mapping is the only reliable way to confirm whether the floor is salvageable or headed for replacement.
TL;DR:
Floors affected by clean water with short exposure and a sound subfloor can often be salvaged, but contaminated water or delayed intervention usually require removal.
Accurate moisture readings and subfloor inspections are critical in assessing whether the flooring can be dried and refinished or must be replaced.
Proper drying involves extraction, dehumidification, controlled airflow, and monitoring, which can take several days to weeks depending on the damage extent.
Persistent odors, delamination, buckling, or subfloor deterioration after drying generally indicate that replacement is the best solution.
Hiring a contractor equipped with moisture meters, drying mats, and thorough documentation ensures proper restoration and supports insurance claims.
Table of Contents
-
Quick assessment checklist: what to look for and document now
-
First hours: prioritized steps to improve the chance of saving the floor
-
How to choose a restoration contractor and the right deliverables to demand
-
Practitioner view: how a documented restoration typically runs
-
Preventive measures to protect wood floors from year-round humidity swings
-
What most people get wrong about saving a water-damaged floor
Quick assessment checklist: what to look for and document now
Before calling anyone, walk the affected area and note what you see. This record shapes both the repair decision and any insurance claim that follows.
-
Visual signs: cupping (edges higher than centers), buckling (boards lifting off the subfloor), dark discoloration, or a cloudy, peeling finish.
-
Smell and contamination cues: a musty odor suggests mold has already started; any smell of sewage or chemical runoff means the water is contaminated.
-
Safety first: turn off electricity to the area if water reached outlets or baseboards, and avoid walking on badly buckled boards.
-
Documentation: photograph each affected board with a timestamp, and note when the water appeared and what caused it.
Call a restoration professional immediately if the water came from a toilet, appliance backup, or outside flooding, or if the floor has been wet for more than a day.
Pro Tip: Photograph a coin or ruler next to damaged boards so the scale of cupping or buckling is clear later, especially for insurance review.
First hours: prioritized steps to improve the chance of saving the floor
What you do in the first 24 to 48 hours often determines whether sanding and refinishing is enough, or whether boards need to come out. Mold can begin to develop within 24 to 72 hours of sustained moisture, so speed matters more than perfection.
-
Stop the water source and shut off electricity to the area if there’s any risk of contact with standing water.
-
Remove standing water with a wet/dry vacuum or a pump, working from the wettest point outward.
-
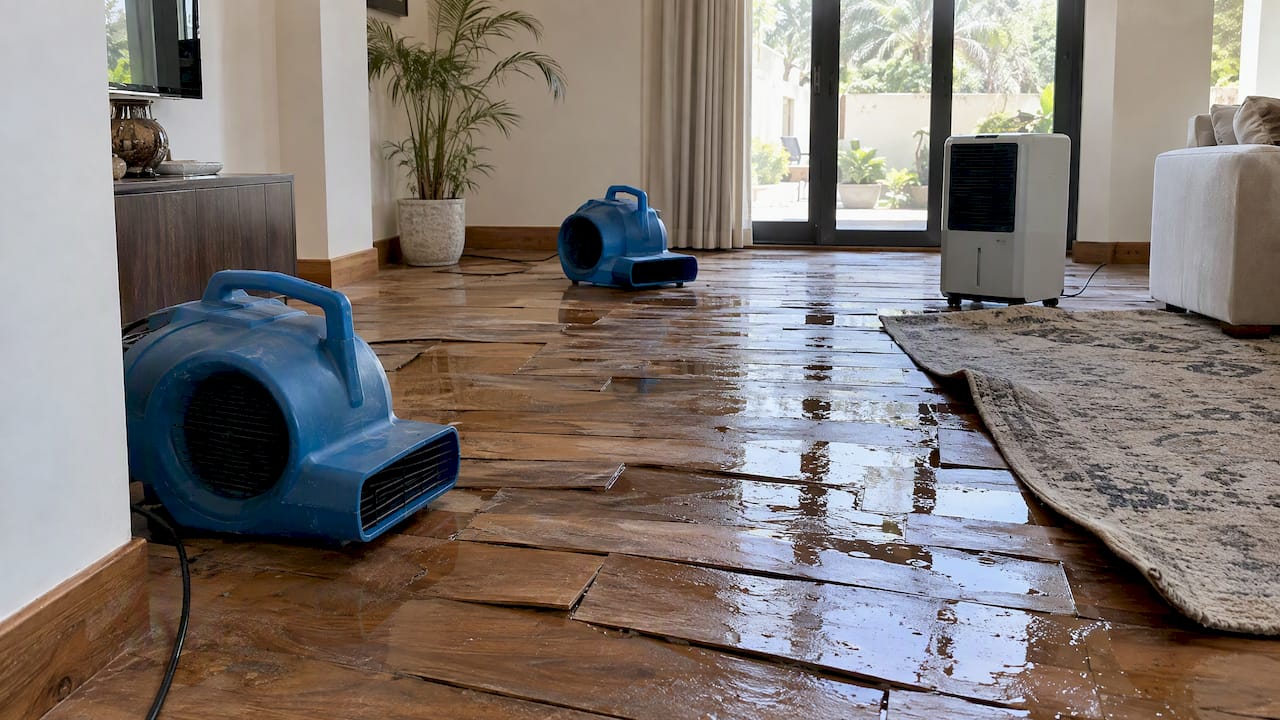
Open windows, run fans, and bring in a dehumidifier to start pulling moisture out of the air and the wood.
-
Take a baseline moisture reading if you have access to a meter, and photograph the area again once water is removed.
-
Avoid sanding, refinishing, or sealing anything until a professional confirms the wood has dried to a safe level.
A controlled drying program should show steadily declining moisture readings over time; when readings stall or plateau despite documented drying effort, it’s usually a sign the wood needs to come up.
How professionals determine salvageability
A visual check tells you part of the story. Moisture meters and subfloor inspection tell you the rest, and that’s what separates a guess from a defensible decision.
-
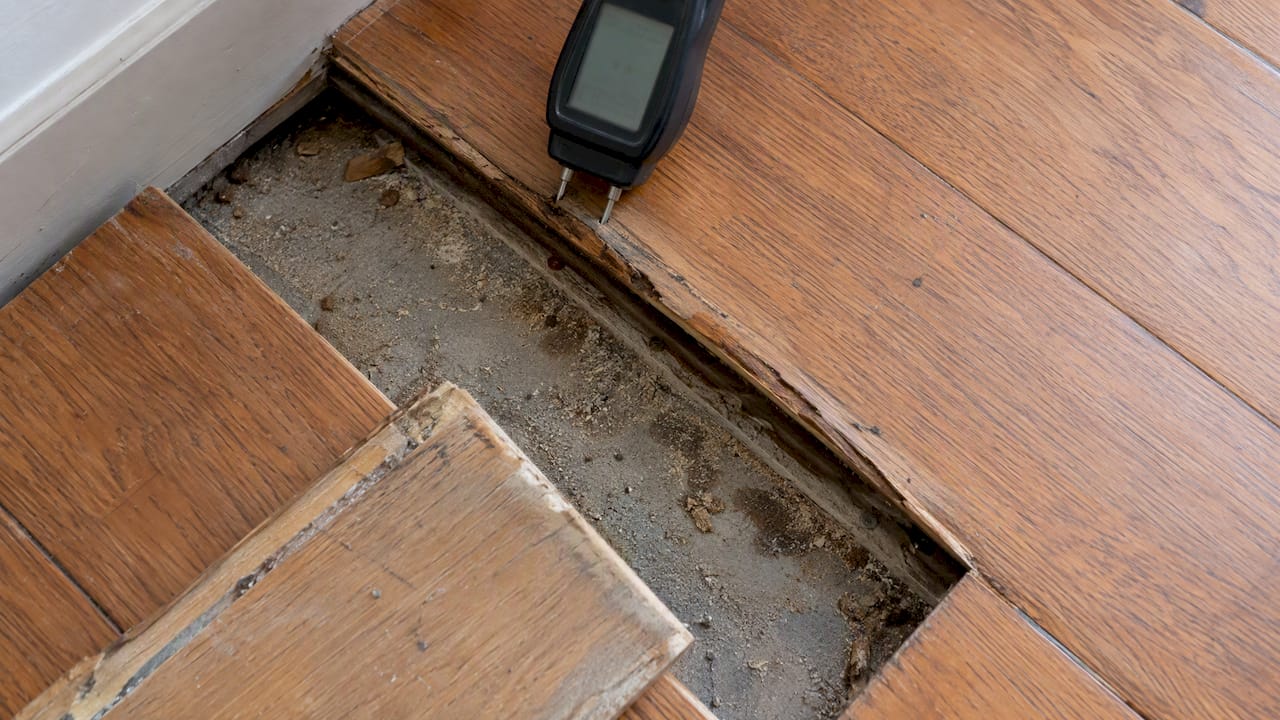
Moisture meters: pin or pinless meters compare the wet area’s reading against a dry baseline elsewhere in the room, since wood naturally holds some moisture even when healthy.
-
Moisture mapping and thermal imaging: these tools trace where water traveled, often revealing migration under cabinets, baseboards, or into the subfloor well beyond the visible stain.
-
Subfloor inspection: swelling, soft spots, rot, or adhesive failure under the planks are signs that force removal regardless of how the surface looks.
-
Water category: clean water from a supply line behaves very differently from grey water (appliance discharge) or black water (sewage or flood water), and the category changes both the cleaning protocol and the disposal approach.
Standing water that has sat for more than a couple of days, visible buckling, subfloor swelling, or mold growth are strong signs that replacement is likely, while cupping alone often reverses once the wood dries out fully.
Clean water with a short exposure window and a dry, intact subfloor is the best-case scenario for restoration. Contaminated water or a compromised subfloor pushes the decision toward removal almost every time.
Drying and restoration methods that can save floors
Once the assessment confirms the floor is a candidate for restoration, the drying phase does the real work. Extraction removes bulk water first, then dehumidification and directed airflow pull residual moisture out of the wood fibers over days, not hours.
-
Extraction and containment: wet/dry vacuums and pumps clear standing water, while plastic sheeting can isolate the drying zone from unaffected rooms.
-
Dehumidification and airflow: commercial dehumidifiers paired with air movers keep humidity low enough for the wood to release moisture instead of reabsorbing it.
-
Specialty floor-drying mats: these create a vacuum or airflow chamber directly on top of affected boards, pulling moisture from underneath without removing the flooring in many clean-water cases.
-
Monitoring: daily moisture logs and readings track progress, and acceptance usually requires the wood to reach a level close to its pre-damage baseline along with stable humidity and temperature in the room.
Pro Tip: Ask whoever handles the drying for a printed or digital log of daily readings. That record is what insurers and future buyers will want to see.
Once dry, solid wood floors usually respond well to sanding and refinishing, restoring the surface even after cupping or minor staining. Engineered wood has a thinner wear layer, so sanding options are limited, and warped boards may need partial replacement rather than refinishing. When odor persists after drying, when boards have delaminated, or when adhesive has failed under engineered planks, removal is the safer and often only workable path.
When replacement is necessary and what to expect
Some damage simply can’t be reversed, no matter how thorough the drying. Recognizing the signs early saves time and prevents money spent trying to save a floor that was never going to make it.
-
Persistent musty odor after a full drying cycle, which usually signals mold growth inside the wood or subfloor.
-
Delaminated engineered planks, where the layers separate and can’t be reglued or refinished.
-
Buckled boards that have permanently warped and no longer sit flat against the subfloor.
-
Subfloor rot or swelling, which requires removal of the flooring above it regardless of the flooring’s own condition.
Replacement typically follows a set sequence: removing damaged boards, remediating or replacing the subfloor, letting new material acclimate to the room, installing it, then sanding and finishing to match the rest of the floor. Cost depends heavily on the material (solid wood costs more to replace than engineered), how much cabinetry or trim has to be removed for access, how much subfloor work is needed, and the finish chosen. Keep every moisture reading, photo, and invoice from the drying attempt, since insurers and contractors both rely on that record to support a replacement decision.
How to choose a restoration contractor and the right deliverables to demand
The equipment and paperwork a contractor uses tell you more about their competence than their sales pitch does.
-
Verify their equipment: ask whether they use commercial dehumidifiers, moisture meters, and specialty drying mats, not just fans and a wet vacuum.
-
Demand documentation: pre- and post-drying moisture readings, dated drying logs, photographs, and a written scope of work for any subfloor repairs.
-
Watch for red flags: a contractor who recommends immediate removal without testing, skips moisture readings entirely, or pressures you to sign for replacement before drying even begins.
-
Get it in writing: a final report with acceptance criteria protects you if a dispute arises later with an insurer or a future buyer.
| Deliverable | Why it matters |
|---|---|
| Initial moisture reading | Establishes how wet the floor and subfloor really are before work starts |
| Daily drying log | Shows whether moisture is falling or has stalled |
| Final moisture reading | Confirms the floor reached a safe level before refinishing begins |
| Written scope of repair | Defines what’s included, especially subfloor work |
Practitioner view: how a documented restoration typically runs
A clean-water incident under a dishwasher, caught within a day, usually follows a predictable path: inspection and moisture mapping to trace how far the water traveled, containment and controlled drying with mats and dehumidifiers, then sanding and resealing once readings confirm the wood is dry. If a few boards near the leak buckled beyond recovery, only those get replaced rather than the whole floor.
-
Local HVAC settings and temperature swings between indoor cooling and outdoor heat affect how fast wood gives up moisture, so drying times aren’t identical from one property to the next.
-
A floor that looks dry on the surface can still read wet at the core, which is why readings matter more than appearance.
Preventive measures to protect wood floors from year-round humidity swings
Wood floors face steady pressure from indoor air conditioning running against warm, humid air outside, and that contrast drives moisture in and out of the wood more than in milder climates. A few habits reduce the risk of the kind of damage this guide covers.
-
Wipe up spills and condensation around windows, entry doors, and AC units promptly, since standing moisture on the surface is what starts cupping.
-
Keep indoor humidity in a stable range with a dehumidifier or a well-maintained AC system rather than letting it swing widely between seasons.
-
Check under sinks, behind washing machines, and near water heaters every few months for slow leaks that go unnoticed until boards start cupping.
-
Use rugs with breathable, non-trapping backing near entrances rather than rubber-backed mats that hold moisture against the finish.
-
Reseal or refinish a worn floor before the protective finish fails completely, since an intact finish is the floor’s first defense against everyday moisture.
None of these steps make a wood floor waterproof, but they buy time. A floor with an intact finish and a dry subfloor underneath it can shed an accidental spill or short leak with no lasting damage, while a floor with a worn finish and existing moisture problems has almost no buffer left.
Long-term effects of water damage on wood floors
Damage that isn’t fully dried out doesn’t stay contained to the surface. Mold can take hold within a few days of sustained moisture, and once it’s established inside the wood or the subfloor beneath it, surface cleaning won’t remove it. The smell that lingers after a supposedly finished drying job is usually a sign that moisture is still trapped somewhere out of sight.
Left long enough, trapped moisture also weakens the wood’s structure. Boards that stayed wet for an extended period can develop soft spots, and the subfloor underneath can swell, rot, or separate from the joists it’s fastened to. At that point the problem is no longer cosmetic. A floor that looks fine after a quick sanding can still have a compromised subfloor underneath, which is why moisture readings at the subfloor level matter as much as readings on the surface boards.
The other long-term cost is to the finish and the wood’s dimensional stability. Repeated wetting and drying cycles, even mild ones, cause wood to expand and contract more than it’s built for, which shows up later as gaps between boards, a finish that no longer bonds evenly, or boards that never quite sit flat again even after refinishing. This is part of why catching and drying a leak fast the first time matters more than trying to fix the cosmetic result months later.
How long restoration actually takes, start to finish
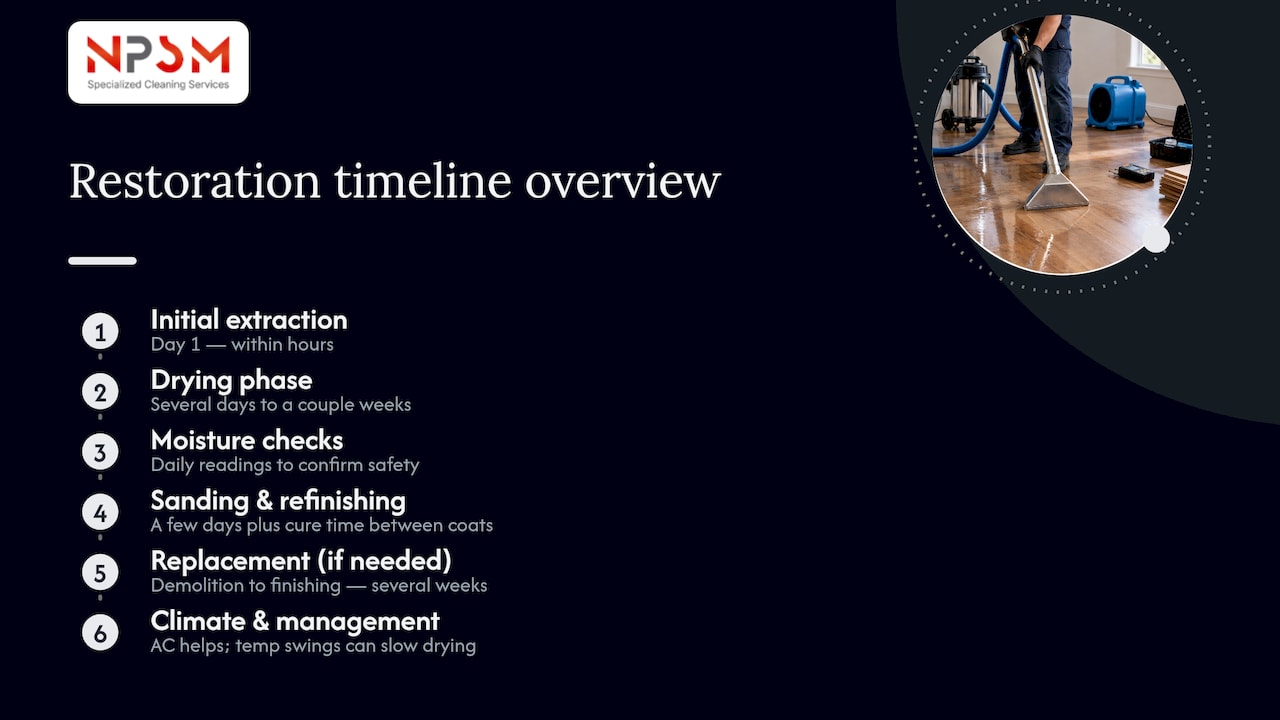
Timelines vary by damage severity, but a rough sequence holds in most cases. Initial extraction and setup of drying equipment happens on day one, ideally within hours of discovering the leak. The drying phase itself, using dehumidifiers, air movers, and sometimes specialty drying mats, typically runs for several days to a couple of weeks depending on how deep the moisture penetrated and how the readings progress.
Once moisture readings confirm the wood and subfloor have reached a safe level, sanding and refinishing a solid wood floor usually takes a few more days, including time for stain and finish coats to cure between passes. If replacement is needed instead, add time for demolition, any subfloor remediation, acclimation of new material to the room’s humidity, installation, and finishing, which can extend the overall process to several weeks depending on the scope.
Dubai’s climate can work for or against the timeline. Consistent air conditioning helps control humidity during drying, but frequent temperature swings between cooled interiors and hot, humid air infiltrating through doors and windows can slow the wood’s release of moisture if not managed carefully. A contractor who checks readings daily rather than guessing by the calendar is the difference between a floor that’s actually ready for refinishing and one that only looks dry.
What most people get wrong about saving a water-damaged floor
The biggest mistake isn’t waiting too long to call someone. It’s assuming that a floor looking dry after a few days of fans and open windows means it’s actually dry. Surface dryness and core dryness are different things, and refinishing too early is what turns a salvageable floor into a replacement job, since sealing over trapped moisture locks in the conditions mold needs.
The second mistake is treating every water event the same. A clean supply line leak caught within hours and a sewage backup that sat for two days call for entirely different responses, yet both often get the same generic advice to just dry it out and see. Water category should drive the urgency and the protocol, not just the visible mess.
If there’s one thing worth prioritizing, it’s getting an actual moisture reading before deciding anything, whether that means buying a basic meter or calling someone who has one. A number beats a guess every time, and it’s the one piece of information that turns “maybe it’s fine” into an actual decision.
— Qadir
Get an inspection and moisture report for your floor
FloorPolishing.ae, operated by NPSM Specialized Cleaning Services LLC, inspects water-damaged wood floors with moisture readings and mapping, then handles the drying, sanding, refinishing, or partial plank replacement the results call for.
-
Moisture testing and drying logs that give you a documented basis for repair decisions or an insurance claim.
-
Sanding and refinishing for floors that dry successfully, or targeted plank replacement where boards didn’t make it.
-
A wooden floor restoration service built around Dubai properties, from villas to commercial spaces.
Request an inspection through the floor polishing and restoration services page to get moisture readings and a clear recommendation before you spend money on the wrong fix.
Selected evidence and guidance sources
-
A restoration industry resource on salvage versus replace criteria supports the decision framework used throughout this guide, including cupping versus buckling and subfloor checks.
-
A professional restoration guide on repairing water-damaged wood supports the drying-before-refinishing sequence and the 24 to 72 hour mold development window.
-
A hardwood floor repair resource supports the 48-hour threshold for standing water and the distinction between reversible cupping and irreversible buckling or delamination.
-
A restoration blog on water-damaged drywall supports the extraction and dehumidification background used in the drying section.
FAQ
Can you fix water damage on a wood floor?
Often, yes, especially when the water was clean, the floor dried within a day or two, and the subfloor stayed sound. Whether it’s fixable comes down to moisture readings and a subfloor check rather than how the surface looks after a few days.
How can I repair a water-damaged wooden floor?
Start by stopping the water source, extracting standing water, and running fans and a dehumidifier to bring moisture down. Once readings confirm the wood and subfloor are dry, solid wood floors can usually be sanded and refinished, while badly buckled or delaminated boards need replacing instead.
How much does it cost to repair a water-damaged hardwood floor?
Cost depends on the extent of drying needed, whether any boards or subfloor sections require replacement, and the finish used, so there’s no single figure that applies everywhere. Floor Polishing & Restoration services are priced within a range per square foot for polishing work; repair and replacement scope pricing is provided after an inspection.
How much does it cost to restore a parquet floor?
Parquet restoration pricing depends on the pattern’s complexity, how many blocks need replacing, and whether the subfloor underneath needs work, so it’s assessed floor by floor rather than quoted as a flat rate. Parquet floor restoration pricing is available on request after an inspection confirms the scope of work.