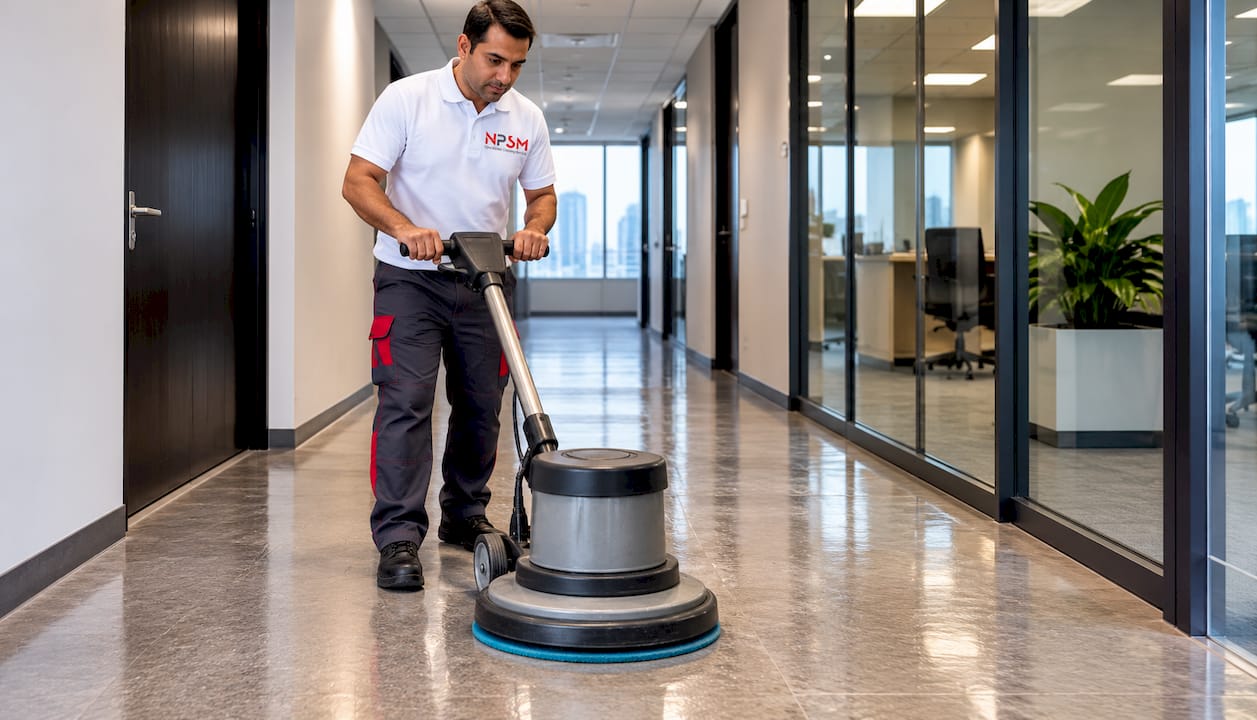

Start by deep-cleaning to remove any residue film, then apply a vinyl-safe restorer or arrange low-speed buffing if the wear layer remains intact. Skip abrasive pads, ammonia, and dry-buffing, since all three can wear through the protective layer and force plank replacement. A pH-neutral cleaner and a low-speed single-disc buffer running around 175 rpm handle most commercial jobs safely, and a professional crew like the one at FloorPolishing.ae can step in when the wear layer is already compromised.
TL;DR:
Check installation records or manufacturer specifications for wear layer thickness and vinyl type, since thin residential layers tolerate less buffing and chemical exposure.
Clean in small sections, rinse with fresh water, and dry thoroughly; avoid flooding plank seams because trapped moisture can lift edges over time.
Use a tennis ball for black scuffs, rubbing alcohol for ink or grease after a spot test, and baking soda paste for food stains.
A quiet back office may need a recoat nearly once a year, while busy lobbies may need one every few months; strip buildup before recoating.
Dust mop busy walkways daily, clean spills promptly, and damp mop weekly with a resilient floor cleaner, rinsing afterward when you use detergent.
Table of Contents
-
Practical maintenance schedule to preserve the restored finish
-
Assessing vinyl floor condition before you start restoration
Immediate checklist for staff before a deep restore
Before scheduling a full restoration, a facilities team can knock out a short prep list in a short time. This triage step tells you whether the floor needs a simple clean, a restorer coat, buffing, or a professional visit.
-
Dry-sweep or vacuum without a beater bar to clear grit that scratches the wear layer during mopping.
-
Dry-mop first, then test a pH-neutral cleaner or a diluted white vinegar mix on a hidden patch, only if the manufacturer allows vinegar.
-
Photograph and mark scuffed or stained zones so the crew can target them instead of treating the whole floor the same way.
-
Decide on next steps: a standard deep clean, a restorer application, machine buffing, or a call to a restoration service, based on how the test patch responds.
Pro Tip: Keep a simple log of which zones failed the test patch. It saves time when you brief a cleaning crew or a restoration contractor later.
Deep-clean process to remove residue and film safely
Most dullness on commercial vinyl comes from layered cleaning residue rather than actual damage. Removing that film with the right tools and sequence often brings back noticeable shine without touching the floor’s finish.
Stick to soft tools: a soft-bristle broom, a vacuum with the beater bar switched off, a microfiber flat mop, and non-abrasive scrub pads or soft nylon brushes for stubborn spots. For cleaner choice, a commercial pH-neutral product made for resilient flooring is the safest default. Diluted white vinegar works as a backup when the flooring manufacturer permits it. Ammonia, bleach, and mop-and-shine products that leave a waxy film are the main things to avoid since they dull the surface further over time.
The sequence that gets consistent results:
-
Dry sweep or vacuum the whole area to remove loose grit.
-
Apply the cleaner in small, manageable sections rather than flooding the whole floor.
-
Agitate gently with a soft brush or a non-abrasive pad where buildup is heavier.
-
Rinse immediately with fresh water and a clean mop, swapping the rinse water often so you are not redepositing dirt.
-
Dry the floor thoroughly, then hand-buff with a microfiber cloth to bring up the shine.
A few cautions matter more on commercial vinyl plank than on sheet goods. Avoid soaking the seams between planks, since trapped moisture can lift edges over time. Steam mops are a poor match for most vinyl plank installations because heat and moisture can compromise the wear layer and adhesive underneath. Always test any new cleaner in an out-of-the-way spot before using it across the whole floor.
Pro Tip: Change your rinse water regularly. Reusing dirty rinse water just redeposits the film you are trying to remove.
Safe fixes for scuffs, stains, and light scratches
Targeted spot treatment handles most of the marks that make a floor look dull even after a deep clean.
-
Black scuffs usually come off with gentle rubbing from a clean tennis ball or a microfiber pad.
-
Ink and grease respond well to rubbing alcohol or odorless mineral spirits on a soft cloth. Test first, then rinse the area afterward.
-
Food and drink stains lift with a baking soda paste, applied and rubbed gently before rinsing, or a vinyl-safe spot cleaner.
-
Light scratches often fade with a small amount of mineral or jojoba oil buffed in lightly, though deeper gouges need plank repair or replacement.
-
Skip sandpaper, steel wool, and acetone. All three are too aggressive for a vinyl wear layer and will leave permanent dull patches.
Choosing and applying a vinyl floor restorer or finish
A restorer makes sense once the floor has been fully cleaned and dullness still shows but the wear layer itself is intact. According to Flooring 101 CA, acrylic-based restorers can often bring shine back when the wear layer remains intact, which lines up with how most commercial products in this category are formulated.
-
Pick an acrylic-based commercial vinyl restorer designed for resilient or commercial floors, not a residential wax product.
-
Apply thin, even coats with a clean applicator rather than one heavy pass.
-
Allow each coat to dry completely between coats, and apply thin coats for even coverage.
-
Treat the restorer as a temporary protective layer rather than a permanent fix.
Reapplication timing depends heavily on foot traffic. A quiet back office might go close to a year between coats, while a busy lobby or retail floor may need a fresh application every few months. When old restorer layers start building up and dulling the surface themselves, the floor needs a full strip before the next coat goes on.
Safe buffing and polishing limits for commercial vinyl
Mechanical buffing can bring back shine quickly on large commercial floors, but the margin for error is narrow.
-
A low-speed single-disc buffer running around 175 rpm paired with a non-abrasive red pad works well on smooth commercial vinyl, according to guidance cited by Marriott LATAM for vinyl maintenance.
-
Auto-scrubbers fitted with soft brushes are a better match for embossed or textured vinyl surfaces.
-
Dry buffing, high-speed burnishing, and abrasive pads all risk cutting through the wear layer rather than polishing it.
-
Check the flooring manufacturer’s instructions before running any machine on the floor, and always test a small patch first.
For large commercial areas or floors that need repair work across many square meters, a professional machine service reduces the risk of uneven results or accidental damage.
Pro Tip: Run your test patch in a low-visibility corner first. A buffer that looks fine on a showroom floor can still leave swirl marks on certain vinyl textures.
Practical maintenance schedule to preserve the restored finish
A restored floor holds its shine far longer with a simple, consistent routine instead of occasional deep cleans.
-
Daily: Dust-mop main walkways and clean up spills as soon as they happen.
-
Weekly: Damp-mop with a pH-neutral cleaner, rinsing afterward if you used a detergent-based product.
-
Monthly or quarterly: Run a deeper rinse and inspection pass, and reapply restorer if traffic has worn it down.
-
Entrances and furniture: Place heavy-duty doormats at every entry point, clean those mats regularly so they do not just drag grit indoors, and fit felt pads under chairs and furniture legs.
-
Recordkeeping: Log cleaning dates and restorer applications so you can plan the next recoat before dullness sets back in.
For more applied tips on keeping shine consistent between deep cleans, our vinyl floor care guide covers day-to-day habits that extend the life of a restoration.
When a professional restoration is the better choice
Call in a professional crew once wear layer erosion, widespread deep scratching, or heavy staining shows up, or when a large area needs machine polishing without shutting the business down for days. Professional teams bring commercial-grade equipment and trained operators, which lowers the risk of the wear-layer damage that an untrained buffer pass can cause.
A typical service visit starts with an on-site inspection, followed by a written quote and a recommended scope, whether that is a deep clean, a restorer coat, or full buffing. The timeline is usually planned around your operating hours to keep disruption to a minimum.
Assessing vinyl floor condition before you start restoration
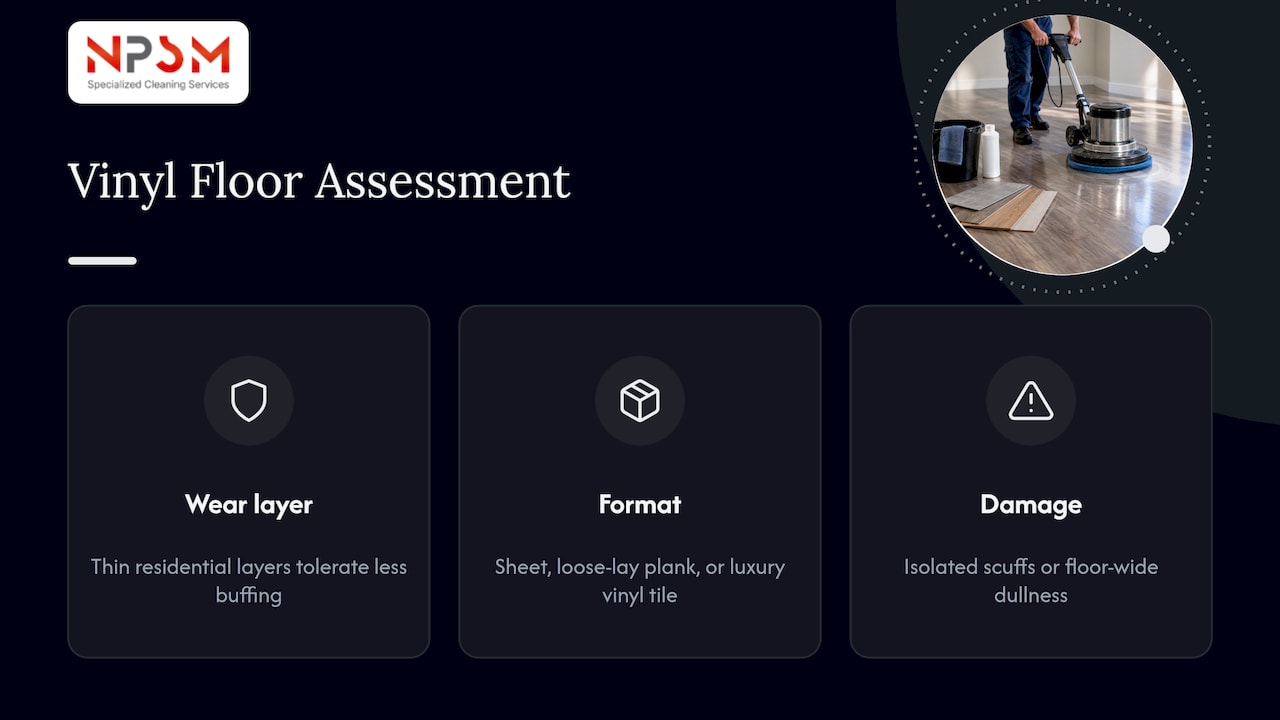
Before any cleaning or buffing begins, it helps to know what you are actually working with. Vinyl flooring comes in sheet, tile, and plank formats, each with a wear layer of different thickness. Thin residential-grade wear layers tolerate far less buffing or chemical exposure than thicker commercial-grade layers, so identifying which type is installed changes how aggressive you can safely be.
A quick inspection should answer three questions. First, how thick is the wear layer, and is that information available from the original installation records or manufacturer specification sheet? Second, what type of vinyl is it: glued-down sheet vinyl, loose-lay planks, or a luxury vinyl tile with embossed texture? Third, how extensive is the damage: isolated scuffs in a few zones, or dullness and scratching spread across the whole floor?
Walking the floor and separating problem areas by severity before you start means you will not spend restorer or buffing time on sections that only needed a basic deep clean. It also flags sections where the wear layer has already worn through, which is a sign the floor needs plank repair or professional attention rather than a surface product. Skipping this step is one of the most common reasons a restoration attempt falls short on a commercial floor.
Safety and environmental considerations during restoration
Restoration work on a commercial scale involves chemicals and equipment that need a bit more care than a quick home cleaning job. Good ventilation matters any time you are using cleaning solutions, restorers, or stripping agents indoors, especially in enclosed office areas with limited airflow. Open windows where possible or run portable fans to keep fumes from building up, particularly during restorer application and drying.
Basic protective gear, gloves and eye protection at minimum, protects staff handling concentrated cleaners, strippers, or mineral spirits used for spot treatment. Buffing machines also kick up dust and fine particulate, so a dust mask is a reasonable precaution during mechanical work on a large floor.
Disposal of used cleaning solutions, old restorer residue, and rinse water should follow your building’s standard wastewater guidelines rather than going straight down a regular drain in bulk, particularly when stripping agents are involved. Keeping a record of which products were used also helps if any surface reacts unexpectedly partway through the job, since you will know exactly what combination of chemicals touched the floor.
Post-restoration care in commercial settings
Once a commercial vinyl floor has been restored, the care routine that follows determines how long that shine actually lasts under daily foot traffic.
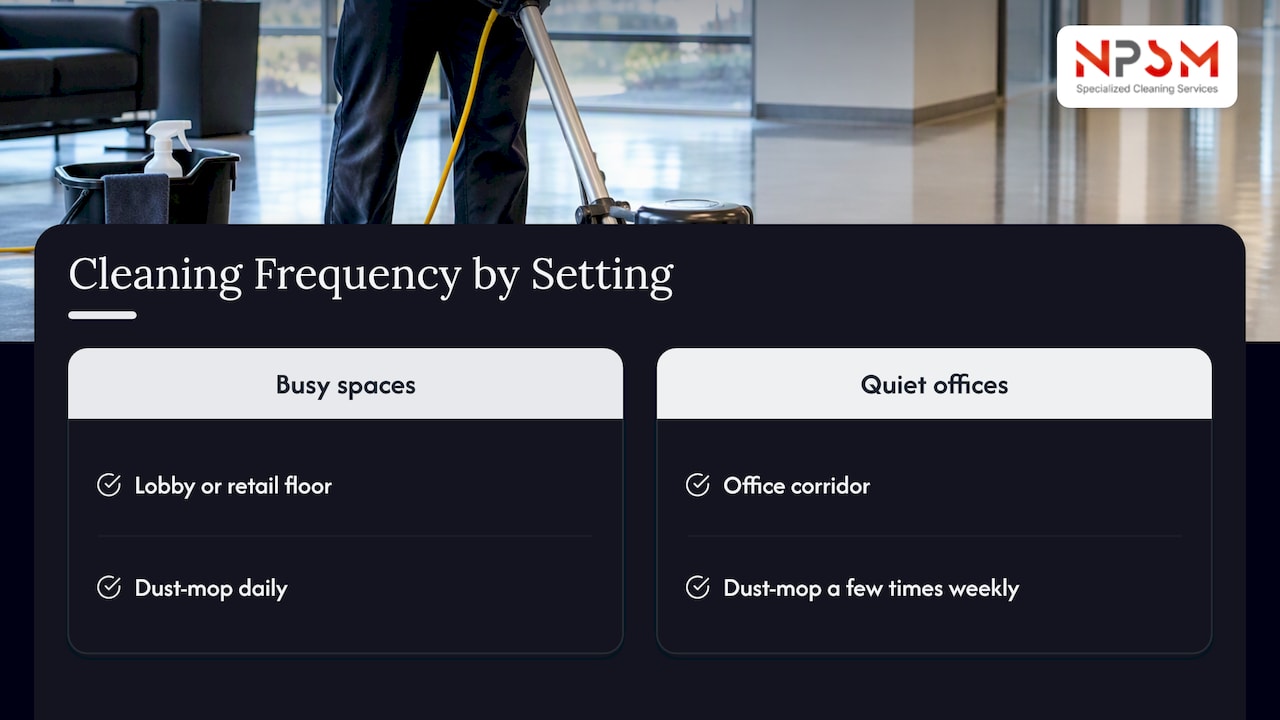
Set a cleaning schedule that matches how busy the space is, using app-based post renovation maintenance tools for first-time builders to keep on top of tasks efficiently. Post-renovation maintenance planning and app-based tools can support this effort. A lobby or retail floor with heavy foot traffic needs daily dust-mopping and immediate spill cleanup, while a quieter office corridor might only need that level of attention a few times a week. Commercial-grade cleaners formulated for resilient flooring are worth the switch from generic household products, since they are built to handle repeated use without leaving the same residue buildup that caused the original dullness.
Spill management deserves its own attention in commercial spaces, particularly anywhere food or drink is served. A spill left sitting for hours can seep into seams or dull the finish faster than normal wear would. Training staff to wipe spills promptly with a damp microfiber cloth, rather than letting them sit until the next scheduled cleaning pass, protects the restoration investment far more than any product choice does.
Why most restoration advice skips the hardest part
Most guides treat vinyl restoration as a product problem: pick the right cleaner, pick the right restorer, done. The harder part, and the one facilities teams actually struggle with, is judging wear layer condition correctly before committing to a method. A floor that looks merely dull but has a worn-through wear layer will not respond to any amount of cleaning or restorer, and pushing ahead anyway just wastes labor hours and product.
The conventional advice also underplays how much damage comes from well-meaning staff using the wrong tool, a beater-bar vacuum, a steam mop, an ammonia-based all-purpose cleaner, rather than from normal foot traffic. Prioritizing a test patch and a short staff checklist before any large-scale cleaning effort prevents more damage than any restorer product on the market. For commercial buildings managing large floor areas, that discipline matters more than brand loyalty to any particular cleaning solution.
— Qadir
Professional vinyl floor polishing and restoration
We handle vinyl floor cleaning and polishing, including deep cleaning, restorer application, and low-speed machine buffing for larger areas where consistency across the whole floor matters. Our crews take wear-layer precautions, so a large lobby or corridor gets even results without the guesswork.
-
On-site inspection to assess wear layer condition and damage before we recommend a scope of work.
-
A written quote with a scheduled timeline built around your operating hours to limit disruption.
-
Follow-up maintenance recommendations so the restored shine holds between visits.
If your office or facility has dull, scuffed, or worn vinyl flooring, request an assessment through our vinyl floor polishing and cleaning services page and we will scope the work and provide a quote before anything starts.
FAQ
How do you restore dull vinyl flooring?
Start with a thorough deep clean using a pH-neutral cleaner to strip away residue film, rinse with fresh water, and dry completely. If the wear layer is intact and dullness persists, follow up with thin coats of an acrylic-based vinyl restorer or cautious low-speed buffing.
What is the best cleaner for commercial vinyl floors?
A pH-neutral, water-based cleaner made for resilient flooring is the safest choice for most commercial vinyl. Diluted white vinegar works as a backup when the manufacturer allows it, but ammonia and bleach-based products should be avoided since they dull the finish over time.
Why do my vinyl floors look dull?
Dullness usually comes from residue buildup left by the wrong cleaners, fine grit that creates micro-scratches, or general wear on the floor’s protective layer from heavy foot traffic. Identifying which of these is happening determines whether a simple deep clean fixes it or whether restoration work is needed.
How do you shine vinyl floors?
After a full deep clean and dry, hand-buff with a microfiber cloth for a basic shine boost, or apply an acrylic-based commercial restorer in thin coats for longer-lasting results. For smooth commercial vinyl where the wear layer allows it, a low-speed single-disc buffer around 175 rpm with a non-abrasive pad can also restore shine.
What should I check before choosing a vinyl restoration method?
Check the wear layer thickness and condition first, since a worn-through layer will not respond to cleaning or restorer products. Also confirm the manufacturer’s cleaning guidance and test any product or machine setting on a small, hidden patch before treating the whole floor.