TL;DR:
- Floor regrouting involves removing deteriorated grout from tile joints and replacing it to restore structural integrity. It prevents water damage, mold growth, and tile loosening, saving costs compared to full tile replacement, especially when addressed early. Proper technique, timing, and sealing are essential for long-lasting results and maintaining tile floor health.
Floor regrouting is defined as the process of removing deteriorated grout from the joints between tiles and replacing it with fresh grout to restore structural integrity and appearance. This repair method applies to bathrooms, kitchens, entryways, and any tiled surface exposed to moisture and foot traffic. The industry standard term is grout replacement, though floor regrouting is the phrase most homeowners search for and use in practice. Understanding when and how to regrout floors can save you thousands of dollars compared to full tile replacement, and it protects your property from water damage that starts the moment grout begins to fail.
What is floor regrouting and why does it matter?
Floor regrouting is the controlled removal of old, failing grout followed by the application of new grout to restore a tile floor’s function and appearance. It is not a cosmetic fix. Grout failure initiates moisture intrusion that leads directly to mold growth and substrate damage beneath the tile, making timely grout replacement one of the most consequential maintenance decisions a property owner can make.
Grout is a cement-based or epoxy-based filler that locks tiles in place and seals the joints against water. Over time, foot traffic, cleaning chemicals, and moisture cycles cause grout to crack, shrink, and pull away from tile edges. Once that seal breaks, water travels below the surface where it cannot evaporate, creating the conditions for mold, rot, and tile loosening. A tile grout restoration guide for residential properties confirms that addressing grout failure early prevents far more expensive structural repairs later.
The floor regrouting process is distinct from simple grout cleaning. Cleaning removes surface stains and biological growth. Regrouting removes the grout itself and starts fresh. Knowing which solution your floor actually needs is the first decision you have to make correctly.
What are the signs that floor regrouting is necessary?
Grout communicates its condition clearly if you know what to look for. A 2026 homeowner guide identifies the following as clear indicators that grout replacement is necessary rather than cleaning or spot repair:
-
Cracked or crumbling grout joints. Grout that fractures underfoot or crumbles when touched has lost its structural bond and cannot be restored by cleaning.
-
Persistent dark stains or mold. If scrubbing and commercial tile cleaners cannot remove discoloration, the mold has penetrated the grout body itself.
-
Grout pulling away from tile edges. Shrinkage gaps between grout and tile are entry points for water. This is not a cleaning problem.
-
Broad discoloration across the floor. Spot staining can sometimes be treated. When discoloration covers most of the grout network, full replacement is the only reliable fix.
-
Loose or shifting tiles. Tiles that move when pressed have lost their grout support. This is a structural failure, not a surface issue.
Understanding when grout cleaning is sufficient versus when full regrouting is required saves you from wasting money on cleaning services that cannot solve a structural problem.
Pro Tip: Run your fingernail along a grout joint. If grout powder comes away or the joint feels hollow, the grout has failed internally even if the surface looks intact. This test takes 30 seconds and tells you more than visual inspection alone.
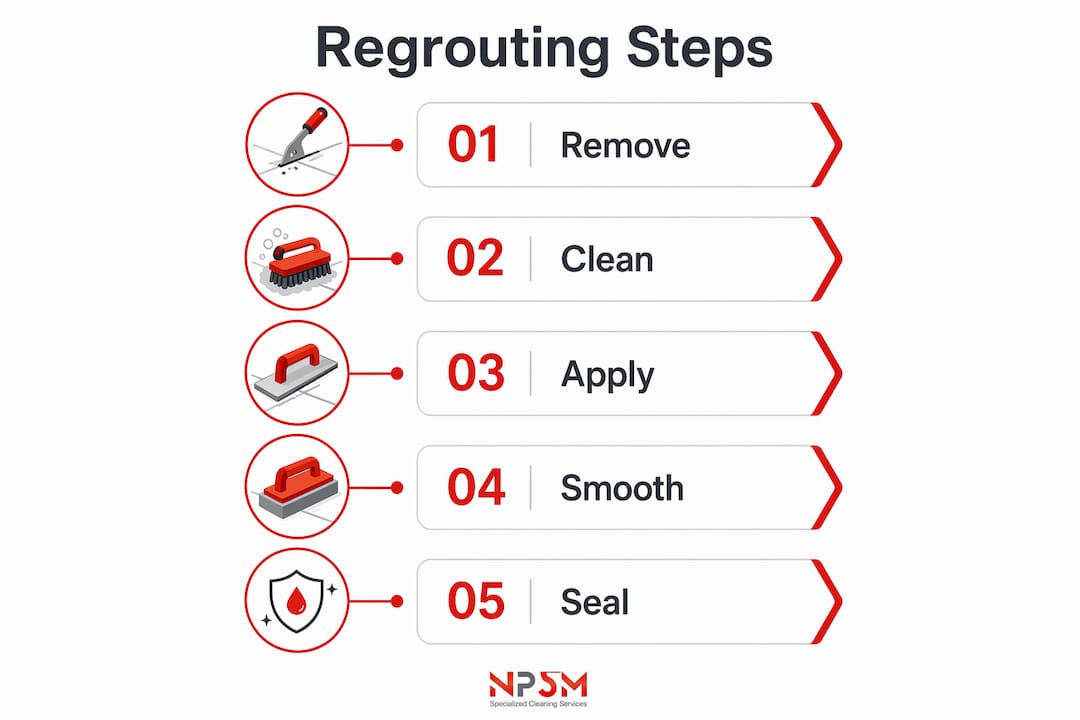
How does the floor regrouting process work step by step?
The floor regrouting process follows a fixed sequence. Skipping or rushing any step produces grout that cracks within months. Here is the correct order:
-
Gather your tools. You need an oscillating multi-tool with a grout removal blade, a grout float, a vacuum, a bucket, a sponge, and grout sealer. An oscillating tool is faster and more precise than a manual grout saw for floors larger than a few square feet.
-
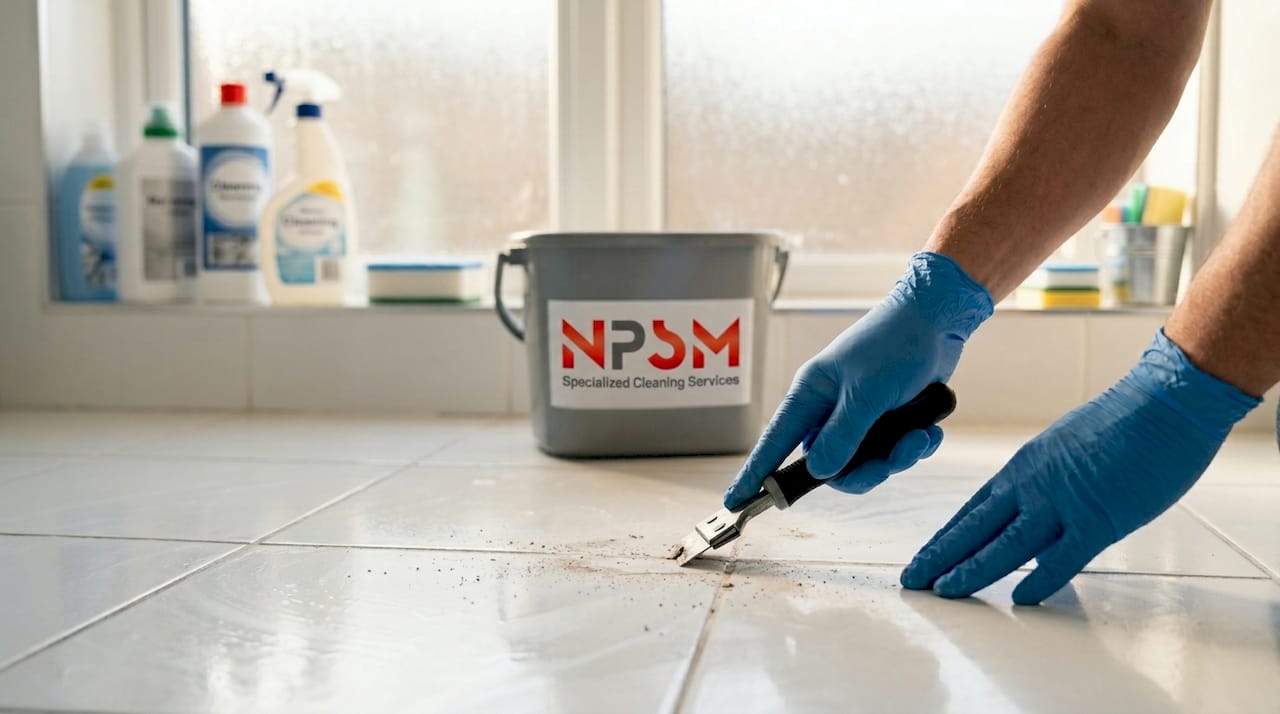
Remove the old grout to the correct depth. Experts recommend removing grout to at least 2 to 3 mm depth to give new grout enough material to bond and resist future cracking. Shallow removal is the single most common reason regrouting fails prematurely. Work carefully along each joint without chipping tile edges.
-
Vacuum and clean the joints. After removal, vacuum all dust and debris from the joints. Wipe with a damp cloth and allow the joints to dry completely before applying new grout. Any residual dust or moisture weakens adhesion.
-
Mix grout to the correct consistency. Inconsistent grout mixing and improper water ratios are among the most common causes of cracking and poor adhesion. Mix only as much grout as you can apply in 20 to 30 minutes. The correct consistency resembles peanut butter: thick enough to hold its shape but workable enough to press into joints.
-
Apply grout with a float. Hold the grout float at a 45-degree angle and press grout firmly into the joints, working diagonally across the tile surface. This diagonal motion packs the joints fully and avoids dragging grout back out of the joint.
-
Clean grout haze before it sets. Wait 15 to 20 minutes after application, then wipe the tile surface with a damp sponge in circular motions. Rinse the sponge frequently. Grout haze that dries on tile faces requires acidic cleaners to remove.
-
Allow grout to cure, then seal. Grout requires 24 to 48 hours drying time before the floor can be used, plus an additional 24 to 72 hours after applying grout sealer before the surface is fully protected. Do not expose the floor to water or heavy foot traffic during this window.
Pro Tip: Schedule regrouting during low-traffic periods in occupied properties. In a home, this means a weekend when a bathroom can be taken offline. In a commercial property, this means overnight or during a scheduled closure. Foot traffic during curing breaks the bond before it fully forms.
Grout removal is the most labor-intensive step and is consistently underestimated by homeowners attempting DIY projects. Budget at least twice the time you think it will take for this stage alone.
How does regrouting differ from caulking and other repairs?
Grout and caulk are not interchangeable, and using the wrong material in the wrong location causes faster failure than the original problem.
| Repair type | Where it applies | Material | Flexibility |
|---|---|---|---|
| Regrouting | Tile-to-tile joints across the field | Cement or epoxy grout | Rigid |
| Caulking | Corners, edges, and expansion joints | Silicone or latex caulk | Flexible |
| Over-grouting | Applying new grout over old grout | Grout | Not recommended |
Caulk addresses expansion and transition joints. These are the joints where a tiled floor meets a wall, a bathtub, or a different flooring material. These joints move slightly as the building settles and as temperature changes cause materials to expand and contract. Grout is rigid and will crack in these locations within weeks. Caulk is designed to flex with that movement.
Over-grouting, which means applying fresh grout directly over existing grout without removing the old material, is not a reliable repair. New grout applied over old grout bonds to the surface rather than to the substrate, producing a layer that chips away quickly. Full removal is the only method that delivers lasting results.
If you apply grout to a corner joint that needs caulk, the grout will crack. If you apply caulk to a field joint that needs grout, the caulk will compress and stain. Identifying the joint type before purchasing materials prevents both mistakes.
What are the benefits and limitations of floor regrouting?
The benefits of floor regrouting extend well beyond appearance, though the visual improvement is immediate and significant.
-
Moisture protection. Sealing failures in grout allow water damage to penetrate the subfloor. Fresh grout with a proper sealer restores the waterproof barrier that protects everything beneath the tile.
-
Mold prevention. Replacing grout that harbors mold eliminates the source rather than treating the symptom. Cleaning mold from failing grout is a temporary measure.
-
Extended tile life. Tiles themselves rarely fail. Grout failure causes tiles to loosen and crack. Replacing grout keeps a structurally sound tile floor in service for decades longer.
-
Cost savings. Full tile replacement in a standard bathroom costs several times more than regrouting. For property managers maintaining multiple units, the cost difference is substantial.
-
Improved property value. Stained, crumbling grout signals neglect to buyers and tenants. Fresh grout restores the floor’s appearance without the cost of new tile.
The limitations are equally worth knowing. Regrouting does not fix cracked or broken tiles. If tiles are damaged, they must be replaced before regrouting. Regrouting also does not address subfloor damage. If water has already penetrated and damaged the substrate, the subfloor must be repaired first or the new grout will fail again. Most floors need regrouting every 8 to 15 years depending on traffic levels, cleaning practices, and whether the grout was sealed after the original installation.
Key takeaways
Floor regrouting is the most cost-effective method for restoring tile floor integrity, and skipping the sealing step after regrouting negates most of the protection the process provides.
| Point | Details |
|---|---|
| Definition of regrouting | Removing old grout and replacing it with fresh grout to restore tile floor structure and appearance. |
| Critical removal depth | Remove old grout to at least 2 to 3 mm depth for new grout to bond and resist cracking. |
| Grout vs. caulk | Use grout for tile-to-tile field joints and caulk for corners, edges, and expansion joints only. |
| Drying and curing time | Allow 24 to 48 hours before use and 24 to 72 hours after sealing before water exposure. |
| When regrouting is not enough | Cracked tiles or damaged subfloors must be repaired before regrouting for lasting results. |
Why I think most homeowners regrout too late
After working with hundreds of tiled floors across Dubai’s villas, apartments, and commercial properties, the pattern I see most often is this: homeowners wait until grout is visibly crumbling or tiles are already loose before they act. By that point, the repair is more expensive and more disruptive than it needed to be.
The real mistake is treating grout like paint. Paint fades gradually and you can repaint at any time without consequences. Grout fails structurally, and every week you delay after the first crack appears is a week water is moving into your subfloor. I have seen bathroom floors where the tile looked acceptable from a standing position but the subfloor underneath had been wet for months. That is a full demolition job, not a regrouting job.
The other thing I see consistently is homeowners rushing grout removal to save time. Most DIYers underestimate the time required for grout removal, and that shortcut directly determines whether the new grout lasts two years or ten. Shallow removal means the new grout has no depth to anchor into. It looks fine on day one and starts cracking by month six.
Sealing is the step that gets skipped most often, and it is the step that matters most for longevity. Unsealed grout in a bathroom or kitchen absorbs moisture, stains, and cleaning chemicals from the first day it is exposed. Sealing takes 30 minutes and adds years to the result. There is no good reason to skip it.
If you are managing a property in Dubai, schedule grout inspection as part of your annual maintenance cycle. Catching grout failure at the cracking stage rather than the crumbling stage keeps the repair simple, fast, and affordable.
— Qadir
Restore your floors completely after regrouting
Regrouting restores the joints, but the tile surface itself often shows years of wear, dullness, and micro-scratching that fresh grout alone cannot fix. NPSM Specialized Cleaning Services LLC offers professional tile polishing and restoration services across Dubai that complement grout replacement by restoring the tile surface to its original finish. Whether your property has marble, ceramic, porcelain, or natural stone tile, combining grout replacement with professional tile polishing delivers a result that looks and performs like new flooring at a fraction of the replacement cost. Contact FloorPolishing.ae to schedule an assessment for your villa, apartment, or commercial property.
FAQ
What is floor regrouting in simple terms?
Floor regrouting means removing old, damaged grout from the joints between tiles and filling those joints with fresh grout. It restores the floor’s waterproof seal and appearance without replacing the tiles themselves.
Is floor regrouting necessary, or can I just clean the grout?
Cleaning works for surface stains, but cracked, crumbling, or mold-penetrated grout cannot be restored by cleaning. When grout has failed structurally, replacement is the only effective solution.
How long does the floor regrouting process take?
The physical work on a standard bathroom floor takes four to eight hours. Add 24 to 48 hours for grout to cure before use, plus 24 to 72 hours after sealing before the floor is fully protected against water.
Can I regrout over old grout without removing it?
Applying new grout over existing grout is not a reliable repair. New grout bonds to the old surface rather than the substrate and chips away quickly. Full removal to the correct depth is required for lasting results.
How often should tile floors be regrouted?
Most tile floors need regrouting every 8 to 15 years, depending on traffic levels, moisture exposure, and whether the grout was sealed after installation. High-traffic commercial floors may need attention sooner.