TL;DR:
- Restoring tile gloss involves removing residues, deposits, and worn finish layers, then polishing to achieve a reflective surface. Proper identification of the cause, thorough cleaning, and the correct chemistry are essential to prevent damage and ensure long-lasting shine. Regular maintenance with pH-neutral cleaners and prompt spill cleanup help preserve the restored gloss over time.
Restoring tile gloss is defined as removing dulling residues, surface deposits, and worn finish layers, then polishing the tile surface back to its original reflective state. Knowing how to restore tile gloss correctly separates a floor that looks clean from one that genuinely shines. The process involves alkaline strippers, pH-neutral cleaners, descalers, polishing creams like Faber STAR SHINE, and microfiber mops. Done right, it extends tile life, improves property appearance, and eliminates the need for costly replacement.
What causes tile gloss loss and how to identify it
Tile floors lose their shine for specific, diagnosable reasons. Identifying the correct cause before you start any treatment saves time and prevents damage.
The most common culprits are:
-
Wax and finish buildup. Consumer floor waxes and low-quality polish products leave plastic-like films that trap dirt and yellow over time. Each new coat compounds the problem.
-
Hard water mineral deposits. In areas with hard water, calcium and magnesium minerals bond to the tile surface after water evaporates, leaving a white or gray haze that scatters light instead of reflecting it.
-
Grout haze. Residual grout cement left on tile faces after installation or regrouting creates a cloudy film. Wrong removal products can permanently etch natural stone or set the haze deeper.
-
Surface scratches and micro-abrasion. Grit tracked in from outside acts like sandpaper under foot traffic, physically dulling the glaze on ceramic and porcelain tiles.
-
Soap scum and cleaning residue. Mopping with too much detergent and insufficient rinsing leaves a thin film that builds up into visible dullness.
Tile type matters enormously here. Ceramic and porcelain tiles have a fired glaze layer that can be polished and restored chemically. Natural stone tiles such as marble, travertine, and limestone require different chemistry entirely because acids that work on mineral haze will etch their surfaces. Unglazed tiles absorb liquids and stains differently from glazed ones. Before you buy a single product, confirm what you are working with.
The distinction between surface residue and physical wear is also critical. Residue wipes off with the right cleaner. Physical scratches require mechanical honing or professional intervention. Run your fingernail across a dull patch. If it catches on a rough texture, you are dealing with surface damage, not just buildup.
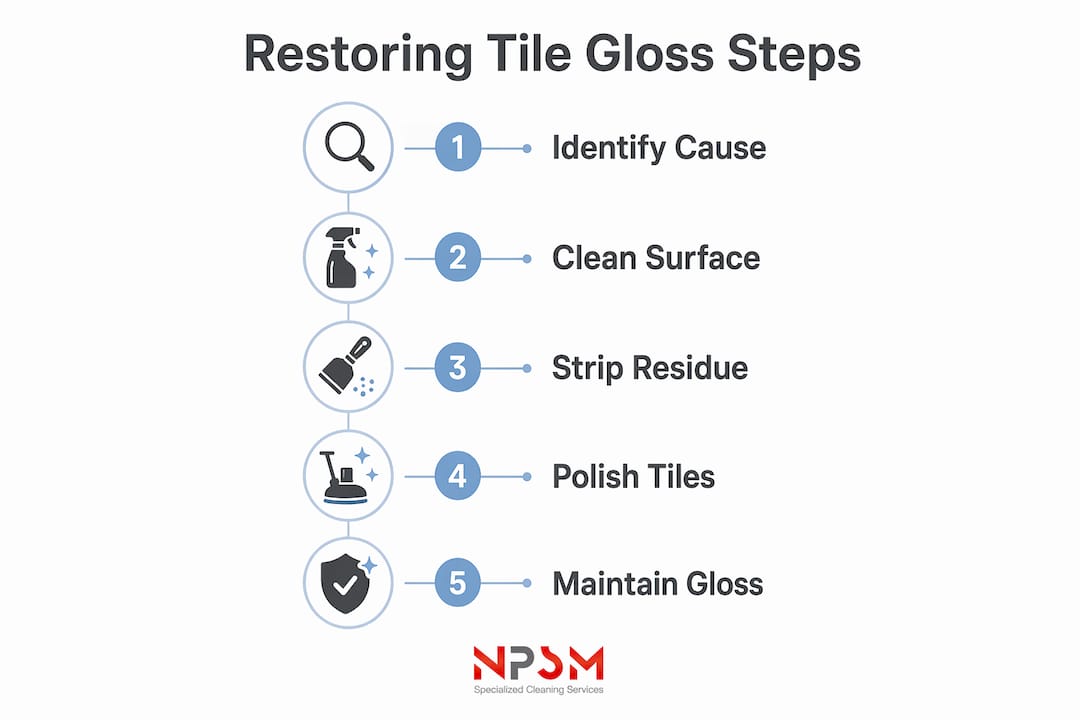
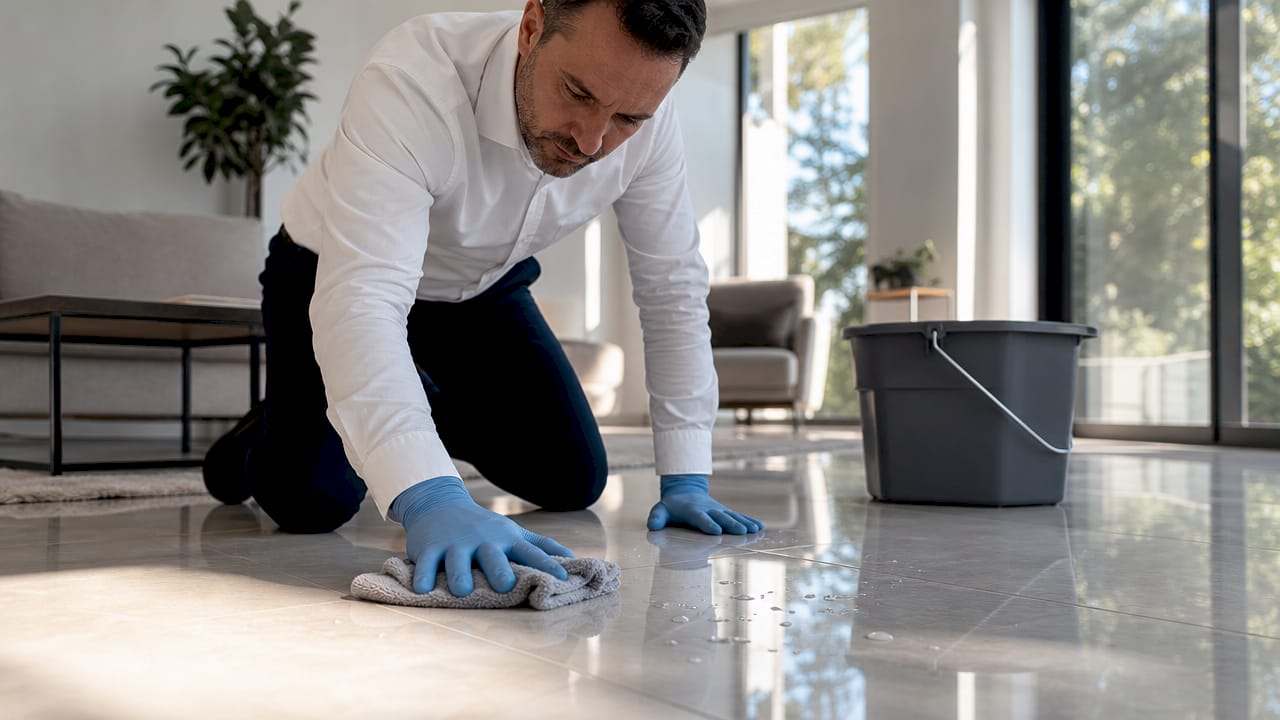
How to clean and prepare tiles before gloss restoration
Preparation is the step most homeowners skip, and it is the reason their results disappoint. Polishing over dirty or residue-coated tile seals the problem in rather than fixing it.
Follow this sequence every time:
-
Sweep or vacuum thoroughly. Use a soft-bristle broom or a vacuum with a hard-floor attachment. Never use a stiff brush that can scratch glazed surfaces. Remove all loose grit, dust, and debris before any liquid touches the floor.
-
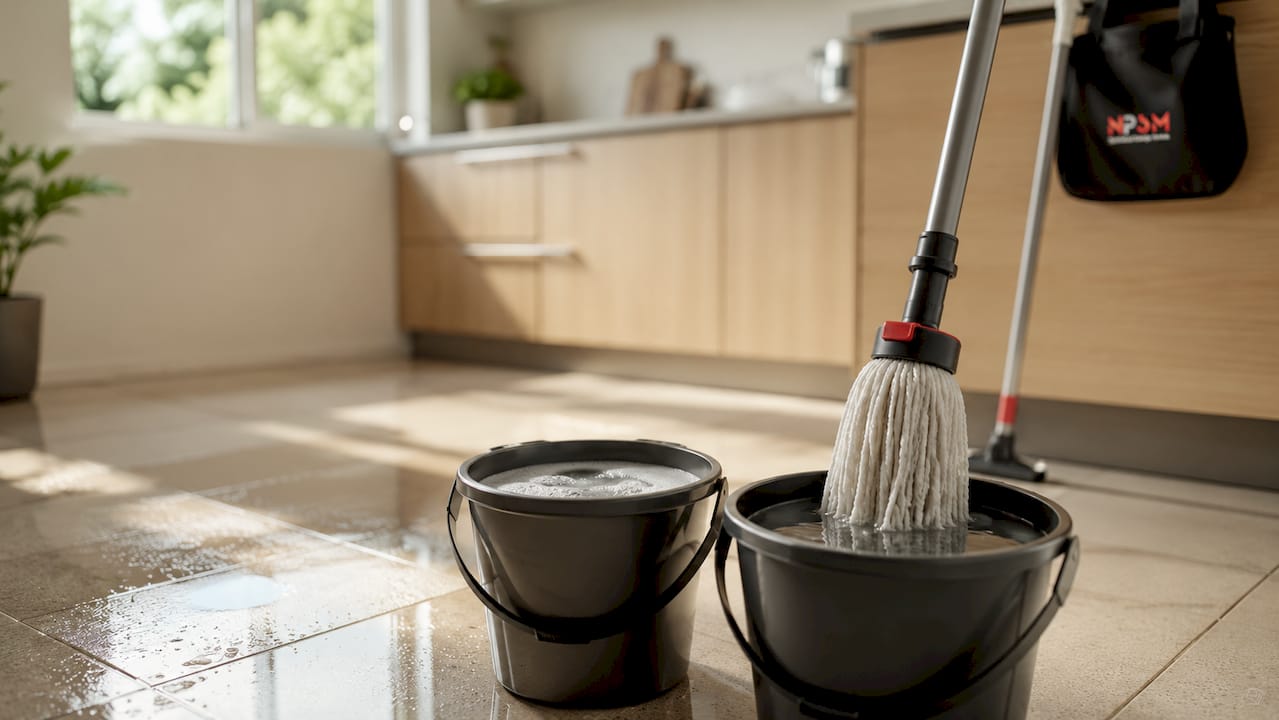
Mop with a pH-neutral cleaner. Mix your cleaner at the manufacturer’s recommended dilution. Use a microfiber mop rather than a string mop. Microfiber mops and thorough rinsing prevent the residue films that are the main cause of lost gloss after mopping. Work in sections, rinsing the mop head frequently.
-
Rinse with clean water. This step is non-negotiable. Fill a second bucket with plain water and go over the entire floor again. Detergent left on the surface dries into a dull film.
-
Dry the floor completely. Use a dry microfiber cloth or a floor squeegee to remove standing water. Letting water air-dry in hard-water areas deposits minerals directly onto the surface you just cleaned.
-
Treat mineral haze with a descaler. For hard-water deposits, apply an acid-based descaler such as Tile Armor’s Hades Heavy Duty Mineral Descaler. Allow 10 to 15 minutes dwell time before scrubbing gently and rinsing completely. Incomplete rinsing re-deposits the dissolved minerals and recreates the haze.
-
Remove grout haze with matched chemistry. Start with dry buffing using a white nylon pad. If that fails, move to a gentle water wash. If haze persists, use a chemical grout haze remover matched to your grout type. Never use acidic cleaners on natural stone and never let the cleaner dry on the surface during application.
Pro Tip: Use two buckets when mopping: one for your cleaning solution and one for rinse water. This single habit prevents you from spreading dirty water across a floor you are trying to restore.
After completing these steps, the tile surface should look uniformly clean with no visible haze, streaks, or residue. Only at this point is the floor ready for polishing or gloss restoration treatments.
Professional and DIY approaches to restore tile shine
Once the surface is clean and prepared, the actual gloss restoration begins. The method you choose depends on the severity of the dullness and the tile type.
Deep alkaline stripping for wax and finish buildup
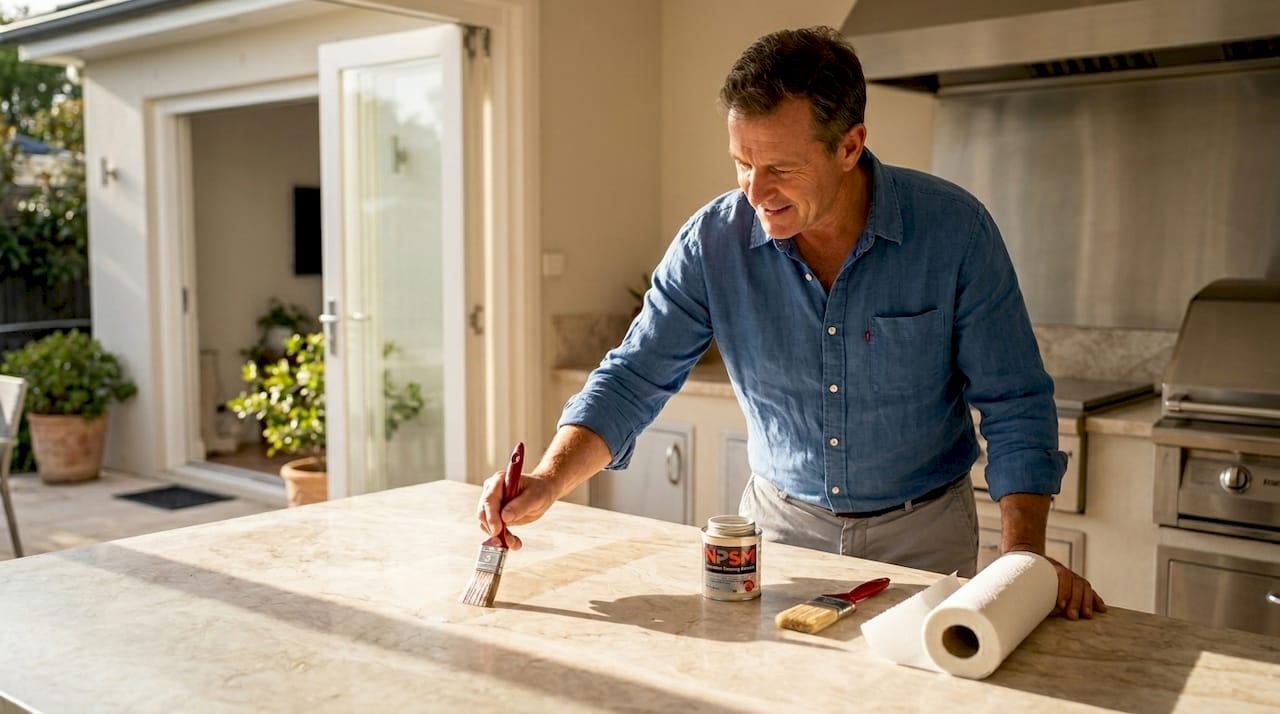
If your tiles have years of consumer wax or floor finish applied, polishing over that buildup produces uneven results. Alkaline stripping before polishing removes old product layers down to the bare tile. Products like FABER 30 stripper are formulated for this purpose. Apply the stripper, allow it to dwell, scrub with a floor machine or stiff nylon pad, then rinse thoroughly. Skipping this step and polishing directly over old wax is the most common reason DIY gloss restoration fails.
Polishing creams and micro-honing for worn glazed tiles
For ceramic and porcelain tiles with physical surface wear, micro-honing compounds and polishing creams restore the reflective layer. Faber STAR SHINE cream is one example of a product designed to restore surface reflection on glazed tiles without leaving a yellowing film. Apply the cream with a soft cloth or low-speed buffer, work in circular motions, then buff to a shine. This approach addresses light scratches and micro-abrasion that cleaning alone cannot fix.
Here is a comparison of the main restoration approaches:
| Method | Best for | Key product type | DIY-friendly? |
|---|---|---|---|
| Alkaline stripping | Old wax/finish buildup | FABER 30 or equivalent stripper | Yes, with care |
| Polishing cream | Light wear, glazed ceramic/porcelain | Faber STAR SHINE or similar | Yes |
| Acid descaling | Hard water mineral haze | Tile Armor Hades Descaler | Yes, with caution |
| Mechanical honing | Deep scratches, worn glaze | Diamond pad system | Professional recommended |
| Grout haze removal | Post-installation cloudiness | Chemistry-matched haze remover | Yes, with correct product |
What to avoid
Consumer “shine” wax products sold at supermarkets are the single biggest mistake in tile gloss restoration. These products leave plastic-like films that trap dirt, yellow with UV exposure, and peel unevenly. They create the illusion of shine for a few days before making the floor look worse than before. Applying wax over an existing polish layer without stripping first causes adhesion failures and peeling. Complete stripping of prior product is required before any new finish goes down.
Pro Tip: Floor polish and floor wax are not interchangeable. Polish is a water-based acrylic coating that dries faster and buffs more easily. Wax is natural or synthetic and suits lower-traffic residential areas. Match the product to your tile type and traffic level before purchasing.
How to maintain tile gloss and prevent future dullness
Restoring gloss is only half the work. Keeping it requires consistent habits that most property owners underestimate.
-
Sweep or vacuum several times a week. Frequent vacuuming minimizes the grit that physically abrades tile glaze under foot traffic. Dirt left to settle bonds to the surface and dulls gloss faster than almost any other factor.
-
Mop every one to two weeks with a zero-residue, pH-neutral cleaner. Avoid dish soap, bleach, or vinegar on glazed tiles. Vinegar is acidic and will etch natural stone over time. Bleach degrades grout and can discolor colored tiles.
-
Rinse after every mop. This is the step most people skip. Detergent residue is the leading cause of gradual gloss loss on otherwise well-maintained floors.
-
Place mats at entry points. Entrance mats at doors catch the grit and moisture that cause the most surface abrasion. This is especially relevant in Dubai, where fine sand tracked indoors acts as a constant abrasive on tile surfaces.
-
Clean spills immediately. Acidic liquids like citrus juice, coffee, and wine can etch glazed surfaces if left to sit. Blot spills rather than wiping to avoid spreading them.
-
Schedule periodic professional polishing. Even with perfect maintenance habits, high-traffic areas develop micro-scratches over time. A professional tile polishing service every one to two years restores the glaze layer that daily cleaning cannot address.
Grout maintenance also affects the overall perception of tile gloss. Stained or cracked grout makes even polished tiles look dull. Sealing grout lines after cleaning locks out staining agents and makes routine mopping more effective. For detailed guidance on grout care, this grout cleaning guide covers safe and effective pH-neutral solutions for household tile floors.
Key takeaways
Restoring tile gloss requires stripping old residues, using the correct polishing chemistry for your tile type, and maintaining the surface with pH-neutral cleaners and regular sweeping.
| Point | Details |
|---|---|
| Identify the cause first | Distinguish between residue buildup, mineral haze, grout haze, and physical surface wear before treating. |
| Strip before you polish | Alkaline stripping removes old wax and finish layers that prevent new polish from bonding correctly. |
| Match chemistry to tile type | Acid descalers work on mineral haze but will etch natural stone. Always confirm your tile material first. |
| Rinse thoroughly every time | Incomplete rinsing after cleaning or descaling re-deposits residue and recreates dullness within days. |
| Maintain consistently | Sweeping several times a week and mopping with zero-residue cleaners prevents buildup from returning. |
Why I think most homeowners overcomplicate this
After years of working with tile floors across Dubai’s villas, apartments, and commercial spaces, the pattern I see most often is this: homeowners either do too little or too much. They either mop with the wrong product for years until the floor looks irreparably dull, or they buy five different shine products and layer them on top of each other, making the problem significantly worse.
The honest truth is that most tile gloss problems are caused by residue, not damage. A thorough strip and a single correct polish application fixes 80% of cases I encounter. The floors that genuinely need mechanical intervention are the ones where someone has been applying consumer wax for five years and the buildup has become a physical layer in its own right.
Where I see property managers go wrong most consistently is skipping the tile identification step. Treating a marble tile floor with an acid descaler because it looks like a ceramic tile is an expensive mistake. The surface etching from that single error costs more to fix than years of professional maintenance would have.
My recommendation: if you are unsure of your tile type, or if the floor has had multiple products applied over the years, call a professional for the initial restoration. Use that clean baseline to maintain correctly going forward. The floor polishing guide for Dubai homes outlines the five key steps that apply to most residential situations and gives you a solid framework for what to expect from a professional visit.
DIY maintenance absolutely works once you know what you are working with. But the first restoration after years of neglect or incorrect products is almost always better handled by someone with the right equipment and product knowledge.
— Qadir
Restore your tile gloss with professional help in Dubai
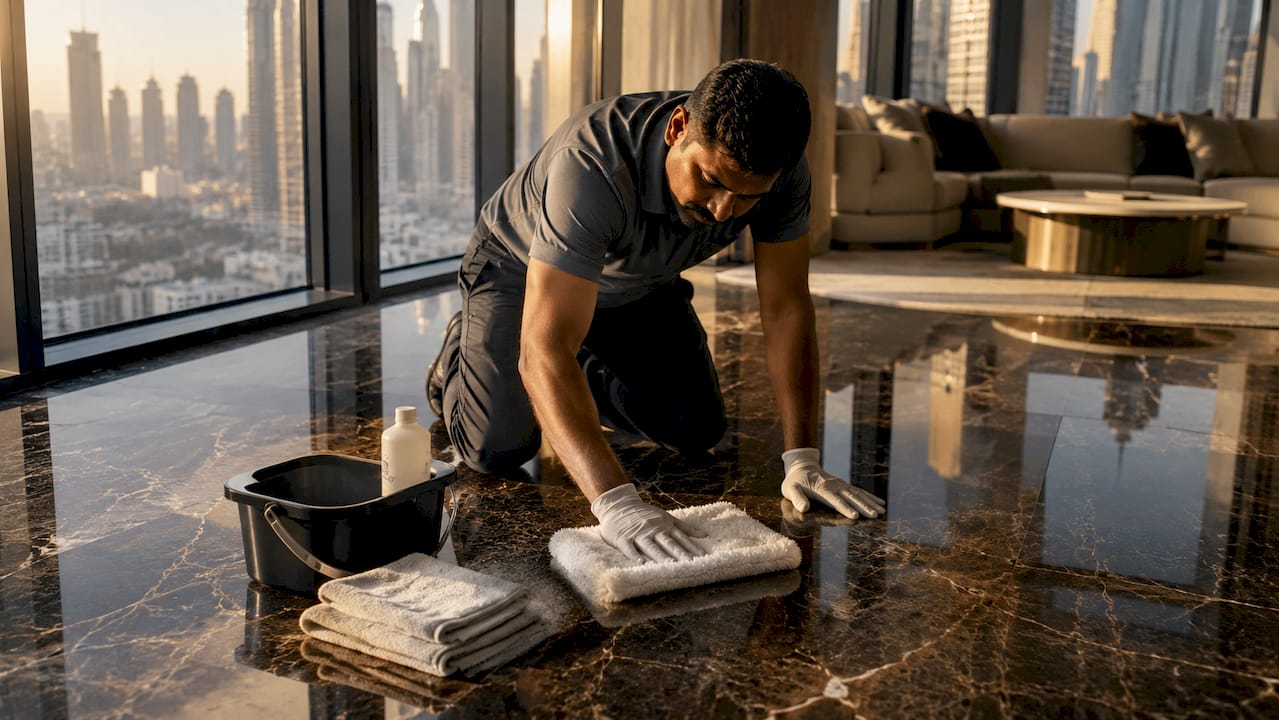
When DIY methods have reached their limit, NPSM Specialized Cleaning Services LLC delivers professional tile restoration across Dubai’s residential and commercial properties. The team at FloorPolishing.ae handles deep alkaline stripping, micro-honing, descaling, and polishing for ceramic, porcelain, and natural stone tiles. Rather than masking dullness with temporary products, the process restores the actual glaze layer for results that last. Homeowners and property managers can request a tailored assessment and quote through the floor restoration services page. For natural stone tile floors specifically, the natural stone polishing service addresses the specialized chemistry those surfaces require.
FAQ
What is the fastest way to restore shine to dull tile floors?
The fastest effective method is deep cleaning with a pH-neutral cleaner, thorough rinsing, and applying a polishing cream matched to your tile type. For floors with wax buildup, alkaline stripping must come first or the polish will not bond.
Can I use vinegar to clean tile floors and restore gloss?
Vinegar removes some mineral deposits on ceramic tiles but will etch and permanently dull natural stone surfaces including marble, travertine, and limestone. For glazed ceramic and porcelain, a pH-neutral cleaner is safer and more effective for maintaining gloss long-term.
How do I remove tile stains without damaging the surface?
Match the cleaner to the stain type. Hard water mineral stains respond to acid-based descalers with a controlled dwell time of 10 to 15 minutes followed by thorough rinsing. Grout haze requires chemistry matched to the grout type, and acidic cleaners must never be used on natural stone.
How often should tile floors be professionally polished?
High-traffic areas in homes and commercial properties benefit from professional polishing every one to two years. Regular sweeping and pH-neutral mopping between professional visits preserves the restored gloss and extends the time between service cycles.
Why do my tiles look dull right after mopping?
Dullness after mopping is almost always caused by detergent residue left on the surface. Using too much cleaner or skipping the rinse step deposits a thin film that dries into a haze. Switch to a zero-residue pH-neutral cleaner and always follow with a plain water rinse.