TL;DR:
- Villa floor polishing restores shine, durability, and value through a precise process involving surface preparation, grit polishing, and sealing. Proper use of tools, adherence to full grit sequences, and careful preparation are essential to achieve professional results and prevent costly mistakes. Regular maintenance and expert restoration prolong the beauty of polished floors and protect your investment.
Villa floor polishing is a precise restoration process involving surface preparation, progressive grit polishing, and protective sealing to recover shine, durability, and long-term value from luxury flooring materials. Whether your villa features marble, terrazzo, hardwood, or natural stone, following the correct villa floor polishing steps determines whether you get a showroom finish or a floor that looks worse than when you started. The tools matter, the sequence matters, and skipping any stage costs you time and money. This guide covers every stage in order, from prep through maintenance, so you know exactly what to do and why.
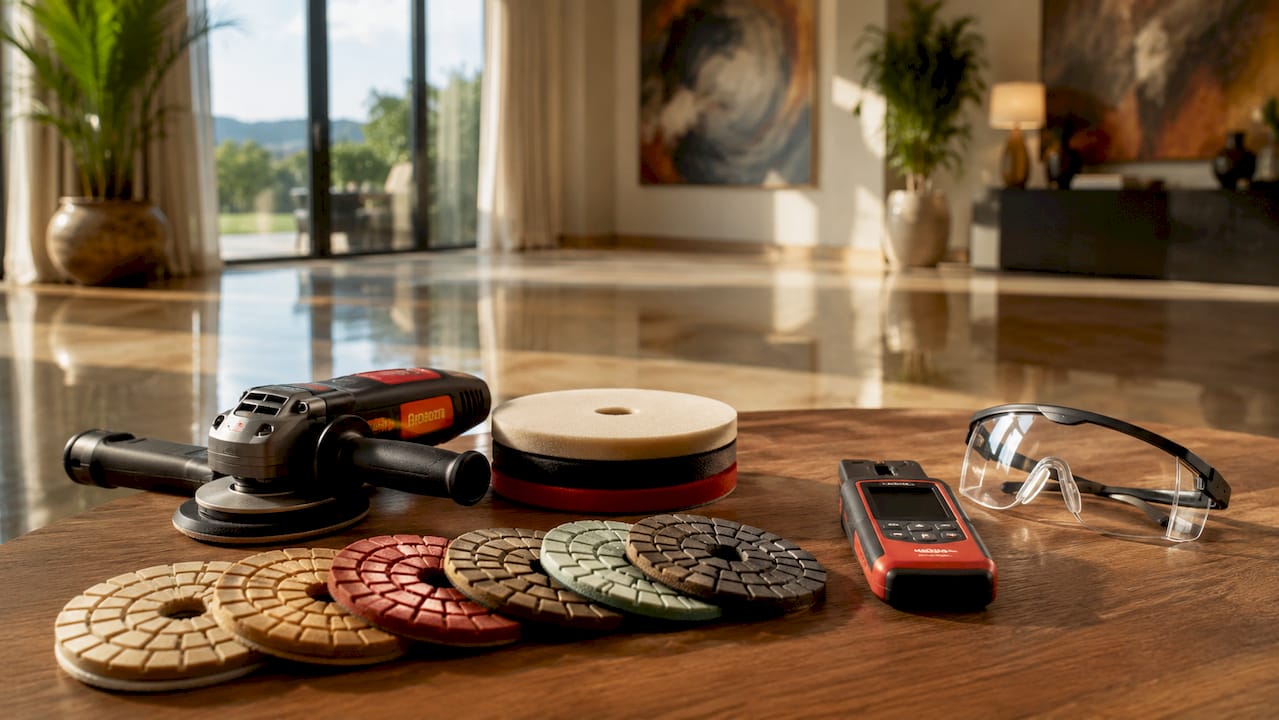
What tools and materials are essential for villa floor polishing?
The right tools separate a professional result from a frustrating one. Before you touch the floor, gather everything you need.
Core tools and materials:
- Floor buffer or rotary polisher: Used for grinding, honing, and final polishing passes. Single-disc buffers work for most residential surfaces.
- Diamond grit pads: These are the workhorses of stone and concrete polishing. You need a range: coarse (50–100 grit) for grinding, medium (200–400 grit) for honing, and fine (800–3000 grit) for polishing.
- Densifier (chemical hardener): Applied after coarse grinding on stone and concrete to harden the surface before fine polishing.
- Stone sealer or floor finish: Locks in the polish and protects against stains and moisture.
- pH-neutral floor cleaner: For pre-polishing cleaning and ongoing maintenance.
- Wet/dry vacuum and mop: For removing slurry and debris between grit passes.
- Protective gear: Safety glasses, knee pads, dust mask, and non-slip footwear.
The table below shows which tools suit which floor types and the recommended grit progression.
| Floor Type | Starting Grit | Finishing Grit | Key Tool |
|---|---|---|---|
| Marble | 50–100 | 1500–3000 | Diamond pad buffer |
| Terrazzo | 100–200 | 800–1500 | Rotary polisher |
| Hardwood | 36–60 (sandpaper) | 120–150 | Drum or orbital sander |
| Concrete | 30–50 | 1500–3000 | Planetary grinder |
| Granite | 100–200 | 1500–3000 | Diamond pad buffer |
Pro Tip: Wet polishing extends diamond pad life 2–3 times compared to dry polishing and reduces heat buildup that can burn or discolor stone surfaces. Use water sparingly but consistently during grinding and honing passes.
For a deeper look at how diamond grit sequences differ across marble polishing methods, the comparison between grinding, honing, and crystallization is worth reviewing before you buy pads.
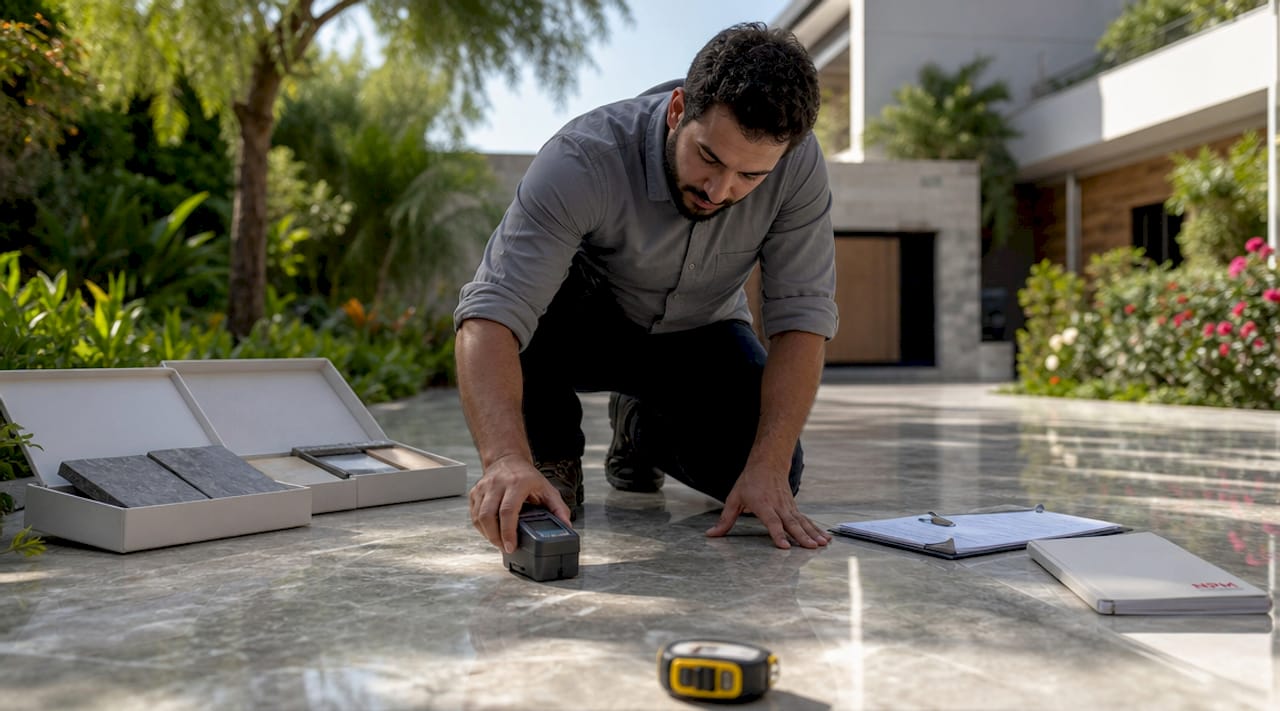
How to prepare villa floors before polishing
Preparation is the most skipped and most critical stage. A poorly prepared floor will show every flaw after polishing because the finish amplifies surface conditions rather than hiding them.
Follow these steps in order:
- Clear the space completely. Remove all furniture, rugs, and décor. Even small items left on the floor can cause uneven polishing passes or scratch the surface when dragged.
- Sweep and vacuum thoroughly. Remove all loose debris, grit, and dust. Grit left on the floor acts like sandpaper under your machine and causes random scratches.
- Strip old wax or coatings. If the floor has been waxed or coated previously, use a chemical stripper appropriate for the floor type. Polishing over old wax seals in the buildup and prevents the new finish from bonding.
- Clean with a pH-neutral cleaner. Mop the entire surface and allow it to dry fully. Acidic or alkaline cleaners can etch stone surfaces and compromise adhesion of sealers.
- Check for moisture. Moisture readings and structural checks prevent floor spalling caused by sealing over damp floors. Use a moisture meter on stone and concrete floors before proceeding.
- Inspect for cracks, loose tiles, or structural damage. Repair any damage before polishing. Running a heavy buffer over a cracked tile will shatter it.
- Test finish compatibility. If you plan to apply a new sealer or finish, test it on a small hidden area first to confirm adhesion and appearance.
Pro Tip: Never skip the moisture test on villa floors in Dubai. Humidity and ground moisture can be trapped under stone slabs, and sealing over dampness causes the finish to bubble, peel, and fail within weeks.
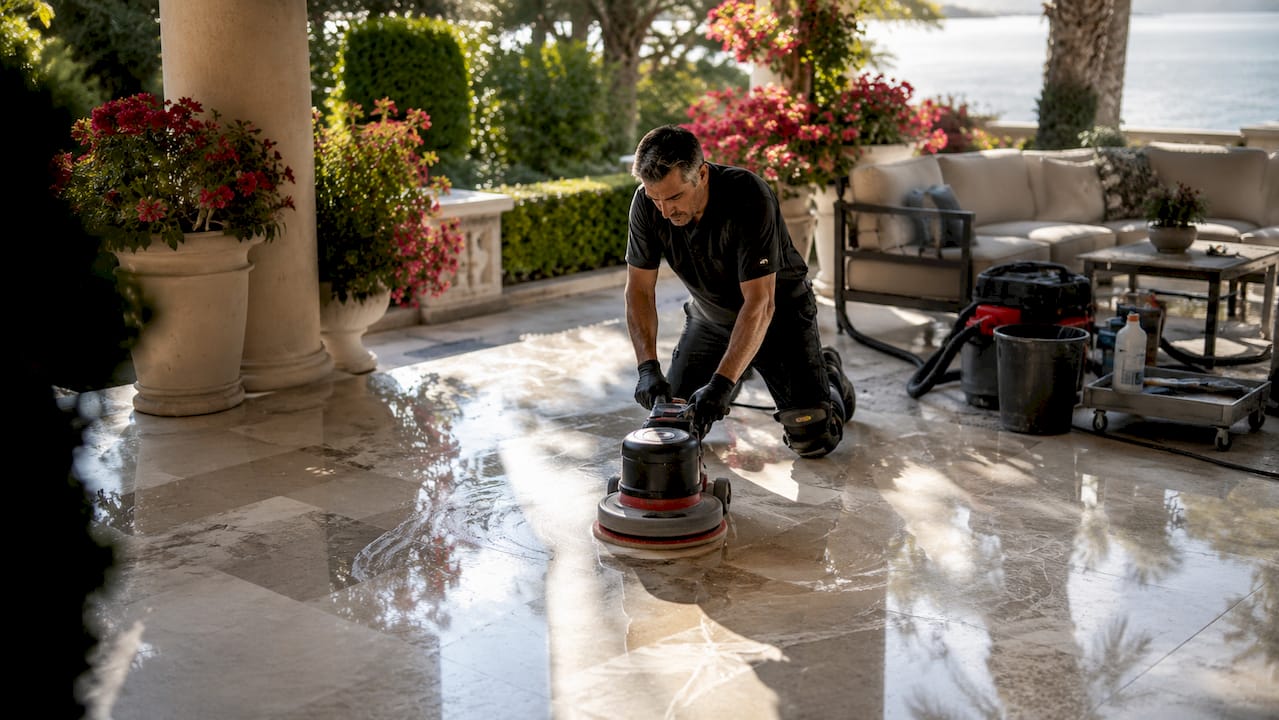
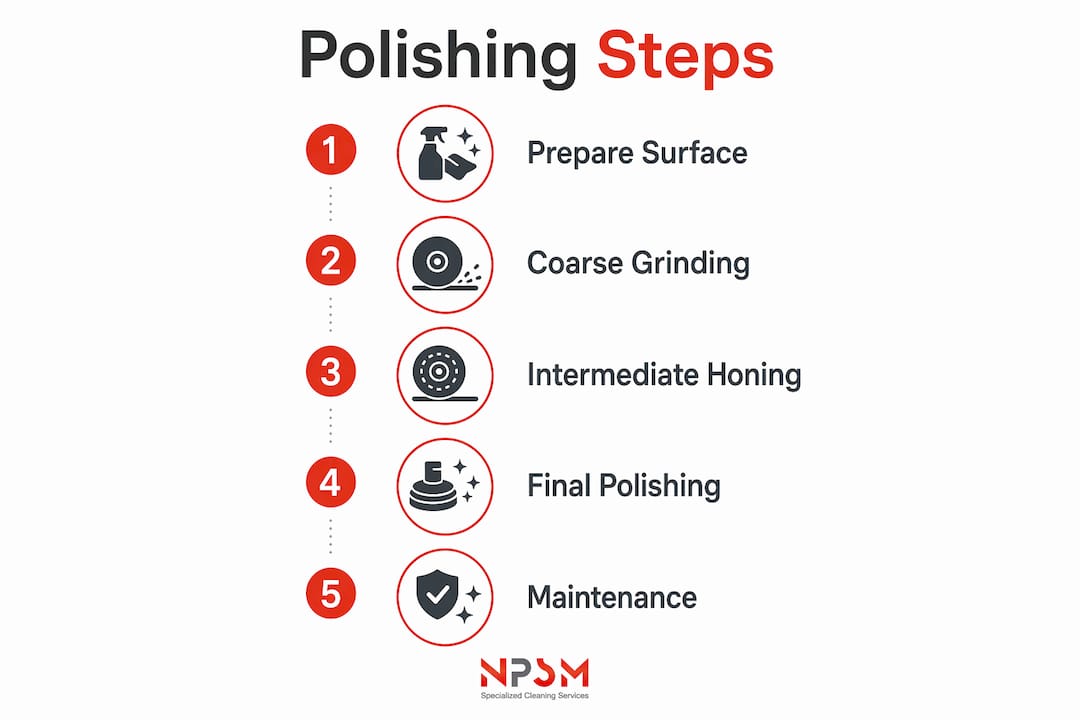
What are the step-by-step polishing stages for villa floors?
This is the core of any villa floor restoration guide. The polishing process moves through three distinct stages: grinding, honing, and polishing. Each stage uses progressively finer abrasives and builds on the work of the previous one.
-
Coarse grinding (50–100 grit). Attach your coarsest diamond pad to the buffer. Work in overlapping passes across the floor, moving with the grain on wood or in consistent circular patterns on stone. This stage removes deep scratches, stains, lippage (uneven tile edges), and old coatings. Expect the floor to look rough and dull after this pass. That is correct.
-
Apply densifier (stone and concrete only). After coarse grinding, apply a lithium silicate densifier to stone and concrete floors. It penetrates the surface and chemically hardens it, which makes the floor more resistant to abrasion and allows finer grits to produce a higher shine.
-
Medium honing (200–400 grit). Switch to a medium grit pad. This stage removes the scratches left by coarse grinding and begins to refine the surface texture. The floor will start to show a matte sheen. Work the same overlapping pattern and vacuum or wet-vacuum slurry between passes.
-
Fine honing (800 grit). This pass removes medium-grit scratches and brings the surface to a consistent, smooth matte finish. Low-angle work light inspection during this stage reveals any remaining scratches before you move to finer grits. Shine a work light at a low angle across the surface and look for lines or swirl marks.
-
Polishing passes (1500–3000 grit). These final passes bring out the reflective shine. Use progressively finer pads and keep the machine moving at a consistent speed. Rushing these passes or pressing too hard creates uneven gloss.
-
Edge and corner work. Use hand scrapers or detail sanders near baseboards instead of large floor grinders. Machines cannot reach tight corners without damaging walls or trim. Take your time on edges. They are the first thing visitors notice.
-
Apply sealer or finish. Once polishing is complete and the floor is clean and dry, apply your chosen sealer in thin, even coats. Two thin coats outperform one thick coat every time. Allow full drying time between coats.
| Stage | Grit Range | Expected Outcome |
|---|---|---|
| Coarse grinding | 50–100 | Removes scratches, stains, old coatings |
| Densifier application | N/A | Hardens surface for better polish |
| Medium honing | 200–400 | Smooths grinding marks, matte sheen |
| Fine honing | 800 | Consistent matte, scratch-free surface |
| Polishing | 1500–3000 | High reflective shine |
| Sealing | N/A | Stain protection, finish lock-in |
Skipping intermediate grit stages causes sanding lines that remain visible after finishing. This is the single most common mistake in DIY floor polishing, and it cannot be fixed without going back to the coarser grit and starting over.
Pro Tip: Use a low-angle work light between every grit change. If you can see scratches, the current grit has not finished its job. Move to the next grit only when the surface looks uniform under that light.
How to maintain polished villa floors to prolong their beauty
Polishing restores your floor. Maintenance keeps it that way. The right routine extends the life of your finish by years and reduces how often you need a full restoration.
For hardwood floors, minimum 24 hours between finish coats, 7–14 days before light foot traffic, and 30 days before placing furniture back are the industry standards. Rushing this timeline dents and scratches the fresh finish before it reaches full hardness.
Floor maintenance do’s and don’ts:
- Do sweep or dust-mop daily to remove grit that scratches the finish under foot traffic.
- Do use pH-neutral cleaners specifically formulated for your floor type.
- Do place felt pads under all furniture legs before moving anything back onto the floor.
- Do schedule a buff and recoat every 12–18 months for hardwood and stone floors with moderate traffic. Screen and recoat preserves the floor and is quicker and cheaper than full sanding.
- Don’t use steam mops. Steam mops strip protective finishes and warp wood, leading to early restoration needs.
- Don’t use vinegar, bleach, or ammonia-based cleaners on stone or hardwood. These etch and dull polished surfaces.
- Don’t drag furniture across polished floors, even with felt pads.
- Don’t allow standing water on any polished surface. Wipe spills immediately.
For spot repairs on stone floors, a hand-held polishing pad at 800–1500 grit can address minor dull patches without requiring a full-room restoration. This works well for high-traffic entry areas that dull faster than the rest of the floor.
What common mistakes should villa owners avoid when polishing floors?
Most polishing failures trace back to a small set of predictable errors. Knowing them in advance saves you from expensive do-overs.
Mistakes and how to correct them:
- Skipping surface prep: Polishing over dirt, wax, or old coatings traps contaminants under the finish. The fix is stripping back to bare floor and starting prep from scratch.
- Jumping grit stages: Moving from 100 grit directly to 800 grit leaves deep scratches that finer pads cannot remove. Always follow the full progression.
- Sealing over moisture: Bubbling, peeling, or white haze under the finish means moisture was present when you sealed. Strip the finish, allow the floor to dry fully, retest moisture levels, and reseal.
- Uneven machine pressure: Pressing down on the buffer creates low spots and uneven gloss. Let the machine’s weight do the work and keep it moving at a consistent pace.
- Neglecting edges: Edges polished by hand to a different grit than the field look noticeably different under light. Match your hand-tool grit progression to your machine progression.
- Applying thick sealer coats: Thick coats dry unevenly, cloud, and peel. Two thin coats with full drying time between them produce a cleaner, more durable finish.
- Returning furniture too soon: On hardwood floors, placing heavy furniture before the 30-day full cure period leaves permanent indentations. Mark the date and wait.
Professional restoration for stone floors uses a progressive grit sequence and can save 60–80% over full floor replacement. That cost advantage disappears quickly if mistakes require stripping and restarting the process.
Key takeaways
Successful villa floor polishing depends on following the full grit progression, preparing the surface correctly, and maintaining the finish consistently after restoration.
| Point | Details |
|---|---|
| Preparation is non-negotiable | Strip old coatings, test for moisture, and repair damage before any polishing begins. |
| Follow the full grit sequence | Skipping grit stages locks in scratches that finer pads cannot remove. |
| Inspect with low-angle lighting | Check for remaining scratches between every grit change before moving forward. |
| Protect edges with hand tools | Machines damage walls and trim in tight spaces; use detail sanders or hand scrapers instead. |
| Maintain consistently after polishing | Daily dust-mopping, pH-neutral cleaners, and scheduled buff-and-recoat cycles extend floor life significantly. |
What i’ve learned after years of villa floor restoration
The biggest mistake I see homeowners make is treating floor polishing like a cleaning task rather than a restoration process. They rent a buffer, buy one pack of pads, and expect a mirror finish in an afternoon. That is not how it works.
Restoration success depends on finesse and gradual grit progression rather than brute force. I have watched people press harder on a buffer thinking it will speed up the process. It does not. It creates low spots, burns the surface, and wastes pads. The machine needs to move at a steady pace with its own weight providing the pressure.
The detail that separates a good result from a great one is edge work. Most people rush the corners and baseboards because it is tedious hand work. But edges are exactly where guests look first when they walk into a room. A floor with a perfect field and rough edges looks unfinished.
My honest recommendation for villa owners in Dubai: not all dull floors need heavy sanding. If your hardwood or stone floor has surface dullness but no deep scratches, a buff and recoat is faster, cheaper, and less stressful on the material. Save the full restoration for floors that genuinely need it.
If you are unsure where your floor falls on that spectrum, get a professional assessment before committing to a full grind-and-polish. The cost of getting it wrong is always higher than the cost of getting it right the first time.
— Qadir
Restore your villa floors with professional-grade results
Knowing the steps is one thing. Executing them on expensive marble, terrazzo, or hardwood without the right equipment is another. NPSM Specialized Cleaning Services LLC brings professional-grade diamond polishing systems, trained technicians, and floor-specific restoration knowledge to every villa project in Dubai. Whether your floors need a light buff and recoat or a full marble polishing and restoration from 50 grit up, the team at FloorPolishing.ae delivers results that protect your investment and restore the look your villa deserves. Explore the full range of villa floor polishing services and request a free quote today.
FAQ
What is the correct grit sequence for polishing marble villa floors?
Start at 50–100 grit for grinding, progress through 200–400 grit for honing, and finish at 1500–3000 grit for polishing. Skipping stages leaves visible scratches that finer grits cannot remove.
How long should i wait before placing furniture on a refinished hardwood floor?
Allow at least 7–14 days before light use and 30 days for full hardness before placing heavy furniture. Rushing this timeline causes permanent indentations in the fresh finish.
Can i polish villa floors myself, or do i need a professional?
Light buff and recoat work is manageable for experienced DIYers with the right equipment. Full grinding and polishing on marble or terrazzo requires professional-grade machinery and diamond pad expertise to avoid costly damage.
Why is my floor finish bubbling after polishing?
Bubbling almost always means moisture was present when the sealer was applied. Strip the finish, allow the floor to dry completely, test moisture levels with a meter, and reseal only when readings are within acceptable range.
How often should polished villa floors be professionally maintained?
Most polished stone and hardwood floors benefit from a professional buff and recoat every 12–18 months, depending on foot traffic. High-traffic entry areas may need spot polishing more frequently to maintain a consistent appearance.