TL;DR:
- Wood surface sealing applies a protective barrier that prevents moisture, UV damage, and wear, extending the lifespan of wood. Proper surface preparation, including cleaning, sanding, and moisture testing, is essential for successful sealing and durability. Using the correct sealer type and application technique ensures a long-lasting, aesthetically pleasing finish tailored to environmental conditions.
Wood surface sealing is the process of applying a protective coating to wood that blocks moisture, resists UV damage, and preserves the structural integrity of the material over time. In professional woodworking and flooring, this practice is called wood finishing or wood surface treatment. Whether you own a villa in Dubai or a suburban home anywhere else, understanding how to seal wood surfaces correctly separates a floor that lasts decades from one that warps, grays, and cracks within a few years. This guide covers the types of sealers, preparation steps, application methods, and the real benefits of sealing wood, with practical advice drawn from hands-on experience.
What is wood surface sealing and why does it matter?
Wood surface sealing is the application of a penetrating or film-forming product that creates a barrier between raw wood and its environment. The barrier serves three functions: it blocks water absorption, slows UV-driven degradation, and locks in the wood’s natural appearance. Products used for this purpose include polyurethane, shellac, lacquer, tung oil, and purpose-built sanding sealers, each suited to different project types and exposure conditions.
The distinction between a sealer and a stain or paint is worth clarifying upfront. Stains add color but offer minimal protection on their own. Paints form a thick opaque film. Sealers, by contrast, are designed specifically to create a uniform base that prevents topcoats from soaking into the wood irregularly, which would otherwise produce a weak, uneven finish. Sealing is the step that makes every other finish layer perform correctly.
For property owners, this matters because wood floor protection is not just cosmetic. Sealed wood resists the kind of slow moisture damage that goes unnoticed until boards start lifting or mold appears beneath the surface.
What are the main types of wood sealers and their differences?
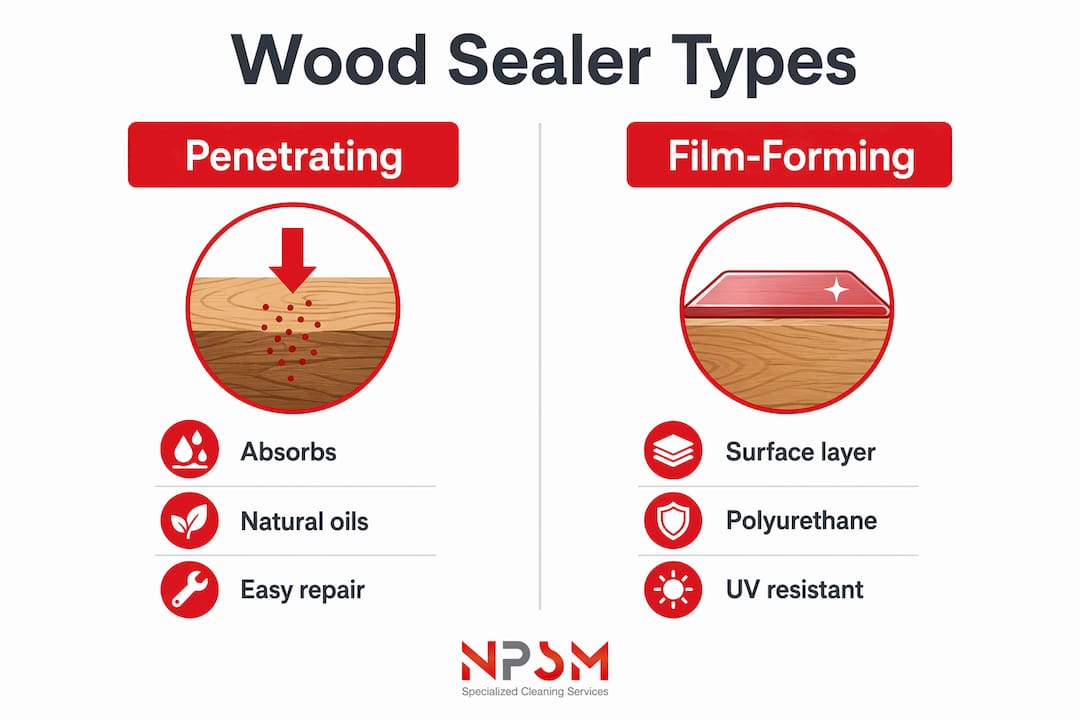
Wood sealers divide into two broad categories: penetrating sealers and film-forming sealers. Knowing which category fits your project determines the finish quality, maintenance schedule, and long-term durability you can expect.
Penetrating sealers
Penetrating sealers absorb into the wood fibers rather than sitting on top of the surface. Tung oil, linseed oil, and Danish oil all fall into this category. They enhance the natural grain, feel warm to the touch, and are easy to repair because you simply reapply to worn areas. The trade-off is lower surface hardness, which makes them better suited to furniture and interior decorative pieces than to high-traffic floors.
Film-forming sealers
Film-forming sealers cure on top of the wood to create a hard, protective shell. Polyurethane is the most widely used product in this category, available in water-based and oil-based formulas. Lacquer dries faster but is more sensitive to humidity during application. Shellac, particularly dewaxed shellac, functions as a universal barrier coat because it bonds well with nearly every stain and topcoat chemistry, preventing bleed-through and improving adhesion across the full finish system.
| Sealer type | Best use | UV protection | Water resistance | Repairability |
|---|---|---|---|---|
| Tung oil / linseed oil | Furniture, interior wood | Low | Moderate | High |
| Polyurethane | Floors, high-traffic surfaces | High (with UV additives) | High | Low |
| Shellac (dewaxed) | Barrier coat, universal primer | Low | Moderate | Moderate |
| Lacquer | Cabinetry, fine furniture | Moderate | Moderate | Moderate |
Quality sealers with UV inhibitors act as sunscreen for wood, blocking the lignin breakdown that causes brittleness and the gray, weathered look common on exterior surfaces. For Dubai property owners dealing with intense sun exposure, UV-rated polyurethane or exterior-grade sealers are not optional. They are the difference between a floor that holds its color for years and one that fades within a single season.
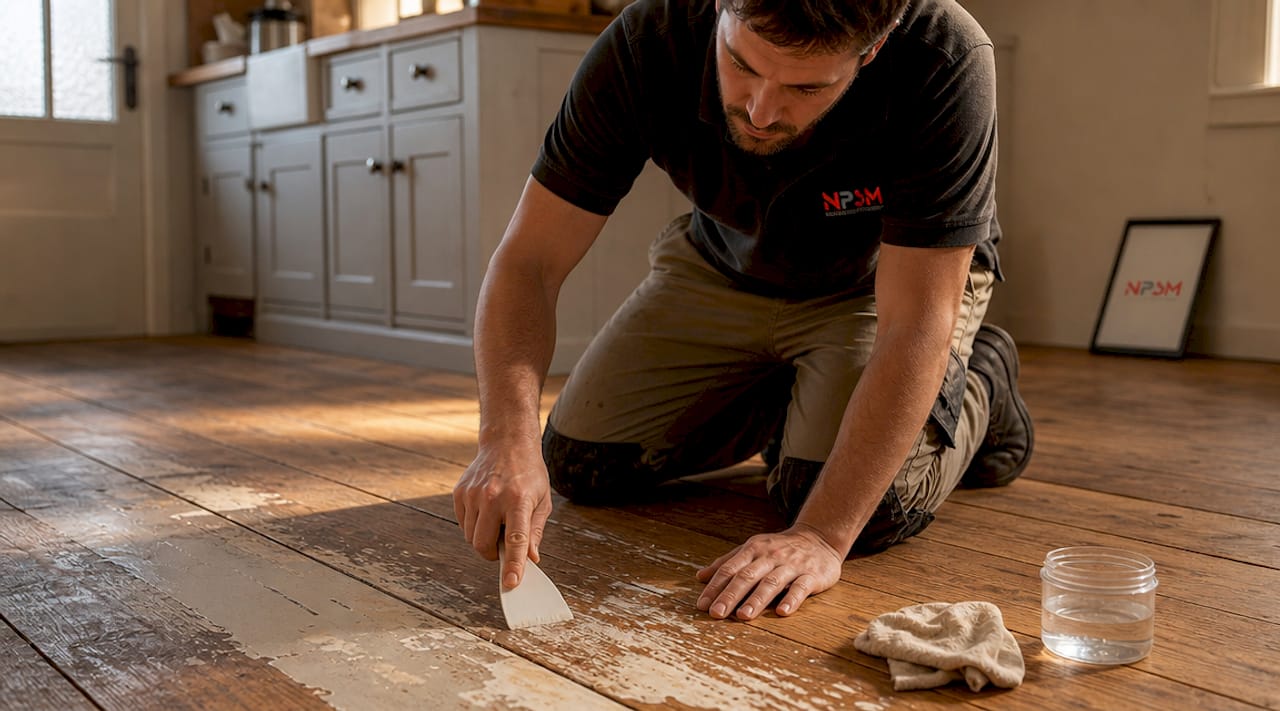
How to prepare wood surfaces properly before sealing
Preparation is where most sealing projects succeed or fail. 90% of sealing success comes down to sanding and dust removal before a single drop of product touches the wood. Skipping or rushing this stage produces bubbles, fish eyes, and adhesion failures that no amount of additional coats can fix.
Follow this preparation sequence for reliable results:
-
Clean the surface thoroughly. Remove all grease, wax, and contaminants with a wood-appropriate cleaner. Raw wood holds significantly more surface dirt than it appears to, and raw wood contamination causes finish defects including bubbles and fish eyes that ruin the final appearance.
-
Sand in progression. Start at 120-grit to remove old finish or level the surface, move to 180-grit to smooth scratches, and finish at 220-grit for the final pass. Never sand finer than 220-grit before sealing. Going finer closes the wood pores and reduces the mechanical bonding surface the sealer needs to grip.
-
Remove all dust. Vacuum first, then wipe with a microfiber cloth, and finish with a tack cloth. Use the tack cloth gently. Pressing too hard deposits a residue that interferes with adhesion.
-
Check moisture content. Wood must reach 12% moisture or less before sealing. Use a pin-type moisture meter to confirm this. Sealing over wet wood traps moisture inside the fibers, which leads to peeling, warping, and mold growth beneath the finish.
-
Allow adequate drying time. If the wood has been washed or exposed to humidity, give it at least 24 to 48 hours to dry before testing moisture levels again.
Pro Tip: In high-humidity environments like Dubai, run an air conditioner or dehumidifier in the room for 24 hours before sealing. This pulls ambient moisture out of the wood and the air simultaneously, giving you a more stable starting point.
Common mistakes at this stage include sealing over wood that feels dry to the touch but still reads above 12% on a meter, and skipping the 180-grit pass to save time. Both shortcuts show up as finish failures within months.
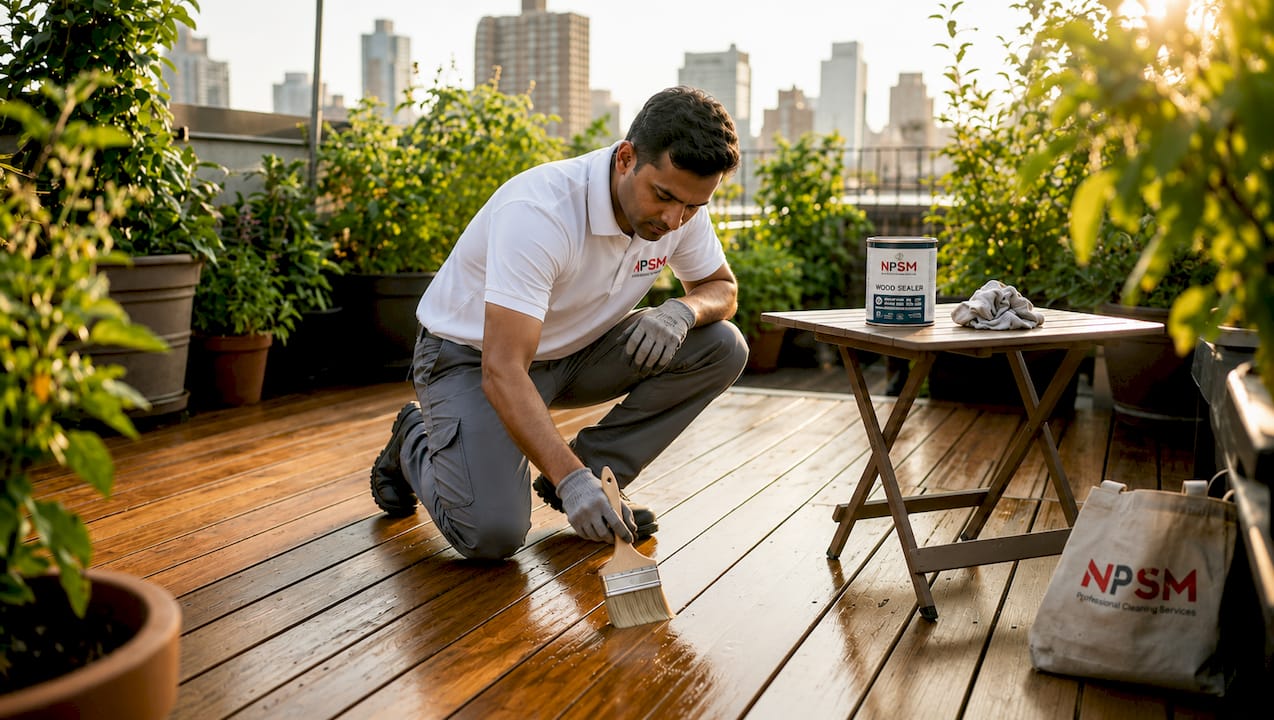
What are the step-by-step methods for applying wood sealers correctly?
Correct application technique determines whether your sealer performs for years or begins peeling within months. The method below applies to brush application of film-forming sealers like polyurethane, which is the most common choice for wood floors and furniture.
-
Load the brush correctly. Dip only the bottom third of the bristles into the product. Overloading the brush causes drips and uneven thickness. Never shake the can before use. Shaking introduces air bubbles that transfer directly to the finish surface. Stir gently instead.
-
Apply thin, even coats. Work in the direction of the grain using long, light overlapping strokes. Thin coats cure faster, bond better, and produce a cleaner surface than thick coats. Overlapping brush strokes reduce visible lap marks and create a more uniform film.
-
Apply the right number of coats. Furniture typically needs two to three coats. High-traffic floors benefit from three to four coats. Allow each coat to dry fully before adding the next.
-
De-nib between coats. After the first coat dries, the wood grain raises slightly, creating a rough texture called grain raise. Lightly sand with 320-grit or fine steel wool (0000 grade) to knock down these raised fibers before applying the next coat. This step, called de-nibbing, is what separates a professional-looking finish from a rough, textured one.
-
Respect the curing timeline. Drying and curing are not the same thing. A surface may feel dry to the touch in two to four hours but full curing takes 2 to 3 days or longer depending on the product and ambient conditions. Placing furniture or heavy foot traffic on a floor before it cures fully causes dents and surface damage that are difficult to repair.
Pro Tip: For the first coat on bare wood, thin the sealer by 10% with the appropriate solvent (water for water-based, mineral spirits for oil-based). A thinned first coat penetrates deeper and creates a stronger foundation for subsequent full-strength coats.
Troubleshooting common issues: bubbles usually mean the brush was overloaded or the product was shaken. Streaks indicate the brush dried out mid-stroke. A “starved” finish, where the wood looks dry and dull even after multiple coats, means the sealer was absorbed unevenly because the surface was not properly sealed before the topcoat was applied.
What benefits does sealing wood provide to property owners?
The benefits of wood sealing extend well beyond appearance. Sealing wood extends project lifespan by 3 to 5 times compared to unsealed wood. That figure translates directly into reduced replacement costs and fewer repair cycles over the life of a property.
The specific protections sealing provides include:
-
Moisture resistance. Unsealed oak absorbs significantly more water than sealed samples, with warping occurring within 48 hours of water exposure. A proper sealer dramatically slows this absorption rate.
-
UV damage prevention. Sealers with UV inhibitors block the breakdown of lignin, the compound that gives wood its structural rigidity. Without this protection, exterior wood becomes brittle and gray within one to two seasons.
-
Mold and mildew resistance. Moisture trapped in wood fibers creates the conditions mold needs to grow. Sealing cuts off that moisture pathway.
-
Wear resistance. Film-forming sealers like polyurethane create a hard surface layer that resists scratches, scuffs, and everyday abrasion from foot traffic and furniture.
-
Aesthetic control. Sealers are available in matte, satin, and gloss finishes, giving you direct control over the final appearance of the wood without altering its natural color or grain.
For Dubai properties specifically, the combination of high humidity, direct sun, and air-conditioned interiors creates rapid moisture cycling in wood. Sealing is the most cost-effective defense against this cycle. You can find more detail on this in the wooden floor maintenance tips guide tailored for Dubai’s climate conditions.
What are common mistakes and expert tips for wood sealing success?
Most sealing failures trace back to three root causes: sealing over wet wood, skipping surface preparation, and applying coats that are too thick. Each of these mistakes is entirely preventable with the right process.
Understanding the finish system as a whole changes how you approach sealing. Stain, sealer, and topcoat work as a chemical and mechanical system. The sealer’s job is to lock down the stain layer and create a consistent surface for the topcoat to bond to. Applying a topcoat directly over stained wood without a sealer causes uneven absorption, which produces a blotchy appearance and a finish that cracks prematurely.
Dewaxed shellac deserves special mention here. It is the one sealer that bonds reliably with virtually every stain and topcoat chemistry on the market, including oil-based stains under water-based topcoats, a combination that would otherwise be chemically incompatible. Keeping a can of dewaxed shellac in your toolkit solves more compatibility problems than any other single product.
“Preparation is not the boring part of sealing. It is the sealing. Everything that comes after is just applying product to a surface you already made ready.”
For brush selection, a quality natural bristle brush works best with oil-based products. Synthetic bristles (nylon or polyester) perform better with water-based sealers because natural bristles absorb water and go limp. Using the wrong brush type creates drag marks and uneven coverage that no technique can fully compensate for.
Key takeaways
Wood surface sealing protects wood by blocking moisture, UV damage, and wear through a system of preparation, sealer selection, and correct application technique.
| Point | Details |
|---|---|
| Sealer type determines performance | Choose penetrating oils for furniture and film-forming polyurethane for high-traffic floors. |
| Preparation drives adhesion | Sanding to 220-grit and confirming moisture below 12% accounts for the majority of sealing success. |
| Curing takes longer than drying | Allow 2 to 3 days for full cure before heavy use, even when the surface feels dry. |
| Dewaxed shellac solves compatibility | Use it as a universal barrier coat between incompatible stain and topcoat chemistries. |
| Sealing multiplies wood lifespan | Properly sealed wood lasts 3 to 5 times longer than unsealed wood under the same conditions. |
Why preparation matters more than the product you choose
After working with wood floors across dozens of properties, the pattern I see most consistently is this: people spend hours researching the best sealer and then spend 20 minutes on surface prep. That ratio is backwards. I have seen mid-range polyurethane applied over a properly prepared surface outperform premium products applied over dusty, slightly damp wood every single time.
The moisture meter is the tool most DIY enthusiasts skip because it feels overly technical. It is not. In Dubai’s climate, where humidity shifts dramatically between seasons and between indoor and outdoor environments, wood that feels dry can still read 15% or higher on a meter. Sealing at that moisture level is a guaranteed callback. The finish peels, the boards cup, and the whole job has to be redone.
My other consistent observation is that people underestimate how much the dull wooden floor problem is a sealing problem in disguise. Floors that look dull and lifeless after cleaning are often floors where the original sealer has worn through and the wood is absorbing light rather than reflecting it. A proper reseal, done over correctly prepared wood, restores that depth and clarity without replacing a single board.
The product matters. The technique matters. But neither one rescues a surface that was not properly prepared before the first coat went down.
— Qadir
Professional wood floor sealing services in Dubai
If your wood floors need more than a DIY refresh, NPSM Specialized Cleaning Services LLC delivers professional-grade sealing and restoration across Dubai’s residential and commercial properties. The team uses industry-approved sealers, professional sanding equipment, and moisture-controlled application methods to produce results that hold up under Dubai’s demanding climate conditions. Whether you need a full floor restoration service or targeted sealing for worn sections, NPSM Specialized Cleaning Services LLC tailors every project to the specific wood species, existing finish condition, and traffic level of your property. Contact FloorPolishing.ae for a site assessment and quote.
FAQ
What does wood surface sealing actually do?
Wood surface sealing creates a protective barrier that blocks moisture absorption, resists UV damage, and prevents surface wear. It also forms the bonding layer that allows topcoats to adhere evenly across the wood surface.
Is wood sealing necessary for indoor floors?
Yes. Indoor wood floors face moisture cycling from humidity, cleaning, and spills, plus abrasion from foot traffic. Sealing extends floor lifespan by 3 to 5 times and prevents warping, cracking, and mold growth beneath the surface.
How long does a wood sealer last before reapplication?
Most film-forming sealers like polyurethane last 3 to 5 years on floors under normal residential traffic before requiring reapplication. High-traffic commercial floors may need resealing every 1 to 2 years.
What is the best sealer for wood floors in humid climates?
Water-based polyurethane with UV inhibitors performs well in humid climates because it resists moisture penetration and dries faster, reducing the window during which ambient humidity can affect the curing process. Confirm wood moisture is at or below 12% before applying any sealer in humid conditions.
Can you seal wood without sanding first?
Sealing without sanding produces poor adhesion and a finish prone to peeling. Proper sanding to 220-grit is required to open the wood surface for mechanical bonding. Skipping this step is the leading cause of sealing failure.